Application Settings
Contents
Learn how to configure the settings for your application.
Managing the application settings
When an application is open for editing, you can click ![]() Settings to view and manage the settings for that application.
Settings to view and manage the settings for that application.
General
- Application Reporting Title - Specify the name to use for the application in reporting.
- Application Version - Specify a version number for this application.
- Stage - Select an application stage. If resource caching is enabled, the application stage also manages how often cached resources are checked for updates. By default, applications are in the Live stage.
Media
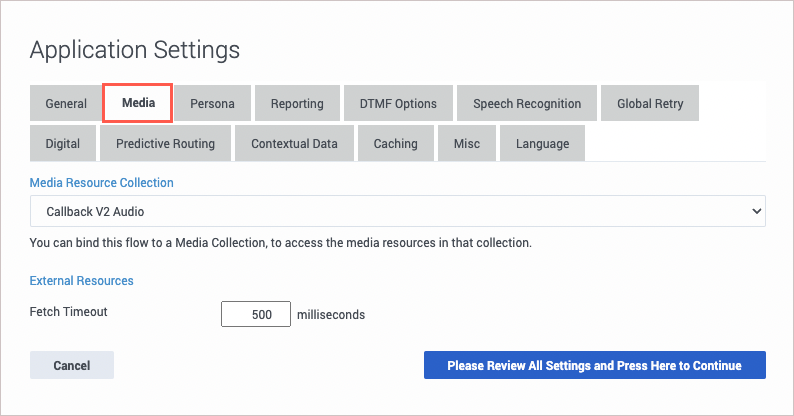
Use this tab to specify the media settings for the application.
Media Resource Collection
Select the Media Collection that this application will use. See the Media Resources page for more information.
External Resources
Fetch Timeout—If you want to override the default fetch timeout for external audio resources (500ms), enter a new value (in milliseconds) here.
This option is applicable to Default application types only.Persona
Use this tab to manage the Personas settings for the application.
- Select Enable Persona to enable the use of personas in the application.
- Select Enable Custom Voices if you are using a Google Text-to-Speech (TTS) custom voice.
If the application uses a Google TTS voice (regular or custom) for a persona and invokes a Google Dialogflow CX voice bot, the same voice is used by the bot when rendering next turn audio.
For more information, see the Personas page.Messaging
- This setting is only available for Digital type applications.
- Digital Resource Collection - Select the Digital Resource collection that this application will use. See the Digital Resources page for more information.
Reporting
- Milestone Path Prefix - Specify a prefix to use with this application's milestone paths.
DTMF Options
This tab enables you to set global DTMF commands for your application. These DTMF keys can be used at any time within the application to trigger a specified action.
A common use case for this feature is a global command for the DTMF key 0 that routes the caller directly to an agent. In this example, you can set 0 as a global DTMF command that routes directly to the Assisted Service phase. In your application, you can add a Play Message block to announce that callers can press 0 at any time to speak to an agent.
Selecting Enable Global Commands enables global DTMF commands for the application.
To set a global DTMF command, select the drop-down menu beside the corresponding DTMF key that you want to use. In the drop-down menu, select a target block or phase for the DTMF key. Click OK when you are done setting global DTMF commands.
Global DTMF commands can target the Self Service, Assisted Service, or Finalize phase, or any block within the Self Service phase.- If the same DTMF key is also used by a block within your application, Designer first processes the command in the block.
- You can also use global DTMF commands with Self Service type shared modules.
Speech Recognition
Configure settings for speech recognition (ASR). See the User Input block page for more information.
Global Retry
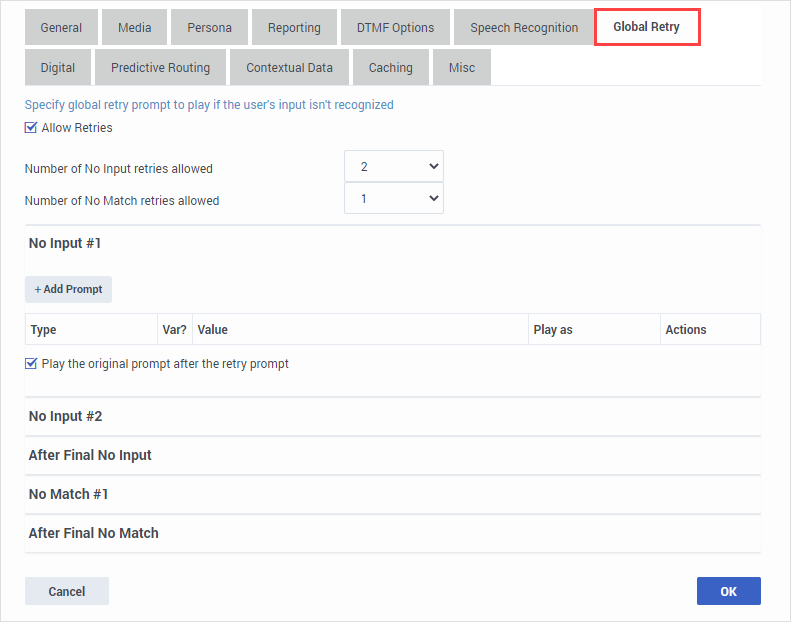
This tab lets you specify a global retry prompt to play if a customer provides input that is not recognized. When Allow Retries is enabled, you can specify the No Input and No Match settings.
These settings are described in more detail in the section below.Number of No Input retries allowed
- Select the number of retries to allow for customers who do not provide any input. For each retry, you can specify whether a prompt is played by clicking the corresponding section beneath this field. For example, if you allow two no-input retries and you want to play a prompt after the first retry, select the No Input #1 line and add a prompt. Enable the Play original menu prompt after this retry prompt check box to repeat the menu prompts for the caller.
Number of No Match retries allowed
- Select the number of retries to allow for customers who do not provide a match for a Menu Block. For each retry, you can specify whether a prompt is played by clicking the corresponding section beneath this field. For example, if you allow two no-input retries and you want to play a prompt after the first retry, select the No Match #1 line and add a prompt. Enable the Play original menu prompt after this retry prompt check box to repeat the menu prompts for the caller.
After Final No Input
- Add the prompt to play after the maximum number of permitted No Input retries is reached. If this block is in the Self Service phase, you can also specify a target destination for the application to jump to, such as another block in the Self Service phase or to the Assisted Service or Finalize phase of the application.
After Final No Match
- Add the prompt to play after the maximum number of permitted No Match retries is reached. If this block is in the Self Service phase, you can also specify a target destination for the application to jump to, such as another block in the Self Service phase or to the Assisted Service or Finalize phase of the application.
Digital
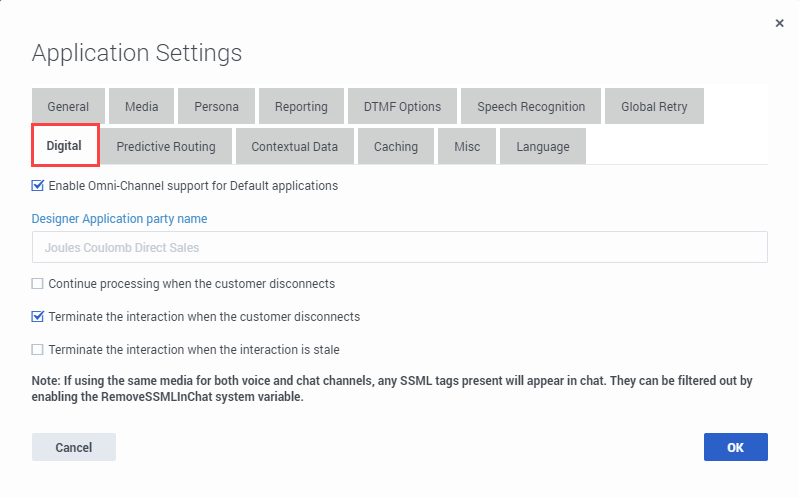
The Digital tab of the application settings allows you to enable omni-channel support for Default applications. When enabled, it allows your application to handle both voice and chat interactions.
You can also specify additional options for what Designer should do in certain scenarios, such as when the customer disconnects from the session.
These options are described in more detail in the section below.Enable omni-channel support for Default applications
If your application is a Default type, enabling this option allows the application to handle both voice and chat interactions. For example, during chat sessions, the application displays voice prompts and menu options as chat messages.
Once enabled, the following additional options are available:
Designer Application party name
You can (optionally) enter a name for the application to use as the chat participant. This is the name that customers will see displayed in the chat widget when they join the chat session. If you don't specify a party name, Designer uses the Application Reporting Title as specified in the General settings.
Continue processing when the customer disconnects
This option is enabled by default for digital interactions but does not apply to voice interactions. Keep this option enabled if you want Designer to continue processing the application after the customer leaves the chat session. If the customer disconnects, Designer moves on to the next block and continues processing blocks that do not require any interaction or involvement with the customer, such as executing an HTTP request or scripting logic, but skips any blocks that would require the customer to be present (such as sending a message or requesting input).
If you disable this option, Designer immediately terminates the chat session when the customer leaves and jumps directly to the Finalize phase. Note that this can interrupt any on-going processing, including routing.
Terminate the interaction when the customer disconnects
This option is also enabled by default and terminates the interaction when the customer leaves the chat session. If the Continue processing when the customer disconnects option is not enabled, Designer jumps immediately to the Finalize phase when the customer disconnects from the session.
However, if both this option and the Continue processing when the customer disconnects option are enabled, Designer continues processing blocks that do not require any interaction or involvement with the customer, such as executing an HTTP request, while skipping any blocks that would require the customer to be present (such as sending a message or requesting input).
Note that this can create a delay in closing the interaction that can cause Designer to sometimes report the interaction as Abandoned. If you want Designer to terminate the interaction immediately when the customer disconnects, enable this option but make sure that Continue processing when the customer disconnects is disabled.
Terminate the interaction when the interaction is stale
This option is enabled by default and terminates the chat interaction if it has gone stale.
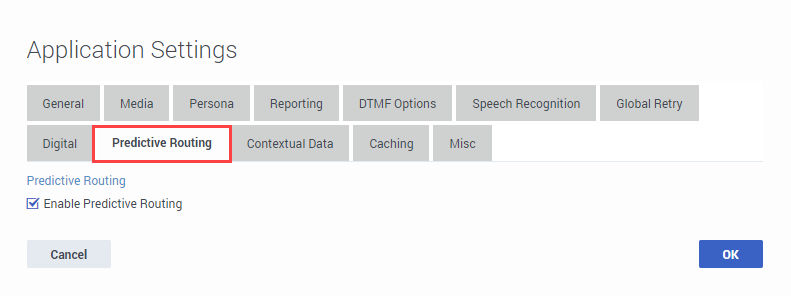
true. Predictive Routing
Contextual Data
The Enable Customer Profile option tells Designer to retrieve certain details about the customer associated with the incoming interaction (such as their name, phone number, and email address). For voice calls, Designer identifies the caller based on their phone number (ANI). For digital interactions, the contact's email address is used. You can then choose how much interaction history data to query for each customer.
This contextual data can then be used in the application to provide a more personalized experience for the customer—for example, by playing announcements that are specifically designed for them or using the Last Called Agent routing option to direct the customer to the last agent they spoke with.
Designer stores contact details in the Contact system variable. For more information, see system variables.Interaction history data
When the Enable Customer Profile option is enabled, you can choose how much interaction history data to retrieve for the customer. By default, Designer retrieves 30-days of interaction history data, but you can adjust this to 1 hour, 24 hours, or choose to disable the interaction history entirely.
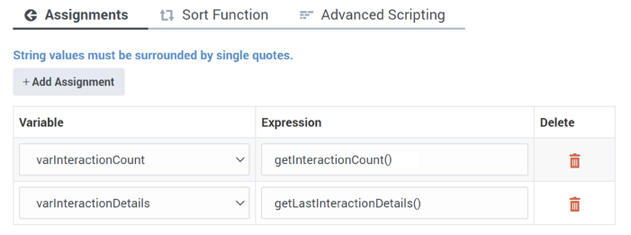
Designer provides the following functions to work with the interaction history data:
- getInteractionCount() — returns the number of interactions for the contact.
- getLastInteractionDetails() — returns a JSON object that contains details about the last interaction with the contact.
To use the results in an application, you can create user variables in which to store the results for each function and then use an Assign Variables block to assign the function expression to the appropriate variable. For example:
Caching
Resource caching can improve overall system performance, but it can also cause a delay in how long it takes for changes in Designer to take effect (changes to Data Tables and Business Controls take effect immediately).
In most cases, it is best to leave Use workspace cache settings selected (it is already selected by default), as each application stage has optimized settings for how often a resource is checked. But you can disable it if you want the application to regularly check the cached resources for updates, and enter your own values for each resource.
The following resources are cached:
- Media Resources
- Speech Grammars
Misc
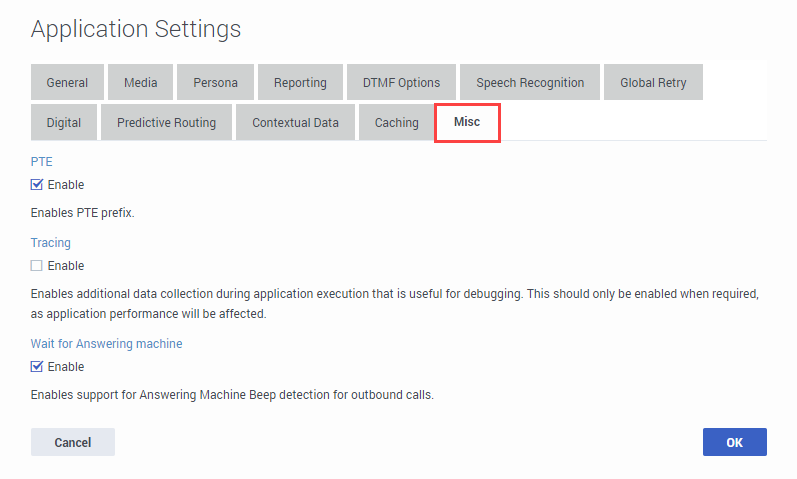
From the Misc tab, you can enable the Parallel Test Environment, Tracing, and Wait Answering Machine options.
PTE (Parallel Test Environment)
Enable the PTE (Parallel Test Environment) option if you want non-production streams (DEV, QA, UAT) to use test versions of resources instead of the resources being used in the LIVE production environment.
For more information, see Parallel Test Environment (PTE) on the Application Workflow page.
Tracing
Enabling the Tracing option enables additional data to be collected while the application runs, which can later be used for debugging.
Wait Answering Machine
This option tells Designer to wait for an answering machine beep (i.e. the tone that signals the caller to begin recording their message) during an outbound call. For example, if the customer does not answer the call, the application waits for an answering machine beep before playing a message.Language
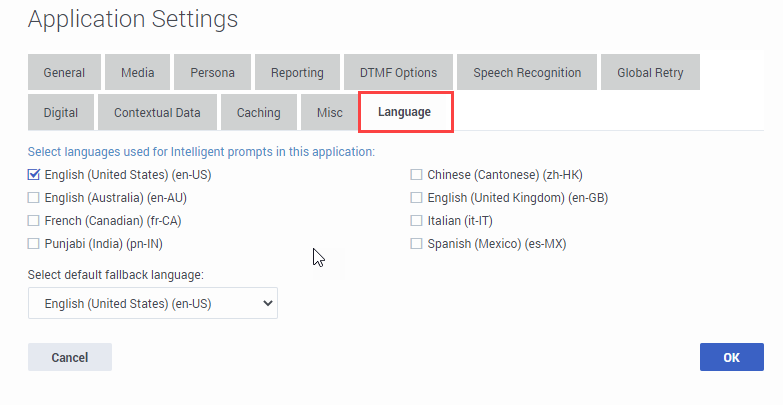
From the Language tab, you can select the languages to be used for playing intelligent prompts.
You can select multiple languages, up to a maximum of eight. When playing intelligent prompts, Designer uses the overall language setting in the application (for example, the language specified by the Language system variable or a Change Language block) to determine which language to use.

