Custom Service Block
Contents
Use this block to access a custom service that was created for you by Genesys.
You can use the Custom Service block to access a custom service that was created by Genesys for your company.
You can provide input to the service. The resulting variable from the block is true if the service request is successful, otherwise the result is false. This result is available for use in later blocks.
Service Details tab
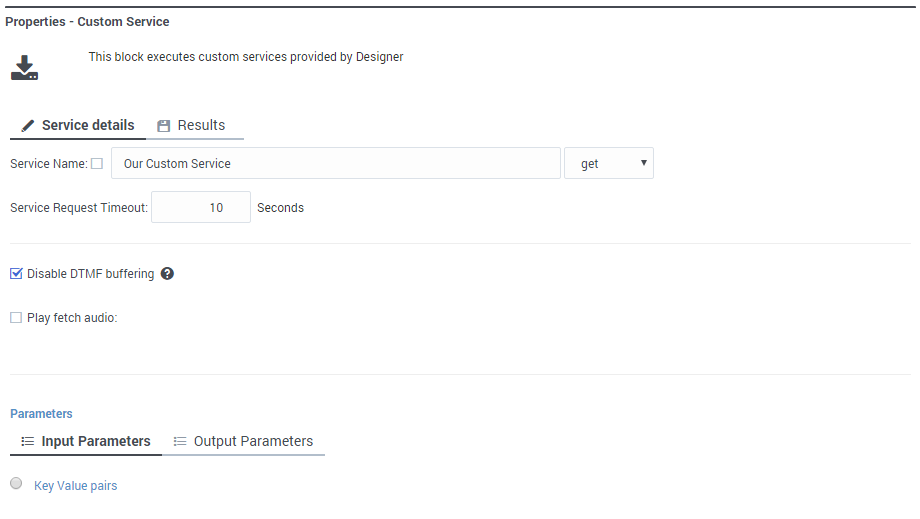
Select the service name and action to use in this Custom Service block.
Select Disable DTMF buffering if you want to prevent any DTMF inputs made during fetch audio playback from being buffered and carried forward into subsequent User Input or Menu blocks.
If you enable the Play fetch audio check box, you can specify an audio resource to play to the caller while the custom service is being fetched.
- Enable the check box beside the Play fetch audio check box to specify a variable.
- In the Play fetch audio minimum for field, you can enter the minimum length of time to play the audio, even if the custom service has arrived in the meantime.
- In the Start fetch audio after field, you can enter a period of time to wait before audio is played.
Input Parameters
In the Input Parameters tab, specify the input expected by the custom service.
- Name - Specify the name of the parameter expected by the custom service.
- Type - The type of parameter (variable or literal).
- Value - Specify the parameter value to pass to the input.
Output Parameters
In the Output Parameters tab, specify how and where to store the results of the custom service.
- Variable Name - Select the application variable in which to store the data.
- JSON Expression - Specify the key in which you expect the result to be in the response object. See the code sample and table below for an example.
{
	"thing": {
		"otherthing": "abc"
	},
	"arrayofthings": [
		"thing1", "thing2"
	]
}| JSON Expression | Result |
|---|---|
| thing.otherthing | abc |
| arrayofthings[1] | thing2 |
Results tab
Select a variable to store the outcome status (true or false) of the Custom Service request.
You must also select an action to take if the fetch operation is not successful. You can choose to "Continue with normal processing" or "Execute error handler blocks".
If you select "Execute error handler blocks", an Error Handler child block appears under the Custom Service block.
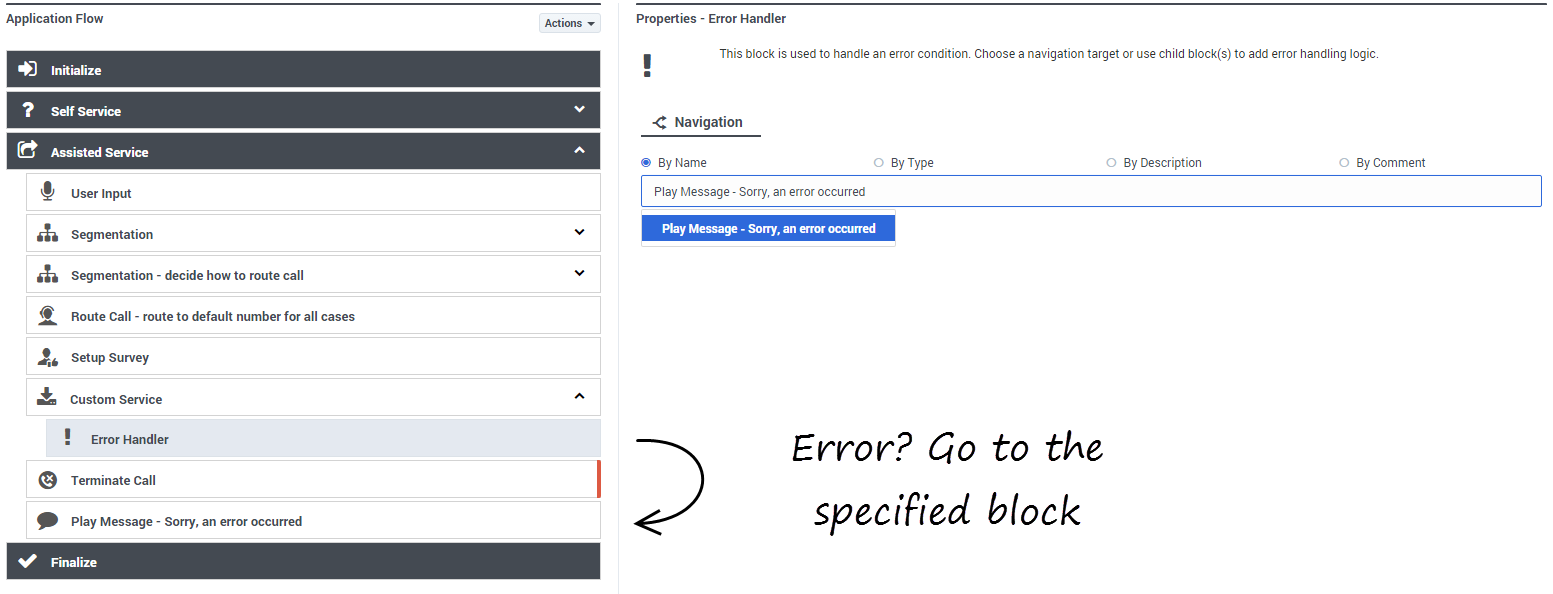
Use the Error Handler block to send the application to another target block that you select from the Navigation tab, or add child blocks that will perform the actual error handling.
Examples
In this example, the Navigation tab is used to specify a target block. If there is an error, the application will go to the Play Message block and play an error message:
In this example, a child block is used to invoke a module that will perform the error handling:
- If you select a target block from the Navigation tab, then any child blocks you've added to the Error Handler parent block are ignored.
- Standard validation rules still apply — any child blocks that you add to the Error Handler block must be valid for the application phase in which they are being used.


