
Difference between revisions of "PEC-WFM/Current/Supervisor/MSIDAccSchDtls"
m (Text replacement - "\|Platform=([^\|]*)GenesysEngage-onpremises([\|]*)" to "|Platform=$1GenesysEngage-cloud$2") |
(Published) |
||
| Line 1: | Line 1: | ||
| − | {{ | + | {{Article |
| − | | | + | |Standalone=No |
| − | |DisplayName=Master Schedule Intra-Day | + | |DisplayName=Master Schedule Intra-Day: Accessibility and Other Dialogs |
| − | |TocName=Master Schedule Intra-Day Accessible | + | |TocName=Master Schedule Intra-Day: Accessible and Other Dialogs |
| − | | | + | |Context=Using this view with screen reader software makes it easy for impaired users to select commands. |
| − | | | + | |ComingSoon=No |
| − | | | + | |Platform=GenesysEngage-cloud |
| − | + | |Section={{Section | |
| − | + | |sectionHeading=Accessible schedule details | |
| − | + | |alignment=Vertical | |
| + | |structuredtext=To reach this view, you clicked the wheelchair icon [[File: WM_851_icon_accessible_schedule_details.png]] in a specific agent's row, for a specific date, in any of the following four views: | ||
| − | + | *{{Link-SomewhereInThisManual|topic=ScnAgntExtdVw|anchor=top|display text=Scenario Agent-Extended}} | |
| + | *{{Link-SomewhereInThisManual|topic=ScnIntrDyVw|anchor=top|display text=Scenario Intra-Day}} | ||
| + | *{{Link-SomewhereInThisManual|topic=MstSWzIntrDyVw|anchor=top|display text=Master Schedule Intra-Day}} | ||
| + | *{{Link-SomewhereInThisManual|topic=MstSWzAgntExtdVw|anchor=top|display text=Master Schedule Agent-Extended}} | ||
This view is designed specifically for screen-reader software, and for ease of selecting commands. It includes: | This view is designed specifically for screen-reader software, and for ease of selecting commands. It includes: | ||
| + | |||
*Read-only information about the selected agent's team, time, and other statuses. | *Read-only information about the selected agent's team, time, and other statuses. | ||
*A table that lists in each row: one item in the schedule and multiple buttons to modify it. | *A table that lists in each row: one item in the schedule and multiple buttons to modify it. | ||
| Line 21: | Line 26: | ||
If you select any action or command in error, click the '''Cancel''' button on the unwanted dialog box, to return to the '''Accessible Schedule Details''' screen. | If you select any action or command in error, click the '''Cancel''' button on the unwanted dialog box, to return to the '''Accessible Schedule Details''' screen. | ||
| + | |Status=No | ||
| + | }}{{Section | ||
| + | |sectionHeading=Performance data target | ||
| + | |anchor=MSIDPrfmDtaTrgt | ||
| + | |alignment=Vertical | ||
| + | |structuredtext=To view performance data in the '''Master Schedule Intra-Day''' view or the '''Schedule Scenario Intra-Day''' view, you must choose a target. The target is the source of the performance data. You can select the Enterprise, a business unit, a site, an activity group, or an activity (either multi-site or single-site). | ||
| + | |||
| + | To change the '''Select Target''' window: | ||
| + | |||
| + | *Click the '''Target:''' button on the '''Schedule Intra-Day''' view window [[File: WM_851_Schedule_Scenarios_Intra-day_controls_target.png|link=https://all.docs-content.genesys.com/File:WM_851_Schedule_Scenarios_Intra-day_controls_target.png]] . | ||
| + | {{NoteFormat|This option is available only if you have chosen to view performance data by selecting the '''Show Performance Information''' check box on the '''Performance''' tab of the {{Link-SomewhereInThisVersion|manual=Supervisor|topic=MSIDAccSchDtls|anchor=MSIDOptnsDlgBx|display text=Options}} dialog.|}} | ||
| + | |||
| + | ===Selecting the appropriate time zone=== | ||
| + | When you select a site on the '''Object''' pane (for example, San Francisco), you are also specifying that site's time zone, which may differ from the data source's time zone. You can change the time zone manually by selecting the appropriate zone from the '''Time Zone''' drop-down list near the upper right of the '''Intra-Day''' view. The selected time zone is applied to the grid and graphs that you view when you request performance data. Schedules and whatever you select to view would be displayed in the selected time zone, regardless of the data source's local hours (WFM makes the appropriate time conversion). | ||
| + | |||
| + | ===Viewing multi-site activity data=== | ||
| + | Select the '''Use Multi-site Activities''' check box to display forecast data that is taken from multi-site activities (MSAs), and schedule data that is the sum/average of '''Activities''' under your selected target (MSA, business unit, or site). All data is transposed to the time zone of the site that you selected on the '''Object''' pane. | ||
| + | |||
| + | Clear the '''Use Multi-site Activities''' check box to display all MSA data as a sum/average. All data is transposed to the selected site's time zone. | ||
| + | |||
| + | If you set the '''Use Multi-site Activities''' button to '''On''', WFM retains your last selection—in the current view and for all other views that contain multi-site activities—preventing you from having to click it every time you want to display data for the selected multi-site activity. | ||
| + | |Status=No | ||
| + | }}{{Section | ||
| + | |sectionHeading=Options dialog | ||
| + | |anchor=MSIDOptnsDlgBx | ||
| + | |alignment=Vertical | ||
| + | |structuredtext=Use the '''Options''' dialog to configure the data that is shown on the: | ||
| + | |||
| + | *{{Link-SomewhereInThisManual|topic=ScnIntrDyVw|anchor=top|display text=Intra-Day view}} or {{Link-SomewhereInThisManual|topic=ScnAgntExtdVw|anchor=top|display text=Agent Extended view}} for the current scenario. | ||
| + | *{{Link-SomewhereInThisManual|topic=MstSWzIntrDyVw|anchor=top|display text=Master Schedule Intra-Day}} or {{Link-SomewhereInThisManual|topic=MstSWzAgntExtdVw|anchor=top|display text=Master Schedule Agent-Extended view}}. | ||
| + | |||
| + | === Opening the Options dialog === | ||
| + | |||
| + | To open the '''Options''' dialog:<ol><li>Click '''Options''' [[File: WM_851_icon-options.png|link=https://all.docs.genesys.com/File:WM_851_icon-options.png]] on the '''Actions''' toolbar, or select '''Options...''' from the '''Actions''' menu. The '''Option'''s dialog opens.<ul><li>When called from an '''Intra-Day''' view, it has three tabs: '''Options''', '''Performance''', and '''Columns'''.</li><li>When called from an '''Agent-Extended''' view, it has two tabs: '''Options''' and '''Columns'''.<br />Each tab is described below.</li></ul></li><li>After you are done configuring the '''Options''' dialog box, click '''OK''' to save your changes, or '''Cancel''' to restore the original selections.</li></ol>The '''Options''' dialog box closes and the view refreshes. The settings that you configure for a scenario or the '''Master Schedule''' appear whenever you return to the view for that scenario or for the '''Master Schedule''', until you log off. | ||
| + | |||
| + | === Configuring the Options === | ||
| + | To configure options in this dialog box:<ol><li>If you do not need the '''Legend''' to appear, you can clear the '''Show Schedule Legend''' check box to provide more space for the grid.</li><li>If you want to see agent availability on the grid, select the '''Show Agent Availability''' check box. Hours when an agent is unavailable are then shown in light gray on the grid.</li><li>Select the check box '''Show agents with granted and scheduled rotating pattern''' or any other calendar preference to see which schedule days contain such an item. The result: a red check box and '''Agent''' icon appears in the left-most column (labeled "!") for every '''Agent''' who meets these conditions.{{NoteFormat|You can use this tool to learn whether an agent was given a schedule based on a schedule preference, which might influence your decision to modify this agent's schedule. This icon is displayed only if the agent was given a rotating pattern or preference (such as for time off) as a result of building a schedule. If an agent’s schedule is manually edited to give him or her a preference, or a schedule from a rotating pattern, then the icon will not be displayed.|2}}</li><li>Select the radio button for the hours you want to show, '''24''' to show 24 hours or '''36''' to show 36 hours.</li><li>{{AnchorDiv|PrsntMrkTim}}Select the '''Presentation''' type: '''Schedule only''', '''Schedule on top''', or '''Marked time on top'''. | ||
| + | Your selection affects the colored bars in the schedule. If '''Schedule only''' is selected, you cannot see '''Marked time'''. | ||
| + | </li></ol> | ||
| + | |||
| + | === Configuring performance === | ||
| + | To configure the '''Performance''' tab (not available in '''Agent-Extended''' view):<ol><li>If you select the Show Performance Information check box, you can further customize exactly what performance information WFM Web shows on the '''Intra-Day Schedule''' view. | ||
| + | If you clear this check box, the rest of the options on this tab are disabled. | ||
| + | </li><li>If you prefer not to see the legend that explains the colors used to distinguish performance data, clear the '''Show Performance Legend''' check box.</li><li>The '''Update Automatically''' check box determines whether schedule changes are shown when they happen. | ||
| + | Clear this only if you have network bandwidth issues that make automatic updates a problem. | ||
| + | </li><li>If you selected to view performance data, you can select the check boxes to show additional information in the performance table.{{NoteFormat|You see the table ''only'' if the '''Full-Day View''' check box is not selected.|2}}In addition to scheduled coverage and calculated staffing, which always appear, you can select any or all of these '''''Show additional data''''' options to appear in the table: | ||
| + | *{{Link-SomewhereInThisVersion|manual=Supervisor|topic=ScnStffgVw|anchor=Req|display text=Required Staffing}} | ||
| + | *Difference between {{Link-SomewhereInThisManual|topic=MstSWzSchdSumVw|anchor=CvrgSchd|display text=Coverage}} and {{Link-SomewhereInThisManual|topic=ScnStffgVw|anchor=Calc|display text=Calculated Staffing}} | ||
| + | *Difference between Coverage and Required Staffing | ||
| + | *Scheduled {{Link-SomewhereInThisManual|topic=ScnSummVw|anchor=SLPrcntgSch|display text=Service Level Percentage}} | ||
| + | *Scheduled {{Link-SomewhereInThisManual|topic=ScnSummVw|anchor=DfrdSLSchd|display text=Deferred Service Level Percentage}} | ||
| + | *Scheduled ASA''' (Average Speed of Answer)''' | ||
| + | *Overtime Schedule (default: cleared) | ||
| + | *Overtime Requirement (default: cleared)</li></ol>{{NoteFormat|If any of the cells in the '''Difference in Calculated Staffing''' or '''Difference in Required Staffing''' columns show as understaffed, WFM alerts the user by changing the color of the cell to red. Although red is the default color, you can change it, by using the settings in '''About > Settings''' (in the upper-right corner of the GUI).}} | ||
| + | |||
| + | === Showing and hiding columns === | ||
| + | To configure the '''Columns''' tab: | ||
| + | |||
| + | *Select the check boxes for the optional columns that you want to display. Clear the check boxes for any columns that you want to hide. For '''Intra-Day''' and '''Agent-Extended''' views, you can add the following columns: '''Site Name''', '''Shared Transport''', '''Overtime''', '''Paid Hours''', '''Total Hours''', '''Start Time''', '''Accessibility''', and '''Comments'''. In '''Intra-Day''' view, all columns are sortable, except for '''Comments'''. In '''Agent-Extended''' view, these columns are not sortable. | ||
| + | |Status=No | ||
| + | }}{{Section | ||
| + | |sectionHeading=Review messages (Save) dialog | ||
| + | |anchor=MSIDRvwMsgSvDBx | ||
| + | |alignment=Vertical | ||
| + | |structuredtext=Use this dialog to respond to any warnings or errors that the server returned during your last attempt to save an agent's edited schedule. | ||
| + | |||
| + | The dialog box includes the following columns and controls: | ||
| + | {{{!}} | ||
| + | {{!}}- | ||
| + | {{!}}'''Team Name''' | ||
| + | {{!}}Displays the team to which this agent belongs. | ||
| + | {{!}}- | ||
| + | {{!}} nowrap=""{{!}}'''Agent Name''' | ||
| + | {{!}}Displays the agent whose schedule generated this message. | ||
| + | {{!}}- | ||
| + | {{!}}'''Messages''' | ||
| + | {{!}}Displays the message type (either '''Warning''' or '''Error'''), numeric code, and the message text. | ||
| + | {{!}}- | ||
| + | {{!}}'''Action''' | ||
| + | {{!}}Use each message's drop-down list to select an action to resolve the warning or error: | ||
| + | |||
| + | *'''Save'''—Saves the edited agent schedule. This is the default action for warnings. It is unavailable for agent schedules whose edits generated errors (which are more severe than warnings). | ||
| + | *'''Fix Later'''—Does not attempt to save the agent schedule, but keeps it in the '''Intra-Day''' grid so that you can further modify it. This is the default action for agent schedules whose edits generated errors. | ||
| + | *'''Do Not Save'''—Discards the change that caused the warning or error to be generated. | ||
| + | {{!}}- | ||
| + | {{!}}'''OK''' | ||
| + | {{!}}Closes the dialog box, applies your selected actions, and retrieves fresh data from the server. | ||
| + | {{!}}- | ||
| + | {{!}}'''Close''' | ||
| + | {{!}}Closes the dialog box without saving or refreshing data. | ||
| + | {{!}}}These errors and warnings are generated by schedule changes that you made manually in the '''Intra-Day''' view. They differ from '''Validation''' warnings and errors, which WFM Web generates during the {{Link-SomewhereInThisManual|topic=SchdBldWzd|anchor=top|display text=schedule building}} process. | ||
| + | |Status=No | ||
| + | }} | ||
| + | }} | ||
Revision as of 17:21, August 19, 2020
Contents
Using this view with screen reader software makes it easy for impaired users to select commands.
Accessible schedule details
To reach this view, you clicked the wheelchair icon ![]() in a specific agent's row, for a specific date, in any of the following four views:
in a specific agent's row, for a specific date, in any of the following four views:
This view is designed specifically for screen-reader software, and for ease of selecting commands. It includes:
- Read-only information about the selected agent's team, time, and other statuses.
- A table that lists in each row: one item in the schedule and multiple buttons to modify it.
- A field for comments by users.
- Buttons for inserting items into the selected day on the selected agent's schedule—also for deleting items, and for performing other functions.
Click a button to display the dialog box or the wizard which corresponds to that action.
If you select any action or command in error, click the Cancel button on the unwanted dialog box, to return to the Accessible Schedule Details screen.
Performance data target
To view performance data in the Master Schedule Intra-Day view or the Schedule Scenario Intra-Day view, you must choose a target. The target is the source of the performance data. You can select the Enterprise, a business unit, a site, an activity group, or an activity (either multi-site or single-site).
To change the Select Target window:
- Click the Target: button on the Schedule Intra-Day view window
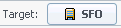 .
.
Selecting the appropriate time zone
When you select a site on the Object pane (for example, San Francisco), you are also specifying that site's time zone, which may differ from the data source's time zone. You can change the time zone manually by selecting the appropriate zone from the Time Zone drop-down list near the upper right of the Intra-Day view. The selected time zone is applied to the grid and graphs that you view when you request performance data. Schedules and whatever you select to view would be displayed in the selected time zone, regardless of the data source's local hours (WFM makes the appropriate time conversion).
Viewing multi-site activity data
Select the Use Multi-site Activities check box to display forecast data that is taken from multi-site activities (MSAs), and schedule data that is the sum/average of Activities under your selected target (MSA, business unit, or site). All data is transposed to the time zone of the site that you selected on the Object pane.
Clear the Use Multi-site Activities check box to display all MSA data as a sum/average. All data is transposed to the selected site's time zone.
If you set the Use Multi-site Activities button to On, WFM retains your last selection—in the current view and for all other views that contain multi-site activities—preventing you from having to click it every time you want to display data for the selected multi-site activity.
Options dialog
Use the Options dialog to configure the data that is shown on the:
- Intra-Day view or Agent Extended view for the current scenario.
- Master Schedule Intra-Day or Master Schedule Agent-Extended view.
Opening the Options dialog
To open the Options dialog:- Click Options
 on the Actions toolbar, or select Options... from the Actions menu. The Options dialog opens.
- When called from an Intra-Day view, it has three tabs: Options, Performance, and Columns.
- When called from an Agent-Extended view, it has two tabs: Options and Columns.
Each tab is described below.
- After you are done configuring the Options dialog box, click OK to save your changes, or Cancel to restore the original selections.
Configuring the Options
To configure options in this dialog box:- If you do not need the Legend to appear, you can clear the Show Schedule Legend check box to provide more space for the grid.
- If you want to see agent availability on the grid, select the Show Agent Availability check box. Hours when an agent is unavailable are then shown in light gray on the grid.
- Select the check box Show agents with granted and scheduled rotating pattern or any other calendar preference to see which schedule days contain such an item. The result: a red check box and Agent icon appears in the left-most column (labeled "!") for every Agent who meets these conditions.TipYou can use this tool to learn whether an agent was given a schedule based on a schedule preference, which might influence your decision to modify this agent's schedule. This icon is displayed only if the agent was given a rotating pattern or preference (such as for time off) as a result of building a schedule. If an agent’s schedule is manually edited to give him or her a preference, or a schedule from a rotating pattern, then the icon will not be displayed.
- Select the radio button for the hours you want to show, 24 to show 24 hours or 36 to show 36 hours.
-
Select the Presentation type: Schedule only, Schedule on top, or Marked time on top. Your selection affects the colored bars in the schedule. If Schedule only is selected, you cannot see Marked time.
Configuring performance
To configure the Performance tab (not available in Agent-Extended view):- If you select the Show Performance Information check box, you can further customize exactly what performance information WFM Web shows on the Intra-Day Schedule view. If you clear this check box, the rest of the options on this tab are disabled.
- If you prefer not to see the legend that explains the colors used to distinguish performance data, clear the Show Performance Legend check box.
- The Update Automatically check box determines whether schedule changes are shown when they happen.
Clear this only if you have network bandwidth issues that make automatic updates a problem.
- If you selected to view performance data, you can select the check boxes to show additional information in the performance table.In addition to scheduled coverage and calculated staffing, which always appear, you can select any or all of these Show additional data options to appear in the table:TipYou see the table only if the Full-Day View check box is not selected.
- Required Staffing
- Difference between Coverage and Calculated Staffing
- Difference between Coverage and Required Staffing
- Scheduled Service Level Percentage
- Scheduled Deferred Service Level Percentage
- Scheduled ASA (Average Speed of Answer)
- Overtime Schedule (default: cleared)
- Overtime Requirement (default: cleared)
Showing and hiding columns
To configure the Columns tab:
- Select the check boxes for the optional columns that you want to display. Clear the check boxes for any columns that you want to hide. For Intra-Day and Agent-Extended views, you can add the following columns: Site Name, Shared Transport, Overtime, Paid Hours, Total Hours, Start Time, Accessibility, and Comments. In Intra-Day view, all columns are sortable, except for Comments. In Agent-Extended view, these columns are not sortable.
Review messages (Save) dialog
Use this dialog to respond to any warnings or errors that the server returned during your last attempt to save an agent's edited schedule.
The dialog box includes the following columns and controls:
| Team Name | Displays the team to which this agent belongs. |
| Agent Name | Displays the agent whose schedule generated this message. |
| Messages | Displays the message type (either Warning or Error), numeric code, and the message text. |
| Action | Use each message's drop-down list to select an action to resolve the warning or error:
|
| OK | Closes the dialog box, applies your selected actions, and retrieves fresh data from the server. |
| Close | Closes the dialog box without saving or refreshing data. |