Agent groups
Contents
- 1 Prerequisites
- 2 Configuring Agent Groups
- 3 Creating an Agent Group
- 4 Adding agents to an Agent Group
- 5 Adding Supervisor to an Agent Group
- 6 Creating a virtual Agent Group
- 7 Viewing an agent's Agent Groups
- 8 Editing an agent's Agent Groups
- 9 Configuring the desktop for an Agent Group
- 10 Exporting Agent Groups
- 11 Next Steps
Organize your agents into groups so they're easier to manage.
Prerequisites
Before you can configure Agent Groups:
- You need to configure skills that will assign to the Agent Groups. If you haven't done so already, go to the skills tab and set up the skills you want to use.
- If you plan on creating Agent Groups by selecting specific agent accounts to the group, you first need to add the agent accounts. If you want to set up Virtual Agent Groups, it is not necessary to add the agent accounts first.
Configuring Agent Groups
You have two options for creating Agent Groups:
- Create an Agent Group and then manually add agents to the group. For example, if you want to create an Agent Group for a group of new hires, you create the Agent Group, and then manually add each of the new hire's agent accounts to the group.
- Create a Virtual Agent Group to automatically group agents, according to their skills. You create an Agent Group object and define a script to identify the skills that you want the agents in the group to share. For example, you can create a virtual Agent Group for all agents that can speak Russian.
Both types of Agent Groups are configurable on the Agent Groups page. Use the following procedures to create and configure your Agent Groups:
Creating an Agent Group
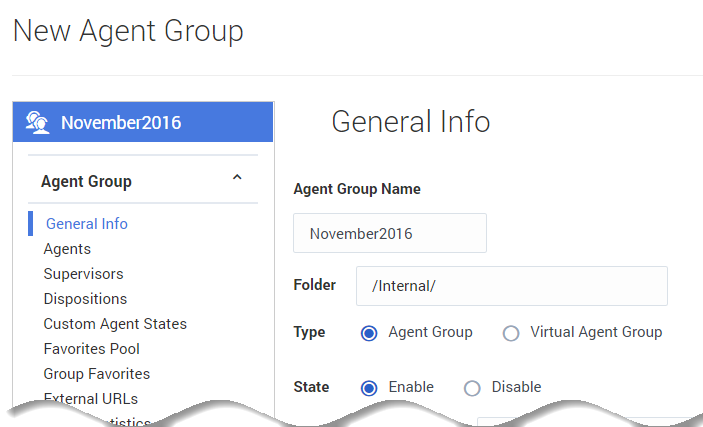
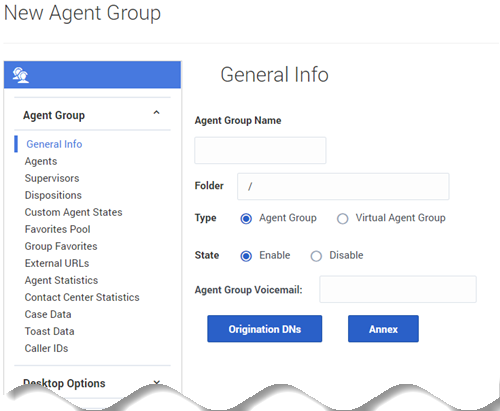
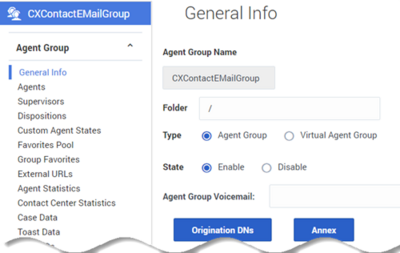
In the New Agent Group window, type the name you want to assign to the Agent Group and click Save. In our example, the new Agent Group is a group of new hires, so let's name the Agent Group November2016 New Agents.
You can put the new Agent Group into a folder. This is useful for organizing your Agent Groups to make them easy to locate in the future. For example, you can place our new group into the Training Groups folder. When you select the Folder option, a drop-down list box is displayed where you can select a folder or click the add folder ![]() icon to create a new folder.
icon to create a new folder.
Adding agents to an Agent Group
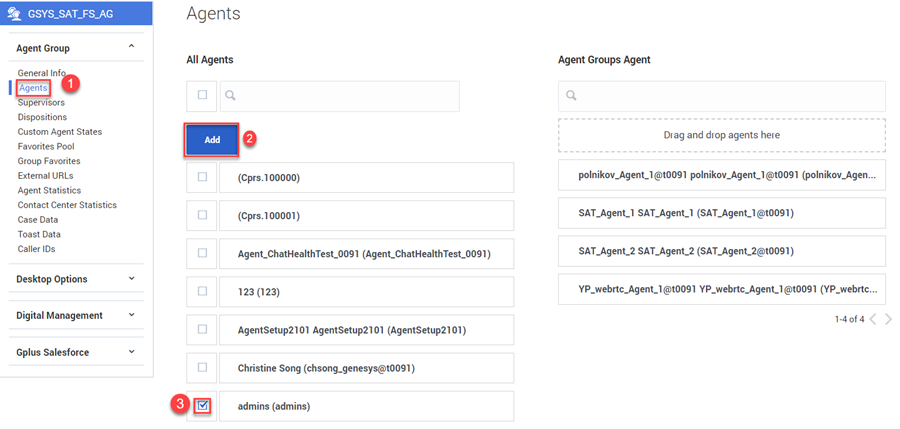
When you create an Agent Group, you can go to the Agents tab and add agents to the group.
You can either drag the agent over to the Agent Groups Agent column, or you can click the box next to the agent's name in the All Agents list and then click Add. This automatically drops the agent into the Agent Groups Agent list.You can assign a designated supervisor for an agent group. A supervisor monitors the performance of the agents in the agent group. Use the Agent Group Supervisor page to select a supervisor. Tasks varies for the supervisor to manage and support the agent group depending on the role assigned. See Supervisor options for the various supervisor options.
Adding Supervisor to an Agent Group
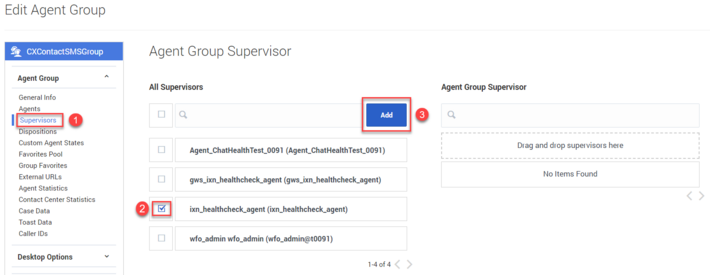
Use the following procedure to assign a Supervisor for an Agent Group:
- Go to the Supervisors section in the Agent Group tab.
- Click the check box next to the supervisor's name in the All Supervisors list and then click Add. This automatically drops the supervisor into the Agent Groups Supervisor list.
Creating a virtual Agent Group
You can create a virtual Agent Group by specifying a script when you add an Agent Group.
As opposed to a regular Agent Group, you can't manually add agents to a virtual Agent Group. Agents are automatically included in the group if the agent is assigned the skill that is specified in the script.
After you add the script, you will see a link in the Script column on the Agent Groups page. The script identifies the common skills shared by all agents that belong to the group. You can edit the script by double-clicking the script text and then updating the script in the dialog box that is displayed.
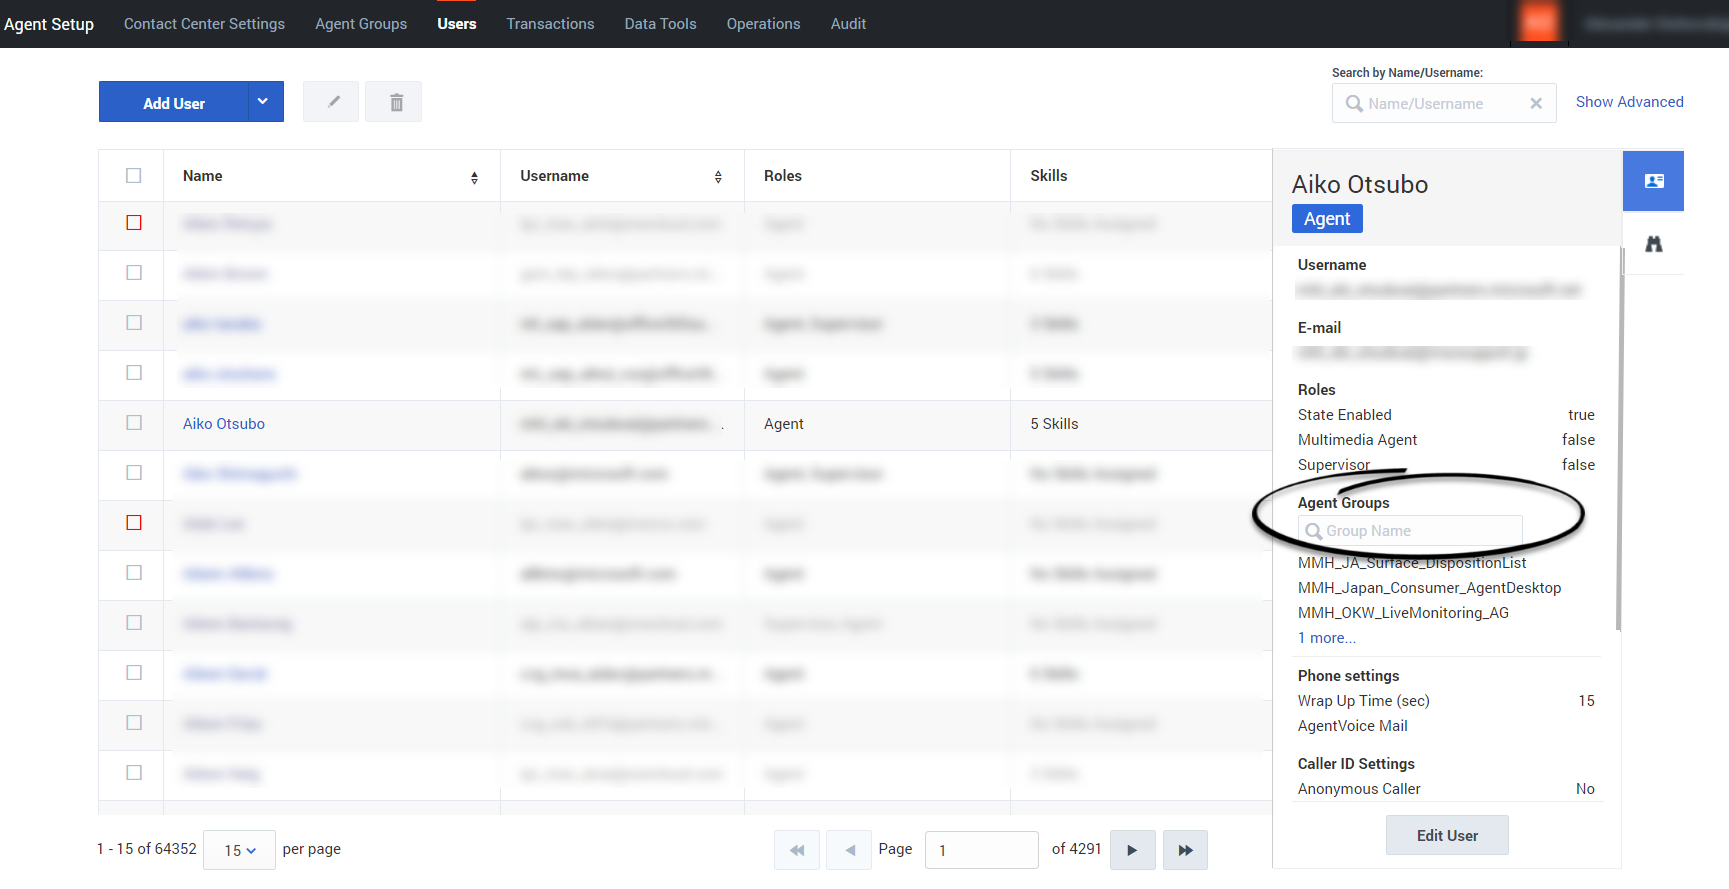
Viewing an agent's Agent Groups
Editing an agent's Agent Groups
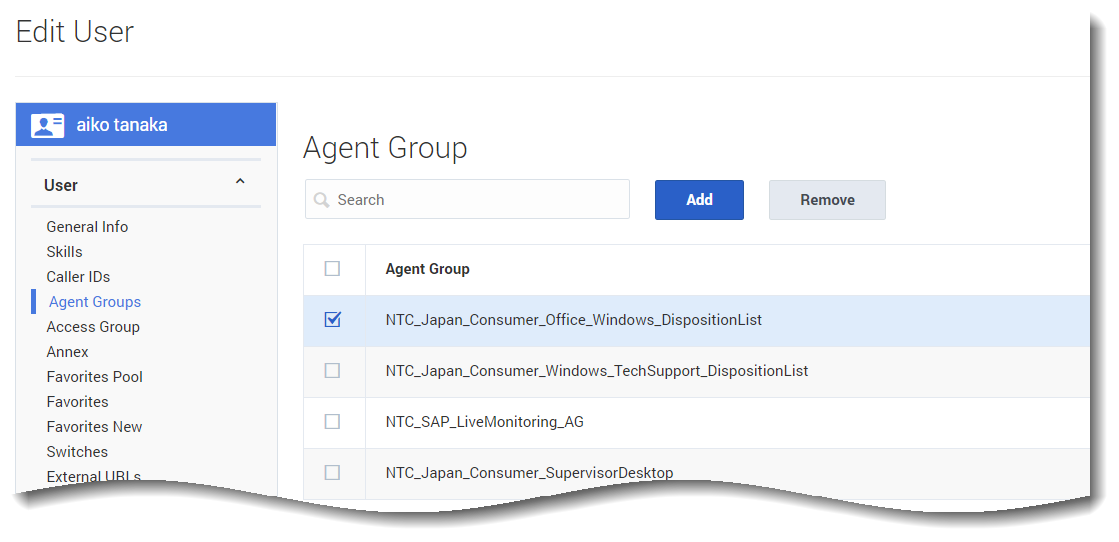
To remove an agent from an Agent Group, from the Users tab, click the agent's Name. From the left-hand navigation menu, click User > Agent Groups. From here you can check the checkbox next to each Agent Group you wish to remove from the agent's list, then click Remove.
Note: Clicking Remove only removes the user from that Agent Group, it does not delete the Agent Group.
Configuring the desktop for an Agent Group
After you populate your Agent Group with agents, you can assign objects to the group. Under each of the following tabs, make your selections:
- Dispositions
- Custom agent states: Custom Agent States only displays existing Not Ready codes created under the Contact Center Settings.
- Group favorites: Group favorites are configured the same way as Global Favorites.
- External URLs
- Statistics options
- Case and toast data
- Caller ID
- Gplus Adapter for Salesforce options: Use the Gplus Salesforce tabs to configure the Gplus Adapter settings for the Agent Group.
Exporting Agent Groups
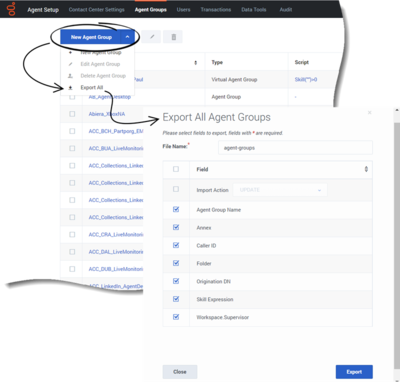
You can export Agent Groups two ways. From the Agent Groups tab, you can export selected Agent Groups from the list, or you can export all Agent Groups.
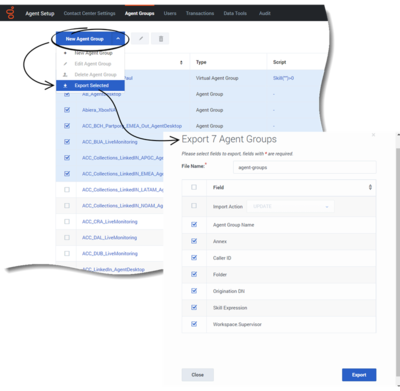
To export only selected Agent Groups, check the checkbox next to the Agent Group Names you wish to export. Click the drop-down arrow next to New Agent Group, and select Export Selected. The export window opens and, from here, you can choose the File Name, as well as which fields to export. Once you click Export a .csv file is saved to your local machine.
To export all Agent Groups, click the drop-down arrow next to New Agent Group, and select Export All. The export window opens and, from here, you can choose the File Name, as well as which fields to export. Once you click Export a .csv file is saved to your local machine.
If you wish to stop the export, click the "x" at the end of the percentage bar and the confirmation window will open. Click OK or Cancel.
Next Steps
After you have configured Agent Groups, you can proceed to configure:
- Business attribute overrides (Transactions)
- Templates

