Agent and Agent Group Annex
Use the Annex to configure advanced features for single agents or groups of agents rather than for your entire contact center.
You might want to set up a single agent or a group of agents for a specific purpose. For example, you might want to create a test agent that you can use to troubleshoot issues or experiment with different settings prior to making changes to all the agents in your contact center.
The Users tab enables you to create and customize agents.
The Agent Groups tab enables you to create agent groups and customize settings for the agents that you have assigned to a group.
Genesys Multicloud CX includes advanced features and functionality that can be enabled for agents or agents groups. Advanced features are configured in the Annex of either an agent or an agent group. This article provides examples of configuring a troubleshooting option for Gplus Adapter for Salesforce.
To configure advanced options you must know the Section where the option is configured, the Name (or Key) of the option, and the Value of the option. This information is obtained from product specific documentation or directly from Genesys.
Configuring the Agent Annex
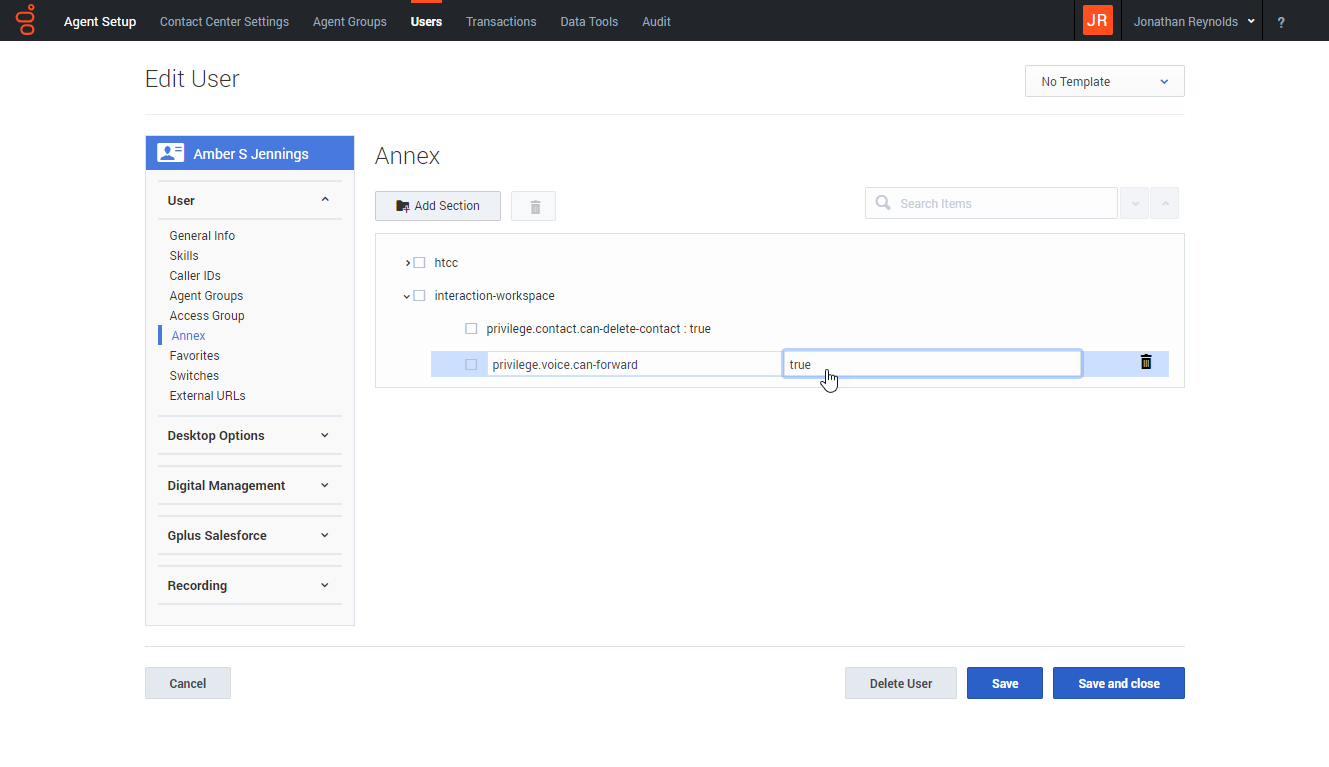
To configure notifications in the Agent Annex, in Agent Setup select an agent from the Users tab.
In this example, the privilege.voice.can-forward option is enabled so that an agent can forward their phone to a different number. Here are the steps to add a new option to an agent:
- Open the Users tab.
- Click an agent (for debugging purposes, choose a test agent).
- Click User to open the User menu.
- Open the Annex view.
- If the interaction-workspace section does not exist, click Add Section and create it; otherwise, click the interaction-workspace section.
- In the interaction-workspace section, click + to create the privilege.voice.can-forward key.
- Assign true as the value.
- Save the changes.
Configuring the Agent Group Annex
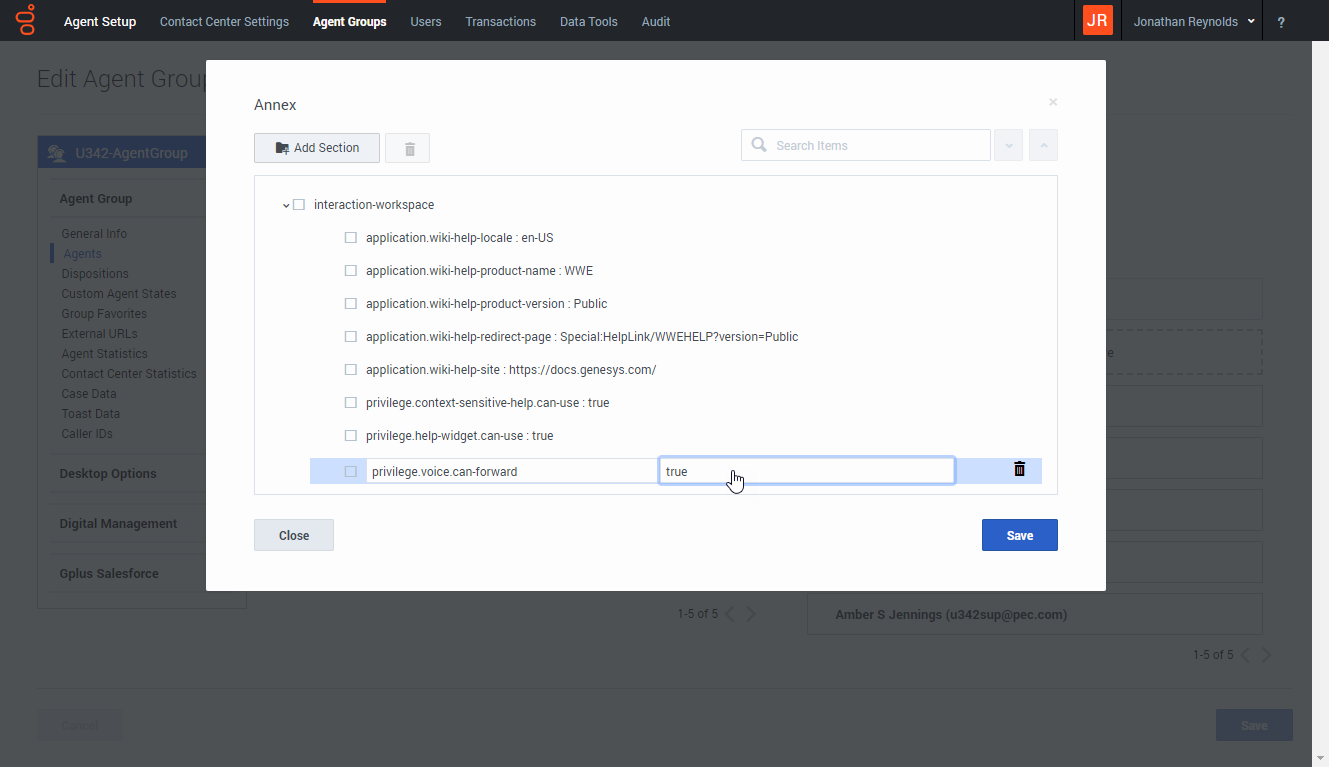
To configure notifications in the Agent Group Annex, in Agent Setup select an agent group from the Agent Groups tab.
In this example, the privilege.voice.can-forward option is enabled so that agents can forward their phones to a different number. Here are the steps to add a new option to an agent group:
- Open the Agent Groups tab.
- Click an agent group to open the Edit Agent Group view.
- Click Agent Group to open the Agent Group menu.
- Click Agents to open the Agents view.
- Click Annex to open the Annex dialog box.
- If the interaction-workspace section does not exist, click Add Section and create it; otherwise, click the interaction-workspace section.
- In the interaction-workspace section, click + to create the privilege.voice.can-forward key.
- Assign true as the value.
- Save the changes.


