Configure a Dashboard
Contents
Learn how to configure a Dashboard.
Specify a default dashboard
You can customize a dashboard and set it as the default one for a partition. To specify a dashboard as the default dashboard, click the Load icon ![]() on the upper-right corner of the analytics page, and then click the Make default icon.
on the upper-right corner of the analytics page, and then click the Make default icon.
Configure a dashboard
The Configure Dashboard window contains 5 tabs that enable you to determine how the specific Analytics dashboard should be viewed and what information should and should not be included.
Configuration of the Configure Dashboard window is specific to each dashboard. For example, if you open the Configure Dashboard window in the User Actions dashboard, select Editable in the General tab and click Save, Editable will only be selected for the Users Action dashboard.
For details about each tab in the Configure Dashboard window, refer to one or more of the following sections:
To open the Configure Dashboard window, select the Analytics menu and click the Configure Dashboard icon ![]() in the top right corner of the Analytics screen.
in the top right corner of the Analytics screen.
General
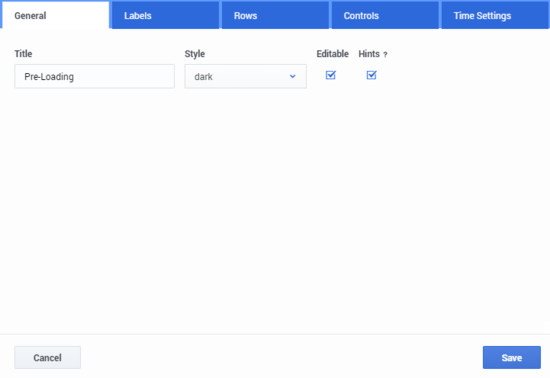
In the Configure Dashboard > General tab (see image below) you can change one or more of the following options:
| Parameter | Description |
|---|---|
| Title | The dashboard title. |
| Style | Reserved for future use. |
| Editable | Enables you to lock the specific dashboard so that it cannot be changed in the future. |
| Hints ? | Reserved for future use. |
Labels
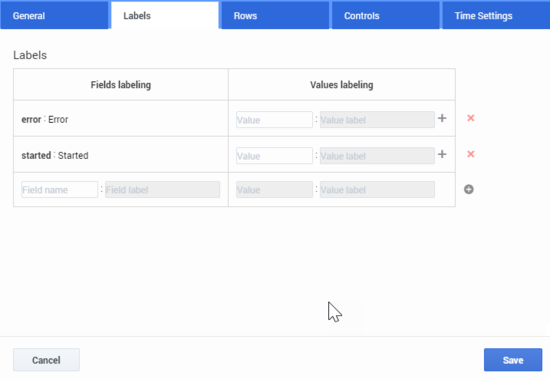
In the Configure Dashboard > Labels tab (see image below) you can change the default name of each field (that is, the Label name) to a name with a meaning that you can easily understand.
Change a field name
- Type the field name in the Field Name text box. A list of fields with the letters you typed appears.
- Select the field whose name you want to change.
- In the Field label text box type the new name for the selected field and click the Add new field icon
 .
. - Click Save.
Rows
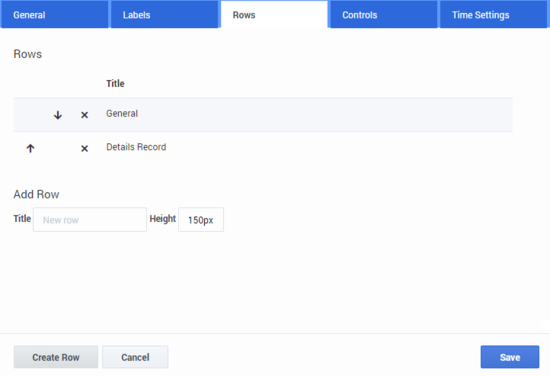
In the Configure Dashboard > Rows tab (see image below) you can add and/or remove dashboard rows. The dashboard row enables you to control the specific dashboard layout with height and row order configuration options.
Add / Remove a Dashboard Row
- Type the name of the new dashboard row and enter a row height.
- Click Create Row.
- Click Save.
Time Settings
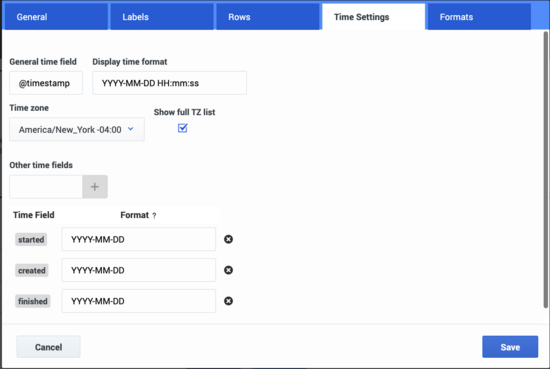
In the Configure Dashboard > Time Settings tab (see image below) you can change one or more of the following options:
| Parameter | Description |
|---|---|
| General time field | The primary field that contains the time stamp. |
| Display time format | The time format you wish to see displayed. For example, YYYY/DD/MM, or hhmmss, and so on. |
| Other time fields | Select optional time fields to be displayed in the format selected in Display time format. |
Fields formatting
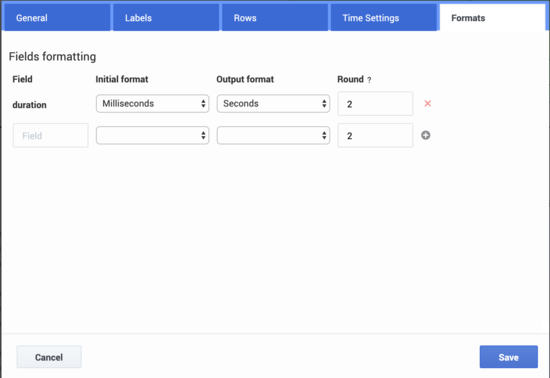
In the Configure Dashboard > Fields formatting tab (see image below) you can add and/or remove time and duration rows. Each row enables you to control the time and duration format that appears in the user interface.
Change a field format
- Type the field name in the Field text box. A list of fields with the letters you typed appears.
- Select the field whose format you want to change.
- In the Initial format select the format you want to change.
- In the Output format select the new format.
- In the Round text box enter the number of decimal points that can appear for the selected Output format.
- Click Save.

