Search for and Manage Contacts
From Genesys Documentation
This topic is part of the manual Outbound (CX Contact) CX Contact Help for version Current of Outbound (CX Contact).
Contents
Learn how to browse a contact list.
Related documentation:
Use the features in the List Details View page and/or the Contact Search page to browse a selected Contact List, optionally applying filtering rules, as well as to perform actions such as:
- Add a contact
- Find a contact
List Details View
Use the List Details View page to do the following:
- View records within a contact list.
- Search lists for a specific contact.
- Apply filters to a contact list to drill down into your data.
The table below describes the available List Details View options.
Important
- All Filtering rules, and Selection rules (Contact and Advanced) are accessible from the Rule drop-down list. With this option you can apply previously created selection and filtering rules to the current view.
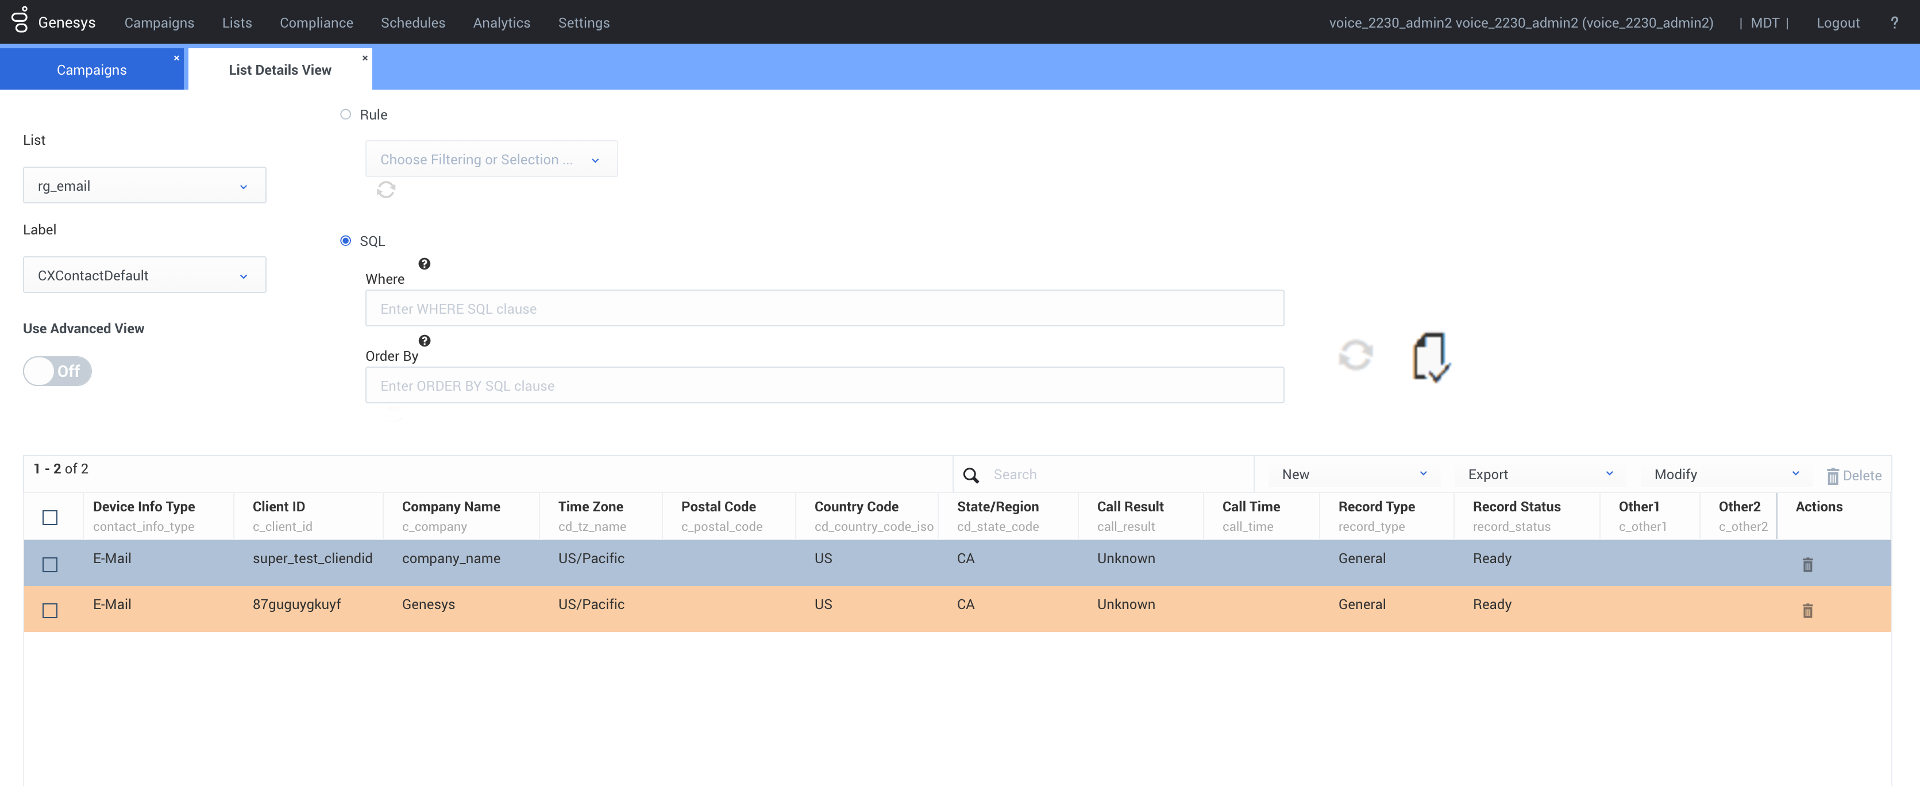
- The records in the List Details View are automatically color grouped. Each color represents a different contact (different customer). Since each customer can have more than one device, the colors enable you to view which records belong to the same customer.
- The List Details View has a Simplified view and an Advanced view. The Simplified view is the default view that includes the most commonly used fields. The Advanced view includes all of the contact list fields.
The following image includes the options described in the table above.
Contact Search
Use the Contact Search page to do the following:
- View all contacts within a list - Leave the Last Name field empty and click View Contacts.
- Search for a single contact for a particular list - Type the first few letters of the last name in the Last Name box, select the list from the List menu, and click View Contacts.
- Add a new contact - Click New Contact.
- Delete a contact - Select the box next to the contact's name and then click the trash can icon.
Important
If a contact you're searching for has multiple devices, the search results will display a separate record for each device. For example, if a contact has three devices, the Contact Search results will return three separate results for the contact - one for each device.For more information about contacts and contact lists, visit the Create and Manage Contact Lists page.
Comments or questions about this documentation? Contact us for support!

