
Manage Consent Lists
Contents
Learn how to view, create, and manage Consent lists.
Consent lists contain contact information about customers who have consented to receive outbound calls, emails, or SMS messages. The key features of Consent Lists are as follows:
- Consent contacts by device—Specify one or many devices for a contact.
- Consent contacts by Client ID—Specify a Client ID for a contact.
- Use a single consent list for multiple Campaign Groups.
Use the Compliance > Consent Lists page to perform any of the following tasks:
View a Consent List
In the CX Contact main menu, select Compliance > Consent Lists to view the available Consent Lists and their associated details in a table view.

This view contains the following Consent Lists details:
| Consent list details | |
|---|---|
| Name | The name of the consent list. |
| Size | The number of entries in the consent list. |
| Channel | Indicates the channel (voice, SMS, or Email) that the consent list applies to. |
| Required | Indicates if the consent list is mandatory or optional. |
| Type | Indicates whether the consent occurs by Device or by Client ID. |
| Secured | Indicates whether or not the consent list was PGP encrypted before it was imported/exported. |
| Last Modified Date | Indicates the date that the consent list was last modified. |
| Created Date | Indicates the date that the consent list was created. |
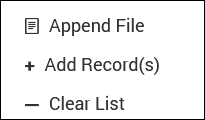
| Actions | Contains a number of Action buttons, as follows:
|
Create Consent Lists
You create Consent Lists by importing the data contained within CSV. files.

To create a new Consent List:
- In the Consent Lists page, select New > New List.
- The Import List dialog opens.
- Enter a name for the consent list.
- If you want to encrypt the data, check the Secure with encryption check box.
- Click Select file to select the CSV file you want to import.
- Select the Channel and Type.
- Optionally, select an upload rule.
- Optionally, select a specification file.
- If this file is required, check the Required check box.
- Click Create empty.
Edit Consent Lists
To edit an existing consent list:
- On the Consent Lists page, select the consent list.
- Click the pencil icon from the Actions menu.
- You can edit any of these fields, excluding Name and Type.
- See the consent list details here.
Delete Consent Lists
To delete an existing consent list and the contacts within it:
- Go to the Actions menu for the list.
- Click the trash can icon.
- Select Delete List.
Add Records to Consent Lists

To add contacts to a consent list:
- On the Consent Lists page, go to the Actions menu for that list and select Add Records.
- Enter one or more devices or Client IDs, depending on the list type.
- Select the Append type.
- Click OK.
There are three Append types from which to choose:
- Append and update - The imported records are added to the consent list. If CX Contact finds a duplicate record it overrides the existing record with the new record
- Append only - The imported records are added to an existing consent list. Duplicate records are always ignored.
- Flush and append - Before the new records are imported into the consent list, the existing contact list is completely flushed.
Associate Contact Lists with Campaign Groups
You can optionally associate Consent Lists with Campaign Groups for any channel (Voice, Email, SMS).

- Go to the Dialing Profile > Campaign Template > Campaign Group view.
- Click Create/Edit to open the dialog.
- You'll see Consent Lists, together with a Change button and the associated lists to the right.
- Click Change to open a dialog containing a list of the available consent lists.
- Click X (to the right of the list) to disassociate it from the Campaign Group.
Search Consent Lists
To search Consent Lists, go to the Suppression and Consent Search page, and then click Search in Consent Lists. You can search by device (phone number) or Client ID.
Click View Entries to display the search results in a table with the following columns:
- Consent Entry
- Consent Last Name
- List Type (Device or Client ID)
- Channel (Voice, Email, SMS)
- Consent Status (Active, Inactive)
- Last Modified Date
- Created Date
Secure Consent Lists
You can secure Consent Lists by adding encryption. See the Settings > Security tab. Encryption is disabled (OFF), by default.
