Co-browse sessions
Contents
A Genesys Co-browse session lets you and a contact navigate the same web page at the same time. Unlike conventional screen-sharing applications where one party sees an image of the other party's browser, in a Genesys Co-browse session both you and the contact share the same instance of the web page.
Start a Co-browse session
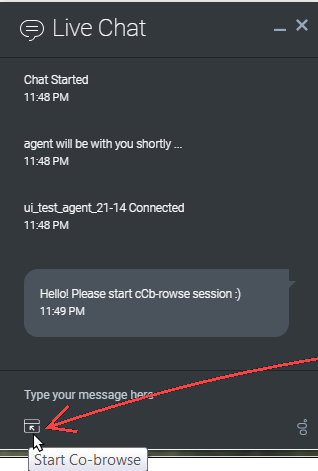
Your contact must initiate a Co-browsing session. You cannot start a Co-browse session. Websites set up for Genesys Co-browse include a widget with a Start Co-browse button that the contact must click to start a Co-browsing session.
One of the widgets that your customer sees might look something like this. Clicking the Start Co-browse button will present the customer with a session ID.
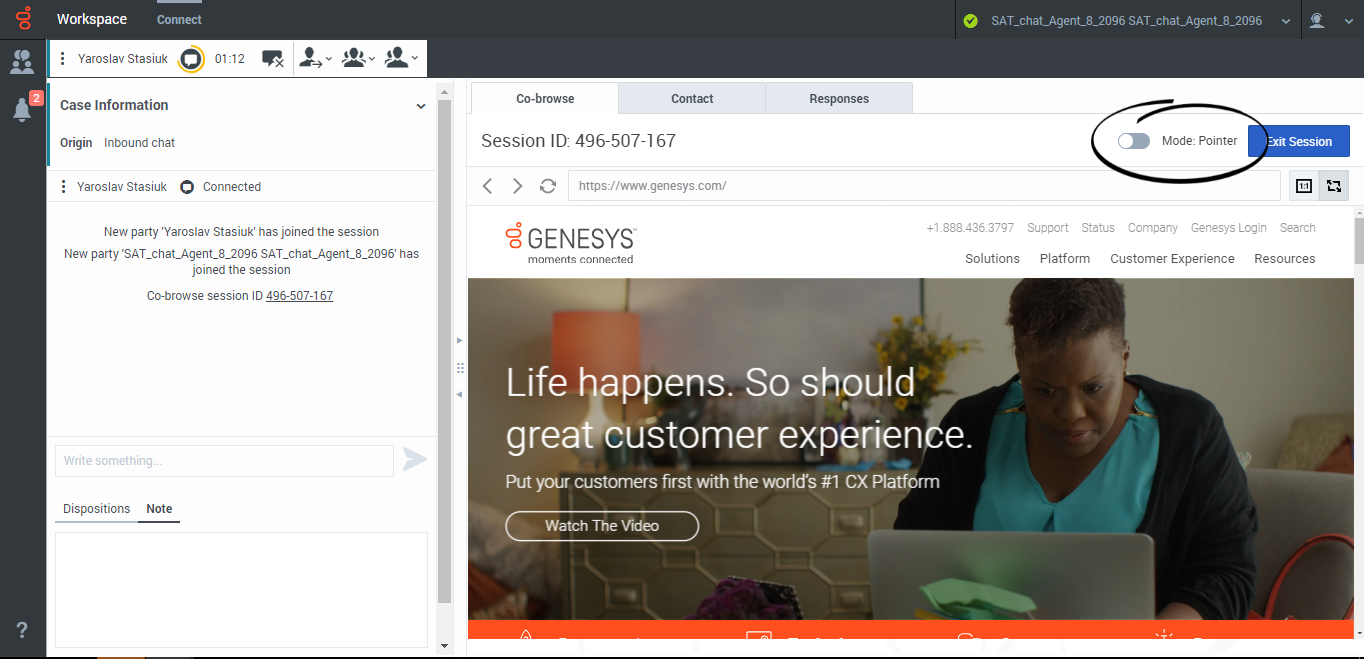
When you want to co-browse a web page with your contact, ask them to look for the widget and click the button.If you are engaged in a chat interaction with your contact, the Co-browse session starts automatically. Once the Co-browsing session starts, you see a special message in the chat transcript that contains the session ID. Click the Co-browse tab to view it or click the session ID link in the chat transcript to open the Co-browse tab to view the session.
On a voice interaction, you must ask your contact to tell you the session ID that is displayed on their screen. Enter the session ID in the Session ID field, then click Join co-browse.
You should now see the contact's browser. You do not need to navigate to the same page as the contact. Co-browse uses the session ID to make sure that you and the contact are viewing the same page. As soon as the session starts, the contact receives a notification on their screen that they have started a Co-browsing session.
Using Pointer mode and switching to Write mode
When you first join a Co-browse session, you are in Pointer mode (Write mode is off). You can see what the contact sees and navigate within the web page using scrollbars, but you cannot perform any actions in their browser. You cannot navigate, input information, or submit forms.
You and the contact can see each other's mouse movements at all times and your mouse clicks create a red circle effect around your mouse pointer. Use the red circle effect to direct the contact to specific sections on the web page.
At any time, you can ask the contact to enable Write mode. First ask the contact if you can take control of the co-browsing session. When the contact agrees, click the toggle next to Write Mode at the top of the Co-browse tab. A confirmation message is sent to your contact. When they approve the mode toggle changes to on and you are in Write mode.
Using Write Mode and switching to Pointer mode
In Write mode, both you and your contact can perform conventional user actions. Both of you can enter text and click buttons.
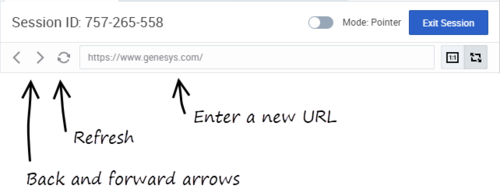
In Write mode, you can navigate by clicking links in the web page or by using the following navigation options in Agent Workspace:
- Click the back and forward arrows to navigate to the previous or next opened page
- Click Refresh to reload the page.
- Type a URL into the URL bar and press Enter.
Your administrator might limit which interactive elements you can use in Write mode.
To switch back to Pointer mode, click the mode toggle at the top right corner of the Co-browse tab.
Your contact can also switch back to Pointer mode at any time by clicking the Write Mode toggle switch.
Stop a Co-browse session
Once a Co-browse session starts, both you and your contact may end the session. You can click Exit Session at the top right corner of the Co-browse tab; your contact can click the Globe button in the Co-browse session toolbar.
Ending your ongoing chat or call with your contact also immediately ends the Co-browsing session.
If your contact exits the session, you are notified and your browser no longer displays a view of the contact's browser. Likewise, if you exit the session, your contact receives a notification. Exiting the Co-browse session does not end your related chat or call with your contact.
Manage your virtual browser
The size of your virtual browser (a window on your computer that displays the contact's browser window) matches the actual size at the contact's end.
Scroll bars are displayed to help you navigate the contact's browser if their window is bigger than your Agent Workspace Co-browse area.
You can use the zoom-to-fit button to scale the display to fit in your window or the 1:1 button to return to the actual size that your contact sees.
Visibility of sensitive data
You administrator might limit which fields are readable to you.
Restricted buttons and controls have green boxes around them. If you hover your pointer over the element, an alert icon is displayed to remind you that the element cannot be clicked by you. Your contact can still interact with these elements.
Restricted text and data entry fields have purple boxes around them. If you hover your pointer over the element, an alert icon is displayed to remind you that the element cannot be clicked by you. Your contact can still interact with these elements.
Examples of restricted text and data fields are those that might contain credit card, personal identification, or password information.
If your contact enters information in a restricted text or data entry field, everything they enter is masked out by asterisks (****).
Images might also be masked from you. These display as a grayed out area surrounded with a purple box.


