Messaging
Contents
- 1 How do I handle a message-based interaction?
- 2 Pushing weblinks (URLs) to your contacts
- 3 Send Emojis to Contacts
- 4 Continuing the conversation
- 5 Web Chat structured messages (Notifications)
- 6 SMS messaging
- 7 WhatsApp messaging
- 8 Connecting to the WhatsApp channel
- 9 Messenger
- 10 Twitter Direct Message
- 11 Public Social Engagement
- 12 What next?
- 13 Top 5 topics
Messaging includes the Genesys Chat, SMS, WhatsApp, Messenger, and Twitter Direct Message Digital channels. Messaging enables you to manage message-based conversations across one or more of these channels in a unified conversation.
This article describes the typical options for handling, as a chat session, message-based conversations from the Genesys Digital messaging channels.
A chat session involves exchanging messages in real time with a contact. The Interaction View transcribes the conversation and allows you to review the conversation.
Chat interactions include Web Chat, SMS, WhatsApp messages, Facebook Messenger messages, and Twitter Direct Messages. Your account might also be set up to enable you to handle public Facebook and Twitter posts.
When either you or the contact ends the session, the interaction is ususally closed and marked as Done. However, sometimes you might have to continue a conversation. Perhaps you had to take time to find additional information for the contact or start a business process in your organization before continuing the conversation.
How do I handle a message-based interaction?
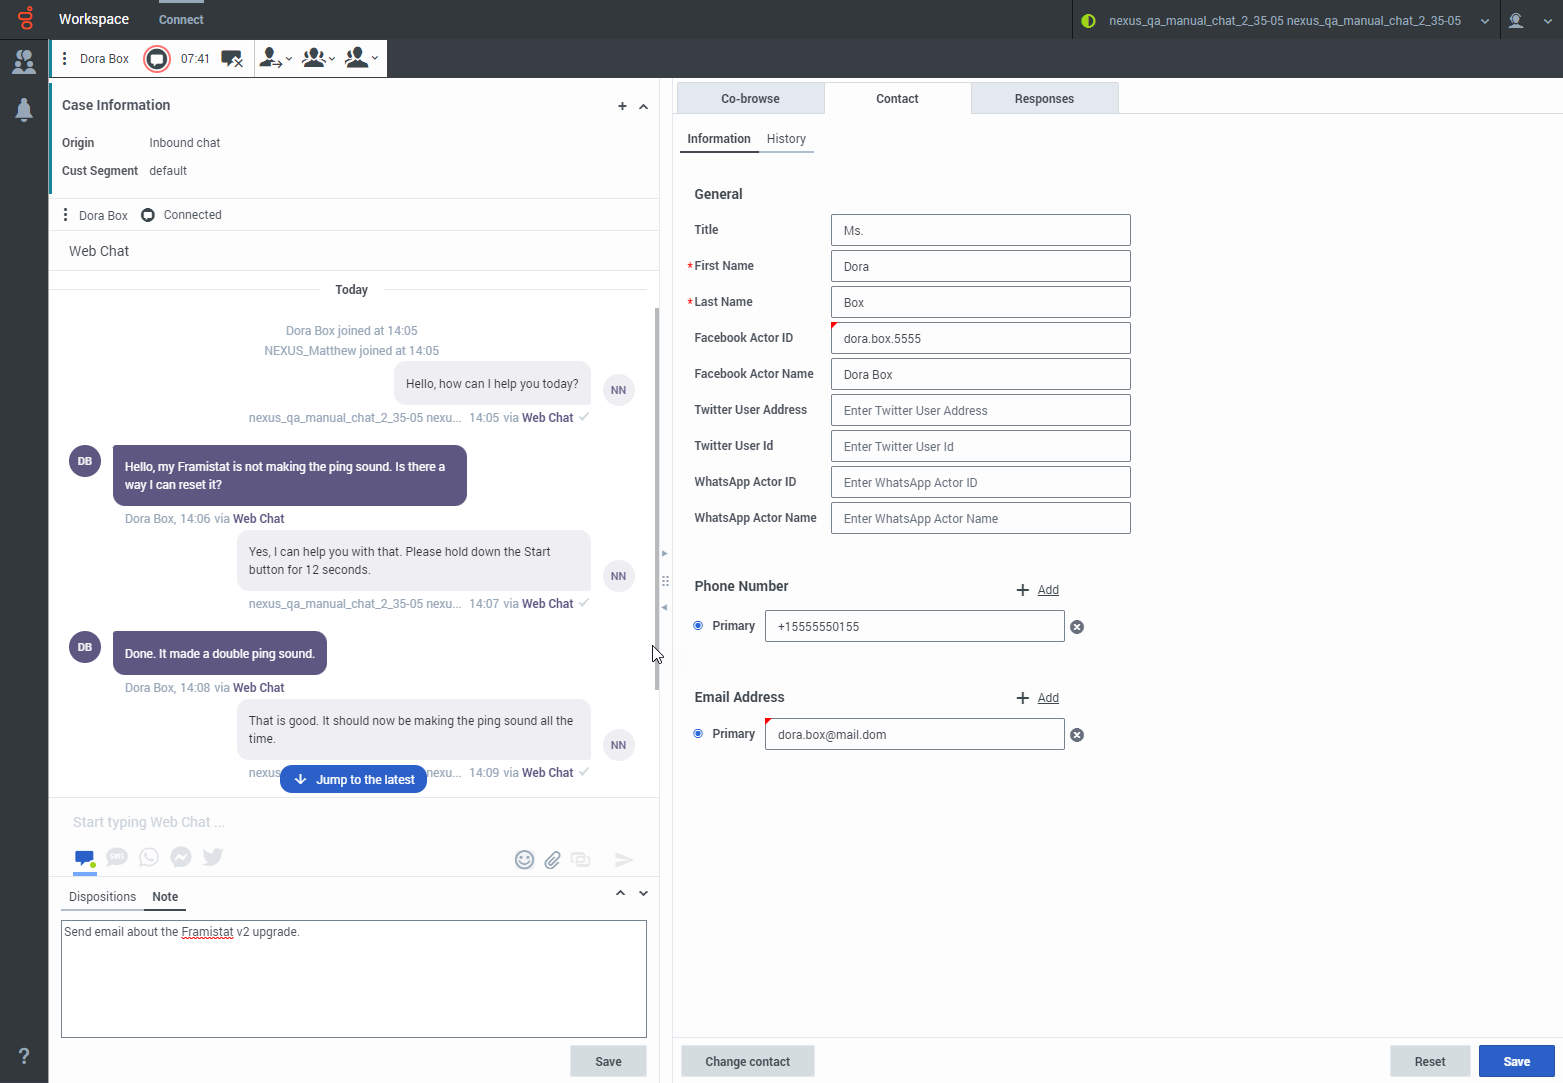
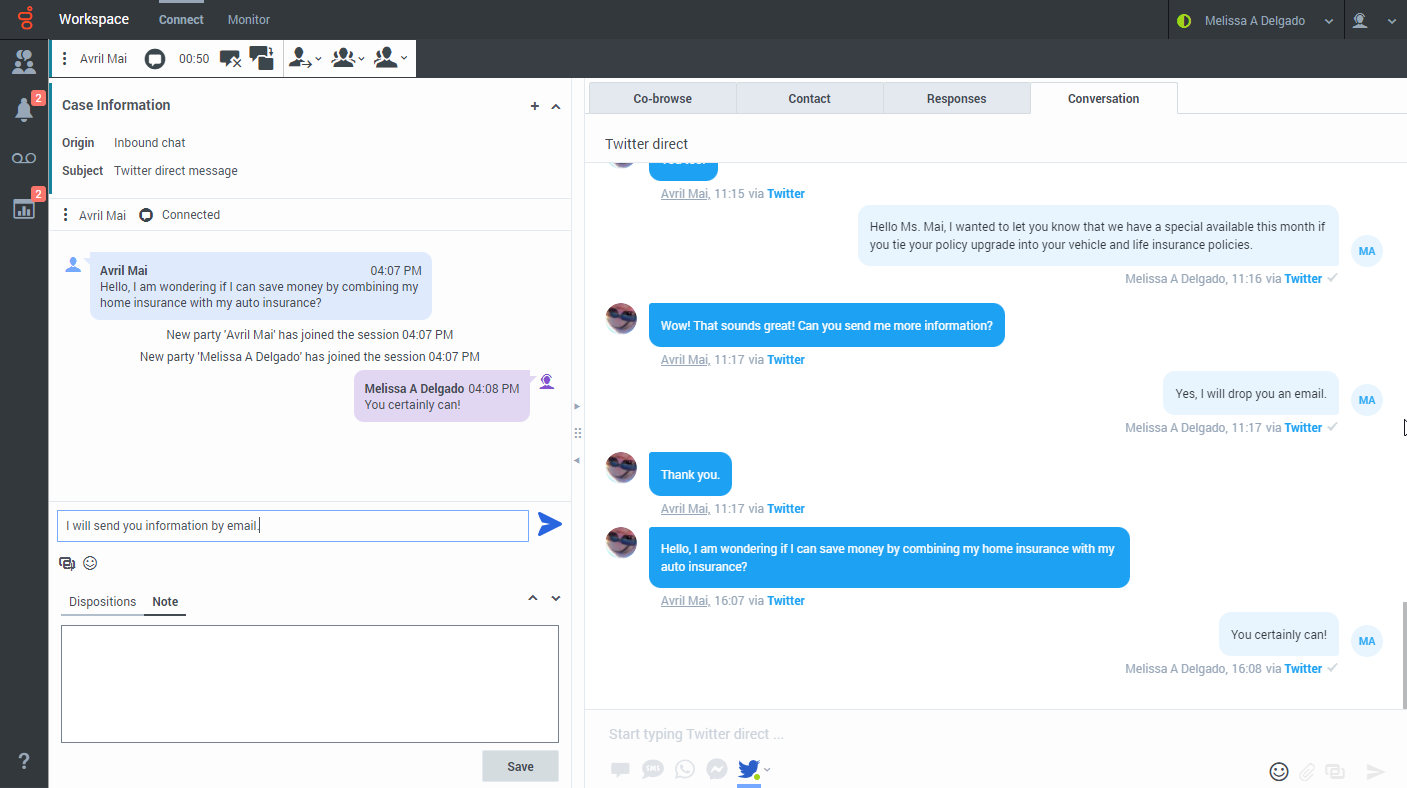
The Chat Interaction view is the Agent Workspace interface that lets you exchange messages with a contact.
The Chat Interaction view includes all the controls to handle the interaction, information about the interaction (Case Information), and Disposition and Note tabs where you can add information about the interaction. There might also be tabs on the right side of the view that contain contact information, history, and other features.
To start receiving chat interactions, set your status on the Chat channel or other messaging channel to Ready.
When you accept a chat interaction, the name of the contact is displayed and the timer for the pending response indicator starts. The color of the indicator begins as green. If you have not responded within the specified time limit, it changes to yellow. If you still do not respond, the indicator changes to red and begins to flash.
You use the Chat Interaction view to handle all message-based interactions (Web Chat, SMS, WhatsApp, Messenger, and Twitter Direct Message). You can distinguish among the different media in multiple ways:
- The color of the message blocks in the transcript
- The information provided in the Case Information area
- The origin text under the message block.
Can I have more than one line in my chat message?
The Agent Workspace Chat message composition field can display up to four lines at a time. It expands as you type. You can use Shift+Enter to add blank lines to your message. Watch this video to find out how.
Some of the things you can do while handling a chat include:
- To transfer the chat to someone else in your organization, click Transfer (
 ).
). - To start a chat conference between yourself, the customer, and someone else in your organization, click Conference (
 ).
). - Start a Voice (internal targets and contacts) or Chat (an internal target only) consultation. If you want to perform a warm transfer or a two-step transfer, click Consult (
 ) to talk to the consultation target and then click Transfer to transfer the call.
 - Call or email the contact, if there is a phone number or email address in the contact database. (You can also start a call or email from the Party Action menu by clicking an email address or phone number.) If your account is set up for it, you can also click a phone number or email address that your contact sends you as a chat message to call or email the contact.
- Add a disposition code or note.
- Click End (
 ) to end the chat and mark it as done (
 ).
). - Sometimes Workspace is unable to assign a call to a contact or it assigns the call to the wrong contact. Your account might be set up to let you assign or change a contact in the Contact tab.
If you place your mouse pointer over the interaction in the Interaction Bar, the elapsed time of the interaction and the last lines of the chat transcript is displayed. Connection-status information is displayed next to the Party Action menu.
Note: If you have a pending response and the Chat Interaction window is not the active window, it starts flashing in the Windows taskbar, regardless of the pending-response indicator status (green, yellow, or red).
Watch the video to see what happens when a chat request arrives at a workstation.
How do I expand or collapse panes to avoid scrolling?
To give yourself more room to work or to enable you to focus on just one panel, use the Collapse the panel, Partially expand the panel, and Fully expand the panel buttons (the little chevrons (up/down arrows)) to expand or collapse different parts of the interaction view.
Why are some numbers masked out?
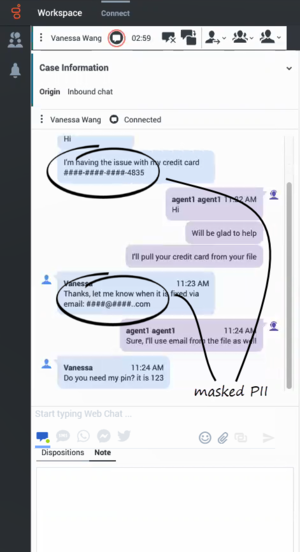
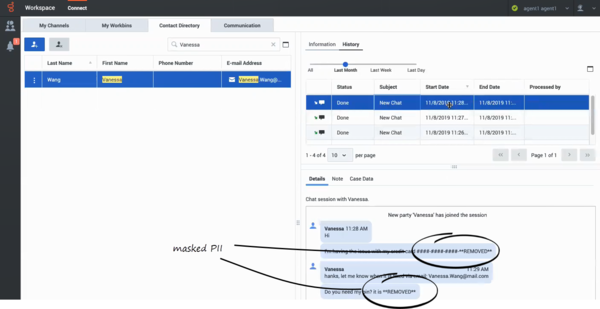
Some organizations must comply with regulations regarding masking Personally Identifiable Information (PII) while handling contact information. Some examples of PII include credit card numbers, personal email addresses, and phone numbers. Exposing PII to agents and other individuals in an organization is a potential security risk for the contact. In some environments, Agent Workspace detects and masks PII to keep contact information private. This figure shows you some of the ways that PII is masked in the chat transcript and in the history. You might also see masked text in the Communication tab.
Pushing weblinks (URLs) to your contacts
Your account might be set up to enable you to push website links (URLs) to contacts. If it is, the Check URL button (![]() ) is displayed beneath the chat text editing area.
) is displayed beneath the chat text editing area.
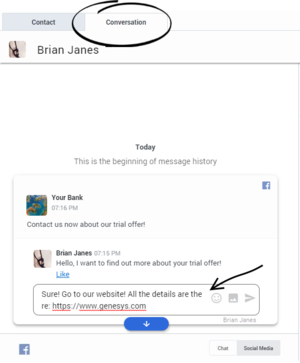
To push a URL to a contact, first type the URL in the chat text editing area. Agent Workspace recognizes correctly formatted URLs and enables the Check URL button for you. Click the button to open the URL in a new tab or window to check the URL before you send it to your contact. This way you can be sure that you are sending your contact to the correct website.
When you are sure that the URL is correct, click Send (![]() ) to send the URL to your contact.
) to send the URL to your contact.
Your contact receives a message in their chat window telling them to click the link that you sent them.
Send Emojis to Contacts
Your account might be set up to let you send emojis (emoticons or smileys) to your contact as part of the chat interaction text. Emojis are little faces and other symbols that you can use to let your contact know how you are feeling or to help them to know when something is good, funny, bad, or sad. Ask your supervisor or administrator about when to use emojis.
Use the Emoji Picker to add an emoji to your chat interaction:- Click the Choose an emoji button (
 ) that appears below the text editing area to display the menu of emojis.
 - Click an emoji.
- Click Send (
 ).
).
Continuing the conversation
Communication tab
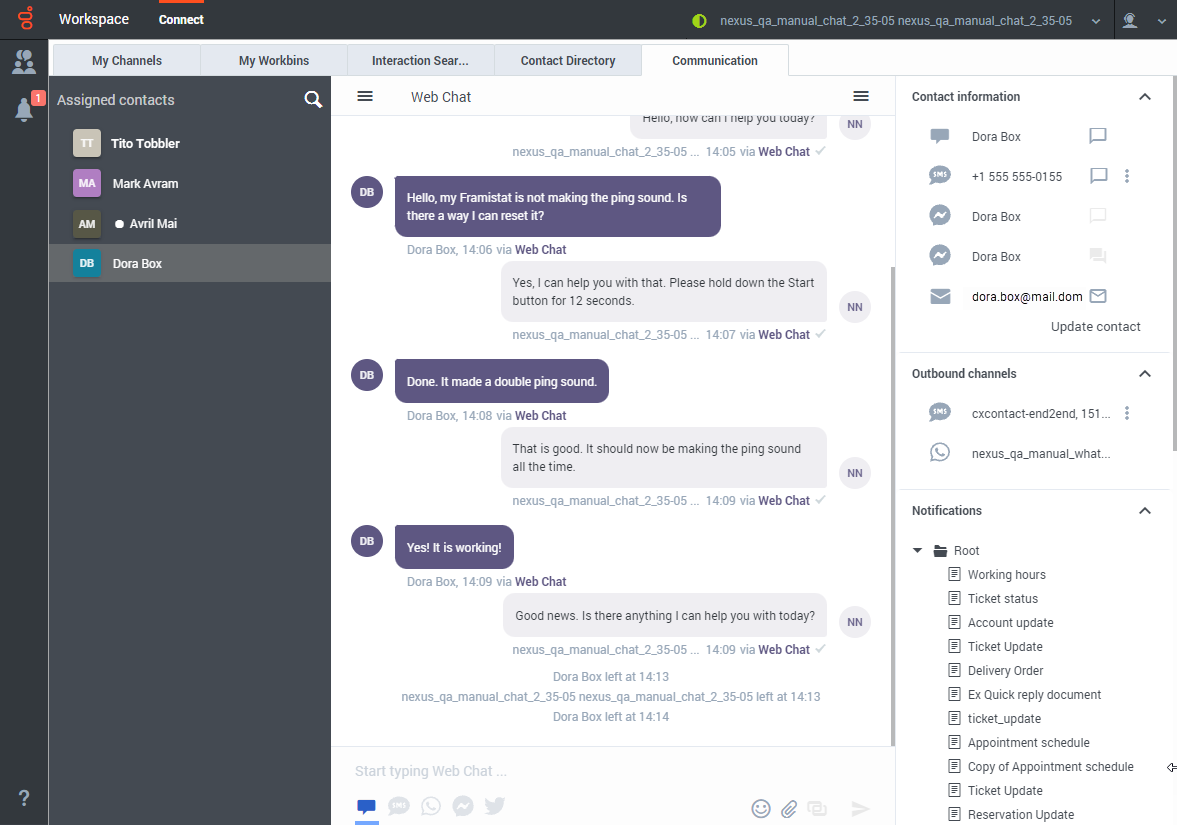
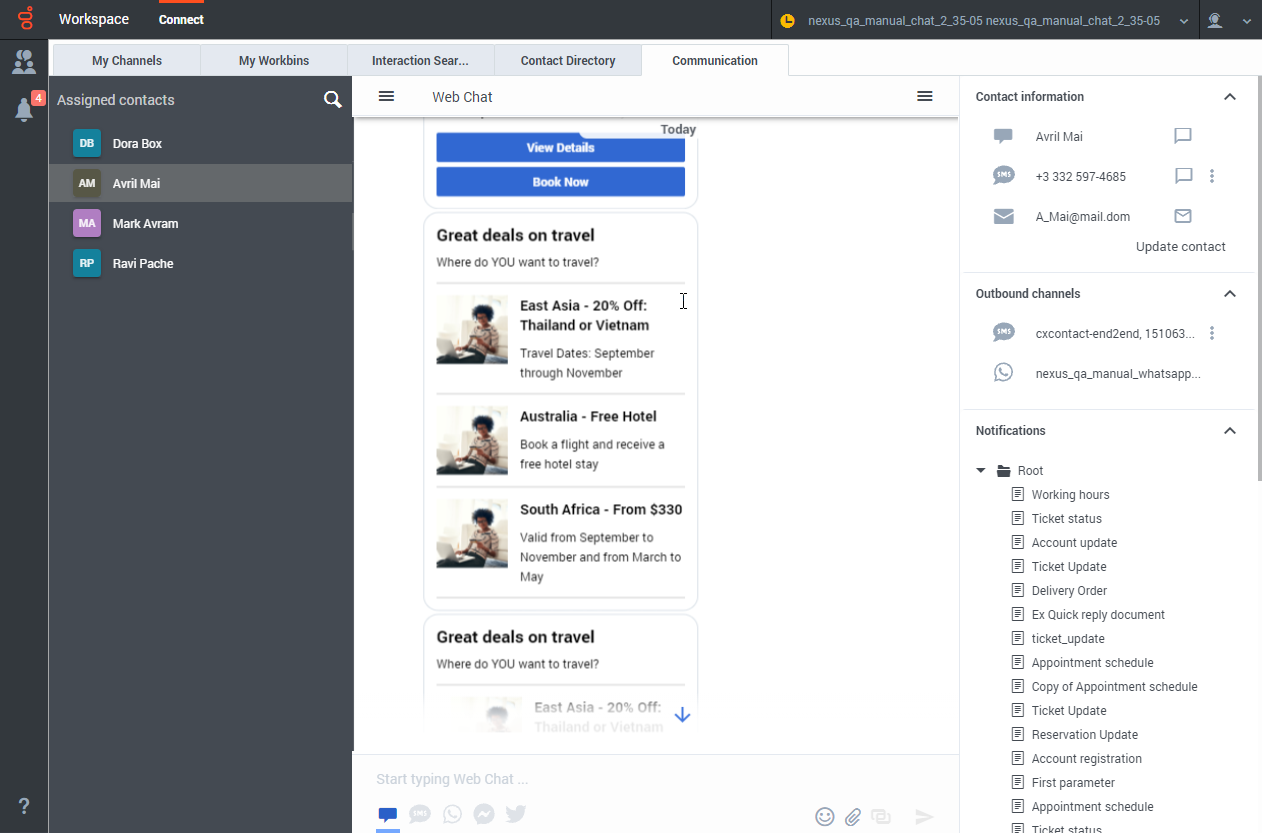
The Communication tab in the Connect group lets you continue chat conversations that you or others at your contact center have had with your organization's contacts.
The Communication tab has five areas:
- Assigned Contacts list
- Conversation transcript
- Contact information
- Outbound channels
- Notifications
Contacts that you have interacted with in the past are in your Assigned Contacts list. If you have not interacted with a contact in the past, or if the contact has been removed from your Assigned Contacts list, those contacts are considered unassigned contacts. If a contact is active on a channel, a white dot is displayed next to their name.
To reactivate an interaction that is already closed and marked as Done, select the Connect group, select the Communication tab, then click a contact name in the Assigned contacts panel. All previous Chat interactions that your contact center has had with the contact are displayed in the transcript area on the right.
To reactivate the chat session, click in the Start typing Web Chat field and enter the message you want to send, then click Send (![]() ). If the contact no longer has the browser open where they started the previous chat, you can still send your message, and the next time that the contact logs in to your organization's website the chat will continue and all the new and previous messages are displayed to the contact.
). If the contact no longer has the browser open where they started the previous chat, you can still send your message, and the next time that the contact logs in to your organization's website the chat will continue and all the new and previous messages are displayed to the contact.
You can perform the following actions:
- Click Send (
 ) to send messages you type in the Start typing Web Chat field.
 - Click Attach (
 ) to attach a file such as an image.
 - Click Emoji (
 ) to send an emoji to your contact.
If you want to transition the conversation to a different channel, you can select the channel by clicking one of the buttons under the Start typing Web Chat field.
- Click Create chat interaction (
 ) to send a web chat message
 - Click Create SMS interaction (
 ) to send an SMS
 - Click Create WhatsApp interaction (
 ) to send a WhatsApp message
 - Click Create Messenger interaction (
 ) to send a message through Facebook Messenger
 - Click Create Twitter Direct Message interaction (
 ) to send a message through Twitter Direct Message
New message notification
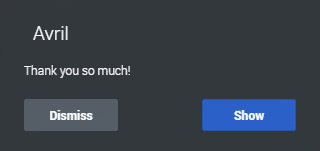
When the contact responds, you receive a notification on your desktop. Click Show to open the Communication tab of the Connect group.
Starting a new interaction
You can start new interactions with an assigned contact by using the new interaction buttons in the Contacts information area. If it is not displayed in the Communications tab, click Contacts (![]() ) to display of the Contacts information area.
) to display of the Contacts information area.
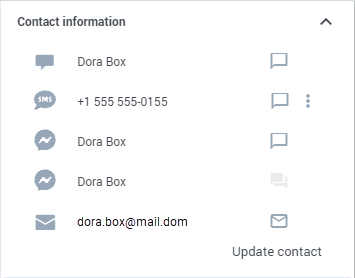
The Contact information area lists all the media that are available for the assigned contact. Not all contacts have all media available. You can create a new chat messaging interaction for Chat (![]() ), SMS (
), SMS (![]() ), WhatsApp (
), WhatsApp (![]() ), Messenger (
), Messenger (![]() ), and Twitter Direct Message (
), and Twitter Direct Message (![]() ), by clicking the Create interaction button (
), by clicking the Create interaction button (![]() ) next to the media.
) next to the media.
If a channel is not displayed, there are no ongoing conversations with the contact on that channel.
- Genesys recommends that you switch to a chat interaction window whenever you want your chatting time to be recorded for KPI purposes.
- Sometimes a Chat message you send cannot be delivered. A system message is displayed in the transcript area if the Chat message was not delivered.
Stop following a conversation
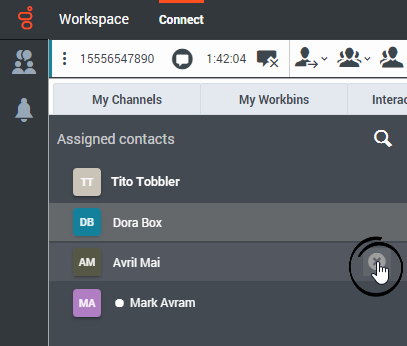
If you no longer wish to follow a conversation, you can remove conversations from the Assigned contacts list. Find the conversation you want to remove, then hover your mouse pointer over the contact name. To remove the conversation from your Communication tab, click the X next to the contact name.
Adding a contact to your assigned contacts
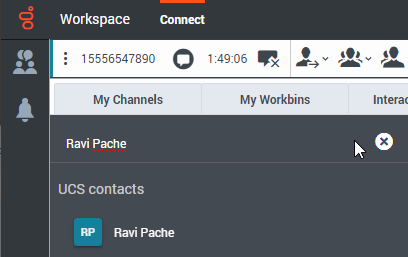
You can use the Communication tab to search for a contact in the Contact database by entering contact information in the search field above your assigned contacts. Click the Search contacts magnifying glass icon to start your search then enter the name of a contact in the Search contacts field.
If the contact is found in your organization's contact database, they can be added to your Assigned contacts list after interacting with the contact, and the contact record is displayed in the Communication tab. You can select any of the available channels to send a new message.
Outbound channels
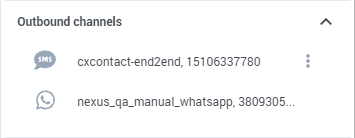
The Outbound channels area enables you to choose different channels to use when starting outbound interactions. If more than one channel is available for you, click the Channel Select (![]() ) button next to the channel name to select a different channel.
) button next to the channel name to select a different channel.
Web Chat structured messages (Notifications)
What are structured messages?
Some organizations use Genesys Web Chat to enable their contacts to interact with a chatbot prior to connecting the chat interaction to a live agent. Chatbots can deliver both regular text and structured messages to contacts.
Structured messages are a way for your organization to send standardized content to contacts. For example , a structured message might be a selection of buttons that a contact can click to indicate a choice. Structured messages can also include images, text, and video to enrich the content delivered by the bot.
Structured messages include the following message types:
- Quick replies
- Single and multi-select lists
- Carousels
Handling web chat interactions with structured messages
When you handle a web chat containing structured messages in either the Chat interaction view (for an active chat) or the Communication tab (for an asynchronous chat), Agent Workspace displays the structured messages for you.
Note: You cannot interact with the choice buttons of structured messages containing buttons and list selections.
Workspace displays the following for you:
- All buttons, videos, images, and lists in the same format that was presented to the contact.
- Single-and multi-select vertical lists, including any images and text associated with the list.
- Carousels and all of their associated elements, including the look-left and look-right buttons.
- Quick Replies and associated buttons.
- A text message describing the action taken by the contact (usually the selection they made).
Notifications area
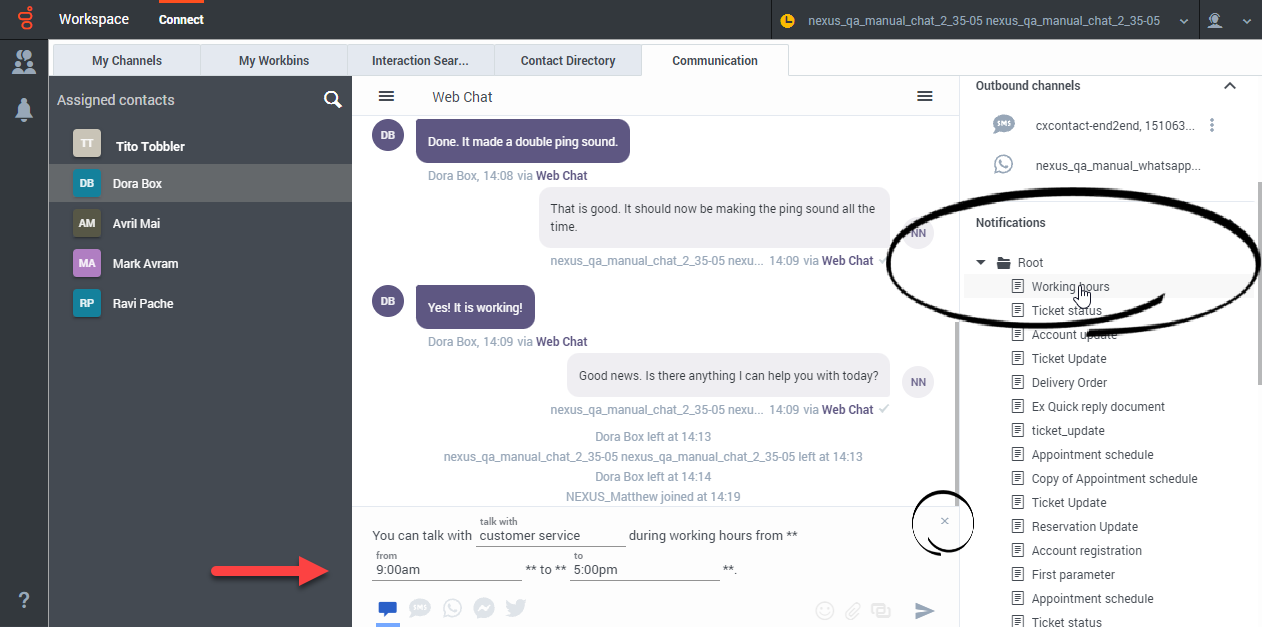
The Notifications area in the Communications tab contains a list of structured messages that you can send to a contact.
To select a message, click it. It is inserted into the Start typing Web Chat field. Click Send (![]() ) to send the notification. You might be able to type in some notifications to add information such as a contact's name, a date, or a ticket number.
) to send the notification. You might be able to type in some notifications to add information such as a contact's name, a date, or a ticket number.
Click the "X" to remove the Notification from the Start typing Web Chat field.
Sample structured messages
The following are examples of structured messages that an organization might send to contacts who are engaged in a web chat with a bot.
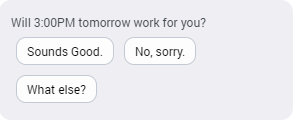
Quick Reply
The Quick Reply structured message usually contains a question from the chatbot to the contact. The contact can click a button to choose an answer. In the chat transcript, the Quick Reply is displayed along with the answer selected by the contact.
Generic structured messages: image or video, text, and buttons
A generic structured message contains any combination of an image or video, some text, and buttons that the contact can click. In the chat transcript, the generic structured message is displayed along with the action taken by the contact.
Multiple-selection list
The multiple-selection list contains a vertical stack of options that might include images and text. The contact clicks one or more of them to indicate a preference. In the chat transcript, the multiple-selection list is displayed along with the list options selected by the contact.
Single selection list
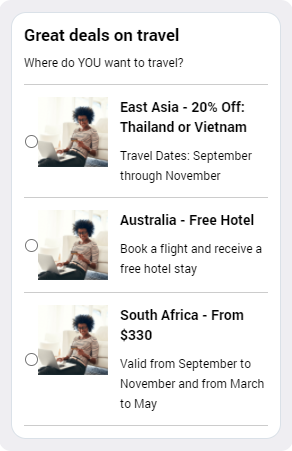
The single-selection list contains a vertical stack of options that might include images and text. There is a button next to each list item. The contact clicks one of the items to indicate a preference. In the chat transcript, the single-selection list is displayed along with the selection the contact made.
Carousel
The carousel is a way of displaying multiple generic structured messages to a contact in a single bot message. The contact clicks the look-left and look-right arrows to horizontally scroll through the generic structured messages in the carousel. In the chat transcript, the carousel of generic structured messages is displayed along with the action taken by the contact.
SMS messaging
An SMS interaction is the Agent Workspace interface that lets you handle an SMS message from a contact as a chat.
To start receiving SMS interactions, set your status on the SMS channel to Ready.
When you receive an SMS it is either accepted automatically, or a pop-up notification is displayed on your desktop to enable you to accept the message. When you accept an SMS, the Chat interaction view opens on your Agent Workspace. It includes all the controls, information about the email (Case Information), and Disposition and Note tabs where you can add information about the SMS. There might also be tabs on the right side of the view that contain contact information, history, and other features.
You exchange messages, and when either you or the contact ends the chat session, the interaction is ended and must be closed and marked as Done.
If you want to reactivate an interaction that is already closed and marked as Done, in the Connect group, select the Communication tab, open the Assigned Contacts panel, search for and select the contact. All previous chat interactions that your contact center has had with the contact are displayed in the transcript area on the right. To reactivate the chat interaction, click Create SMS Interaction icon in the Contact information column to open the Chat interaction view.
SMS vs. MMS
Short Message Service (SMS) is a text-messaging component of voice and Internet communication. SMS enables the exchange of text messages between you and a contact through your computer. Typically, a contact sends you SMS from a mobile device, a web interface, or an email client. From your perspective, handling an SMS chat session is no different from handling any other Chat session, whether you are handling a one time interaction or are continuing a conversation.
Multimedia Message Service (MMS) is a multimedia component of voice and Internet communication. In Workspace, MMS enables you to receive images sent to your contact center from a mobile device, a web interface, or an email client. Images are displayed to you as thumbnails. To view the image full-size, double-click it or right-click it and select Open from the context menu. It opens in the default application specified in the Windows operating system. If you have been granted the correct permissions, you can save an image by clicking the Save icon on the image or by right-clicking on it and selecting Save from the context menu.
Communication tab
The Communication tab in the Connect group lets you continue SMS chat conversations that you or others at your contact center have had with your company's contacts.
After an agent or the contact leaves a chat session, you can continue the conversation by finding the contact in the Assigned Contacts area of the Communication tab and selecting their name from the Assigned Contacts list.
To continue the conversation, either type in the Write a Message field and click Send or click Create SMS Interaction to open a new Chat interaction view. Your message is sent to the contact's device.
In some environments, the Write a Message field is not available. To use the SMS channel, click the Channel icon and select the Chat channel icon.
When the contact responds, you receive a pop-up notification on your desktop. To respond and continue the conversation, click Show in the pop-up notification to open the chat in a new Chat interaction view.
- Genesys recommends that you switch to a chat interaction window whenever you want your chatting time to be recorded for KPI purposes.
- Not all phone numbers can receive SMS. If Agent Workspace detects that it is not possible to send an SMS to the number you choose, you will receive a warning message.
- Sometimes an SMS you send cannot be delivered. A system message is displayed in the transcript area if the SMS was not delivered.
WhatsApp messaging
WhatsApp is a messaging service that enables the exchange of text messages, emojis, images, and Highly Structured Messages (HSM) between you and a contact through your computer. Typically, a contact sends you a message from a mobile device or computer. From your point of view, handling a WhatsApp chat session is no different from handling any other Chat session, whether you are handling a one time interaction or are continuing a conversation.
To start receiving WhatsApp interactions, set your status on the WhatsApp channel to Ready.
When you receive a WhatsApp it is either accepted automatically, or a pop-up notification is displayed on your desktop to enable you to accept the message. When you accept a message, the WhatsApp interaction view opens on your Agent Workspace. It includes all the controls, information about the WhatsApp (Case Information), and Disposition and Note tabs where you can add information about the email. There might also be tabs on the right side of the view that contain contact information, history, and other features.
You handle the interaction by exchanging messages with your contact. If either you or the contact ends the session, the interaction is done. To close the interaction, you must mark it as Done.
To reactivate an interaction that is closed and marked as Done, perform these steps:
- In the Connect group, select the Communication tab.
- In the Assigned Contacts view, select the contact.
All previous interactions that your contact center has had with the contact are displayed in the transcript area on the right. To reactivate the chat interaction, click Create WhatsApp Interaction (![]() ) to open the Chat interaction view.
) to open the Chat interaction view.
Contacts can send WhatsApp messages from their device to your organization's WhatsApp channel. When WhatsApp messages are routed to you, handle WhatsApp messages just like you would handle a Chat interaction with one of your contacts.
Read the messages from your contact in the Transcript area. Type your messages in the Start typing Web Chat field.
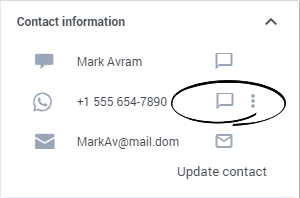
The Contact information area contains information about the contact including the phone number that sent the WhatsApp message if applicable. You can update the contact information and view the history of interactions with the contact.
Communication tab
The Communication tab in the Connect group allows you continue conversations that you or others at your contact center have had with your company's contacts.
To continue the conversation, find the contact in the Communication tab, then select their name from the Assigned Contacts view.
To continue the conversation, perform one of the following actions:
- Type in the Start typing Web Chat field and click Send.
- Click the Create WhatsApp Interaction icon to open a new Chat interaction view.
WhatsApp interaction can also be started by clicking the Create WhatsApp interaction button next to the WhatsApp channel in the Communication tab:
Note: Sometimes a WhatsApp message you send cannot be delivered. A system message is displayed in the transcript area if the WhatsApp message was not delivered.
Connecting to the WhatsApp channel
When you select a contact from the Assigned Contacts view in the Communication tab, the list of channels and phone numbers available for a contact is displayed in the Contact Information area. If you have not interacted with a contact in the past, or if the contact has been removed from your Assigned Contacts list, those contacts are considered unassigned contacts.
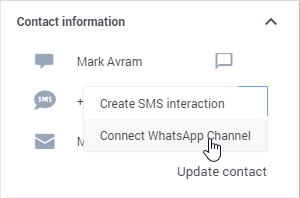
If the contact has a WhatsApp account that is not connected to your organization, send a request to WhatsApp to connect the account to your organization by clicking the Action menu next to the phone number and selecting Connect WhatsApp Channel (refer to the image above). When WhatsApp approves the request by indicating that the number is a valid WhatsApp number, the WhatsApp channel is displayed in the Contact Information area.
If the contact does not have a WhatsApp account for a phone number, ask the contact to confirm which number to use. If the number does not exist in the Contact Information in the Contact Directory, you can add the number. To refresh the Contact Information area, unsubscribe from the contact, and search for them again. When the number displays in the Contact Information area, select Connect WhatsApp Channel from the channel action menu next to the correct phone number.
After you have added the WhatsApp channel to the contact, the channel action menu contains two options:
- Create WhatsApp Interaction: Create and send a new WhatsApp interaction to the contact.
- Validate WhatsApp Channel: If you get an error trying to send a WhatsApp message, validate that the WhatsApp channel is still available for the contact. If there is an error, a warning icon is displayed next to the channel in the Contact Information area.
Messenger
To receive Facebook Messenger chat interactions, set your status on the Chat channel to Ready.
When a contact clicks Send Message on your organization's Facebook page, they can use Facebook Messenger to send a message to your organization. Instead of having to use Facebook Messenger yourself to reply, the message is directed to you as an asynchronous Chat interaction in Agent Workspace. You handle it just like you would any other direct chat message with one of your contacts.
Read the messages from your contact in the Transcript area. Type your messages in the Message Composition field.
The Contact tab contains information about the contact including the Facebook actor name and ID. You can update the contact information and view the history of interactions with the contact.
Communication tab
The Communication tab in the Connect group lets you continue Facebook Messenger chat conversations that you or others at your contact center have had with your organization's contacts.
After an agent or the contact leaves a chat session, you can continue the conversation by finding the contact in the Communication tab and selecting their name from the contact list.
To continue the conversation, either type in the Start typing Web Chat field and click Send or click the Chat icon to open a new Chat interaction view. Your message is sent to the contact's Facebook Messenger account. The next time that they log in to Facebook they will see your message.
When the contact responds, you receive a notification on your desktop. To open the Communication tab of the Connect group, click Show. To open the chat in a new Chat interaction view if you must respond and continue the conversation, click the Chat icon.
Twitter Direct Message
To receive Twitter Direct Messages, set your status on the Chat channel to Ready.
Customers of your organization who are followers of your organization's Twitter page can send Twitter Direct Messages to your organization's Twitter handle (for example, @Genesys). Instead of having to use Twitter Direct Message yourself to reply, the message is directed to you as an asynchronous Chat interaction. Click Accept on the Interaction Notification and a new Chat interaction opens in Workspace.
Read the messages from your contact in the Transcript area. Type your messages in the Start typing Web Chat field.
The Contact tab contains information about the contact including the Twitter actor name and ID. You can update the contact information and view the history of interactions with the contact.
Communication tab
The Communication tab in the Connect group lets you continue chat conversations that you or others at your contact center have had with your organization's contacts.
After an agent or the contact leaves a chat session, you can continue the conversation by using Search contacts to find the contact in the Assigned contacts list then selecting their name.
To continue the conversation, either type in the Start typing Web Chat field and click Send or click the Twitter direct icon to open a new Chat interaction view.
For chat interactions that originated as Twitter Direct Messages, when you send a message, the contact will see it the next time they log in to Twitter.
When the contact responds, you receive a notification on your desktop. To open the Communication tab of the Connect group, click Show. To open the chat in a new Chat interaction view if you must respond and continue the conversation, click the Twitter direct icon.
Public Social Engagement
Social Engagement with Facebook
Using Genesys Social Engagement on Facebook, you can monitor your business presence and identify and respond to online comments. Facebook Messenger direct messages, comments, and replies on your organization's Facebook page are monitored and automatically routed to agents across your organization who are using Agent Workspace. Routing ensures that the right person handles the contact's message, whether it is an inquiry about a new business opportunity or a negative comment that should be handled immediately.
Handling contacts using Agent Workspace's Facebook channel improves Customer Experience (CX) by providing consistent CX across all channels. Genesys Social Engagement identifies the contact and matches them against known individuals already in the contact database. When a Facebook message, comment, or reply is directed to you, you have access to all previous interactions with the contact.
Facebook Public
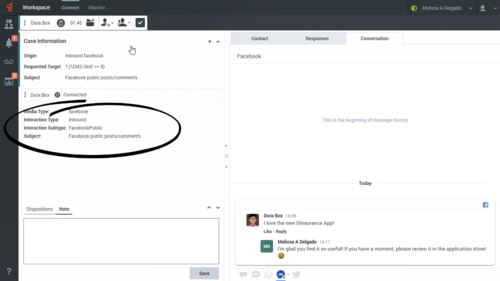
When a contact replies to a post or creates a post on your organization's Facebook page, a new interaction is directed to you as a new Chat interaction. You handle it just like you would any other chat message with one of your contacts. Your reply is posted on your organization's public Facebook page as a reply to the post from the contact. Remember, your post will be seen by anyone who visits your organization's Facebook page, not just the contact.
You handle a Facebook Public interaction the same way you would handle an asynchronous Chat.
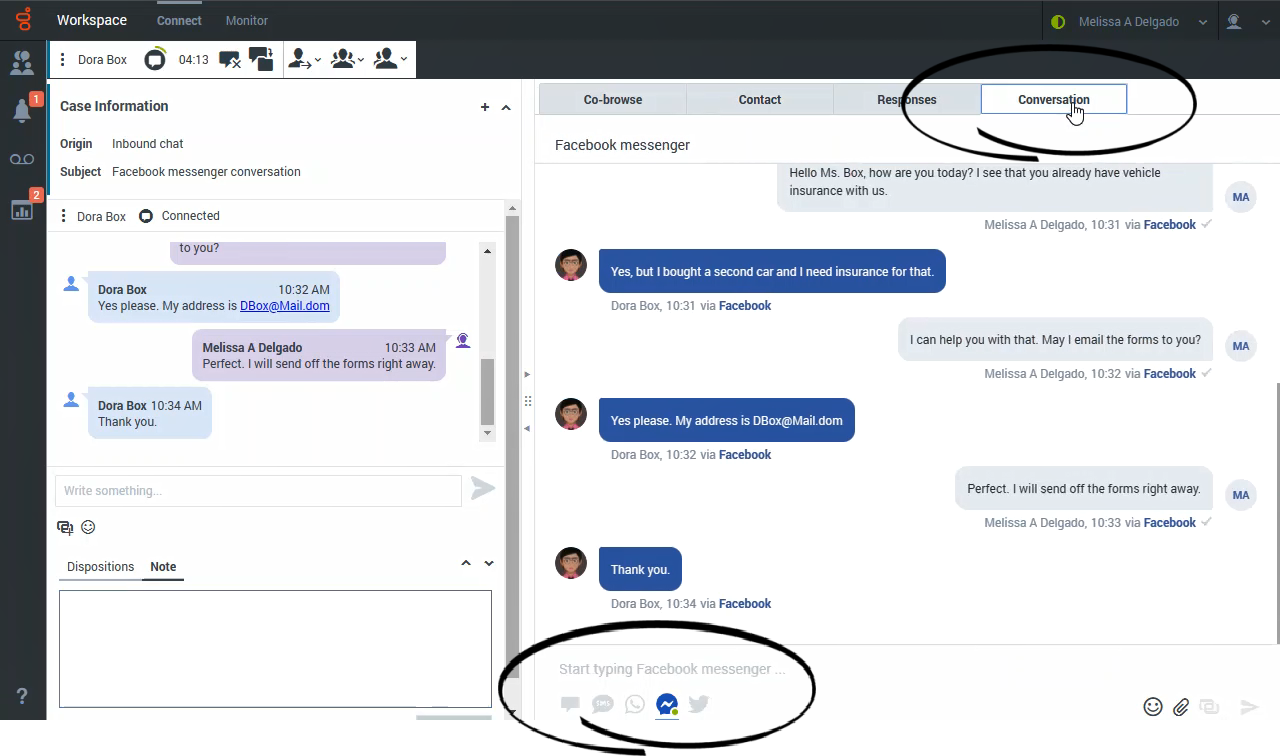
Read the messages from your contact in the Conversation tab. To reply to your contact, type your messages in the Write a message... field in the Conversation tab.
The Contact tab contains information about the contact including the Facebook actor name and ID. You can update the contact information and view the history of interactions with the contact.
If you have had previous chat/Facebook Public interactions with the contact, the full transcript is in the Conversation tab and in the Communication tab.
The Communication and Conversation tabs allow the following actions:
- Click Emoji (
 ) to send an emoji to your contact.
 - Click Attach (
 ) to attach an image.
 - Click Send (
 ) to send messages you type in the Message Composition area.
 - Click Chat (
 ) to filter messages to show Private type only.
 - Click Social Media (
 ) to filter messages to show Public type only.
 - Click Contacts (
 ) to toggle the display of the Contacts information area.
Social Engagement with Twitter
You are not restricted to private Twitter Direct messages. You can also engage with customers by responding to public Tweets and replies from your organization's Twitter page.
You can monitor your business Twitter presence and identify and respond to online comments by using Genesys Social Engagement. Twitter Direct Messages and Tweets and replies on your organization's Twitter page are monitored and automatically routed to agents across your organization who are using Agent Workspace. Routing ensures that the right person handles the contact's message, whether it is an inquiry about a new business opportunity or a negative comment that should be handled immediately.
Handling contacts using Agent Workspace's Twitter channel improves Customer Experience (CX) by providing consistent CX across all channels. Genesys Social Engagement identifies the contact and matches them against known individuals already in the contact database. When a Direct Message, Tweet, or reply is directed to you, you have access to all previous interactions with the contact.
Twitter Public
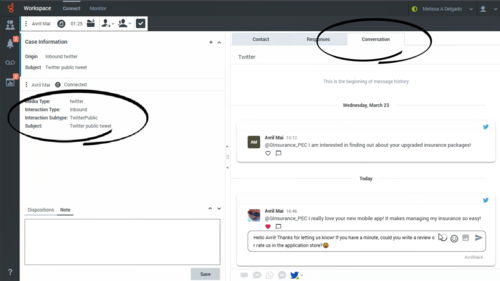
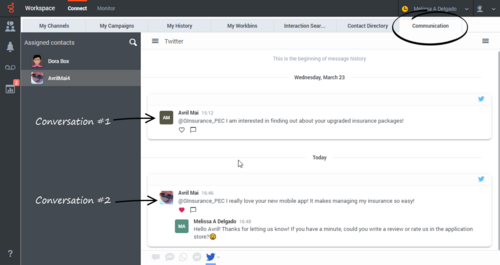
When a contact replies to a Tweet or creates a Tweet on your organization's Twitter page, the Tweet is directed to you as a new Twitter interaction. However, because Public Tweets can be created in a non-linear fashion, a Public Tweet interaction must be handled by using the Conversation or Communication tab. There is no transcript or message field on the left side of the interaction view.
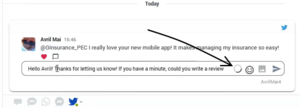
To respond to the Tweet click Reply. You can also click Like. Type your reply in the message field then click Send. In the Conversation tab, your response appears indented below the Tweet from the contact. Your reply is posted on your organization's public Twitter page as a reply to the Tweet from the contact. Remember, your post will be seen by anyone who visits your organization's Twitter page, not just the contact.
The Contact tab contains information about the contact including the Twitter actor name and ID. You can update the contact information and view the history of interactions with the contact.
If you have had previous chat/Twitter Public interactions with the contact, the full transcript is in the Conversation tab and in the Communication tab.
In the Communication tab, select a contact and then click SOCIAL MEDIA to access all the public Twitter interactions your organization has had with the contact. Because social media is non-linear, you can scroll through the transcript and like and respond to any of the Tweets and replies. Think of each Tweet and reply sequence as a separate conversation.
The conversation area allows the following actions:
- Click Emoji (
 ) to send an emoji to your contact.
 - Click Attach (
 ) to attach an image.
 - Click Send (
 ) to send messages you type in the Message Composition area.
 - Click Chat (
 ) to filter messages to show Private type only.
 - Click Social Media (
 ) to filter messages to show Public type only.
 - Click Contacts (
 ) to toggle the display of the Contacts information area.
As you type your reply in the Reply field, the small gray circle on the right begins to turn dark blue. This circle is a progress indicator to let you know how close you are to the maximum number of allowable characters. As you get close to the maximum, a character countdown is displayed and the circle turns yellow. If you exceed the limit, the circle turns red and you will not be able to send your reply until you adjust the wording to make it shorter.

