Standard responses
Contents
While you are handling an interaction, you can use the Responses tab in the interaction view to access a database of pre-written standard responses for your interactions. You can insert a response as a reply into any outbound interaction, such as an email or a chat message, or you can read them to the contact during a phone interaction.
Using the Responses View
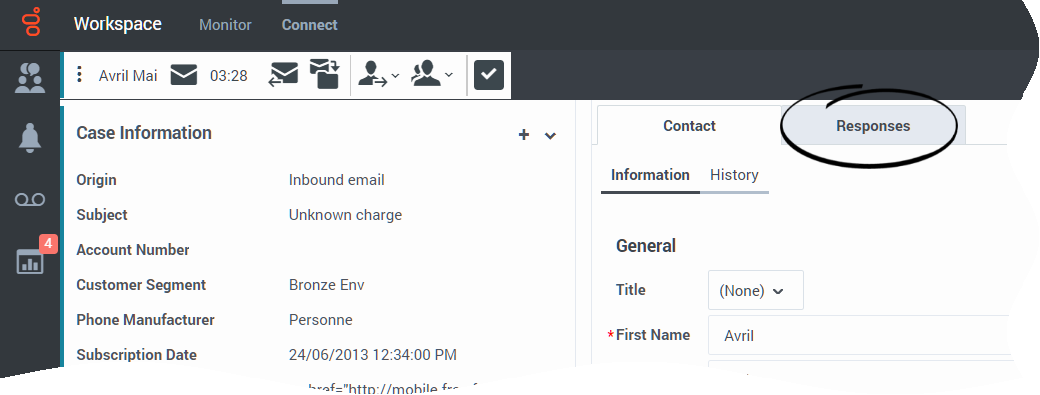
To access the Responses view, select the Responses tab on the active-interaction window.
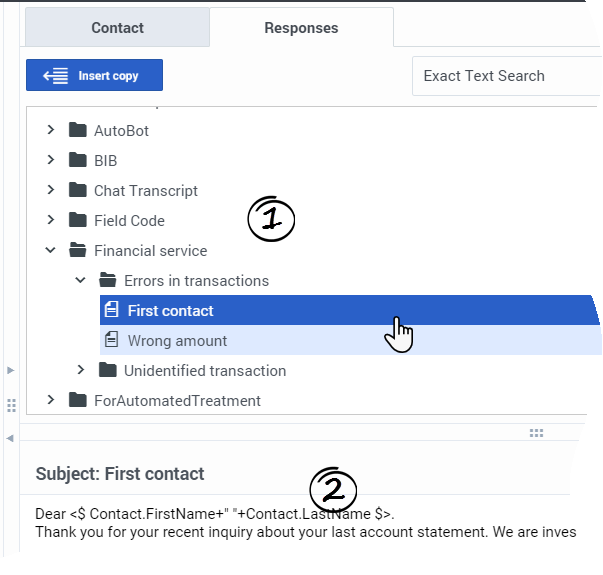
The Responses view comprises two main areas: the Responses Explorer folder view and the response display area.
You can find responses in one of two ways:
- Browse using the Responses Explorer folder view.
- Search the responses database by typing in the Search and Filter field.
Responses Explorer
The Responses Explorer contains a tree view of folders (marked 1 in the image) and a details view (marked 2 in the image). The folders are the standard-response categories. Click a folder to open it.
Each folder contains one or more pages. Each page is a standard-response document related to the category. Click a response to preview it in the details area.
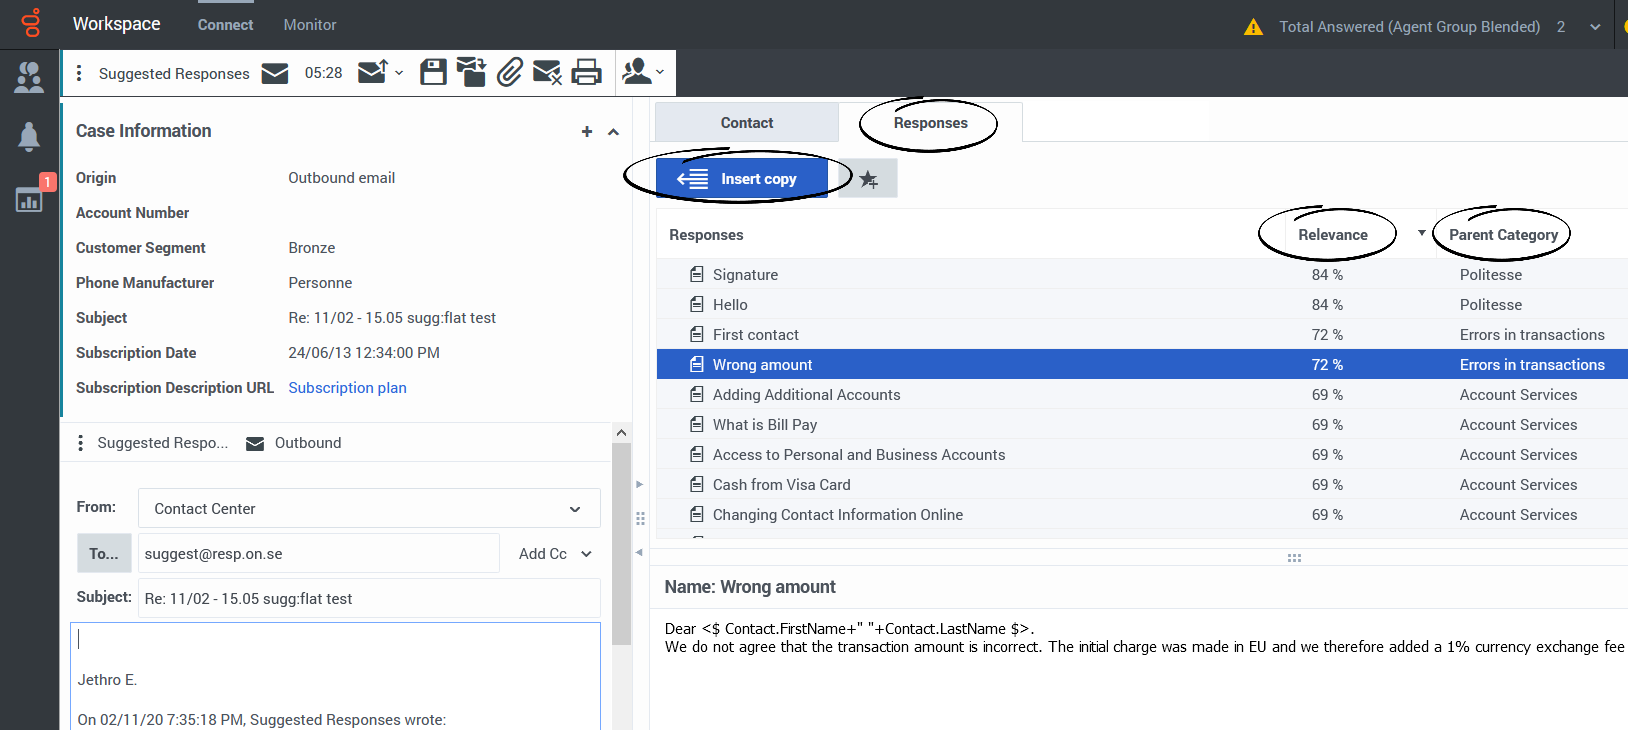
To insert standard-response text into the current interaction, click in the interaction message area to place an insertion point, select a response document, then click Insert copy.To show or hide the responses details area, click Show Detail/Hide Detail ![]() .
.
Another way to insert a response into an interaction is to copy the content from the responses details area and paste it into the message area of your email or chat interaction.
Standard responses use code "tokens" (such as <$ Contact.FullName $>). When you insert a response that contains a token, the code is replaced with specific text. For instance, "Dear <$ Contact.FullName $>" becomes "Dear John Smith" in the email.
If you copy and paste token code (such as <$ Contact.FullName $>) into your draft email, the replacement happens only after you send the email. To review the replacement text before sending, you must click Insert copy.
Search and Filter
The Search and Filter area enables you to specify keywords to search for in the Standard Response Library. It has the following features:
- Search field—Enter the keyword for which you want to search, then click the magnifying-glass icon to initiate the search.
- Search type—A drop-down list that enables you to search using one of the following strategies:
- Any Keyword Search—Find all responses that contain at least one of the specified keywords.
- All Keyword Search—Find all responses that contain all of the specified keywords.
- Exact Text Search—Find all responses that contain the specified keywords in the order in which they are specified.
How do I add or remove favorites?
Adding a Favorite
Agent Workspace might be set up to let you mark (add) and unmark (remove) standard responses as favorites. This feature makes it easy for you to find the responses that you use most often.
There are two ways to mark a response as a favorite:
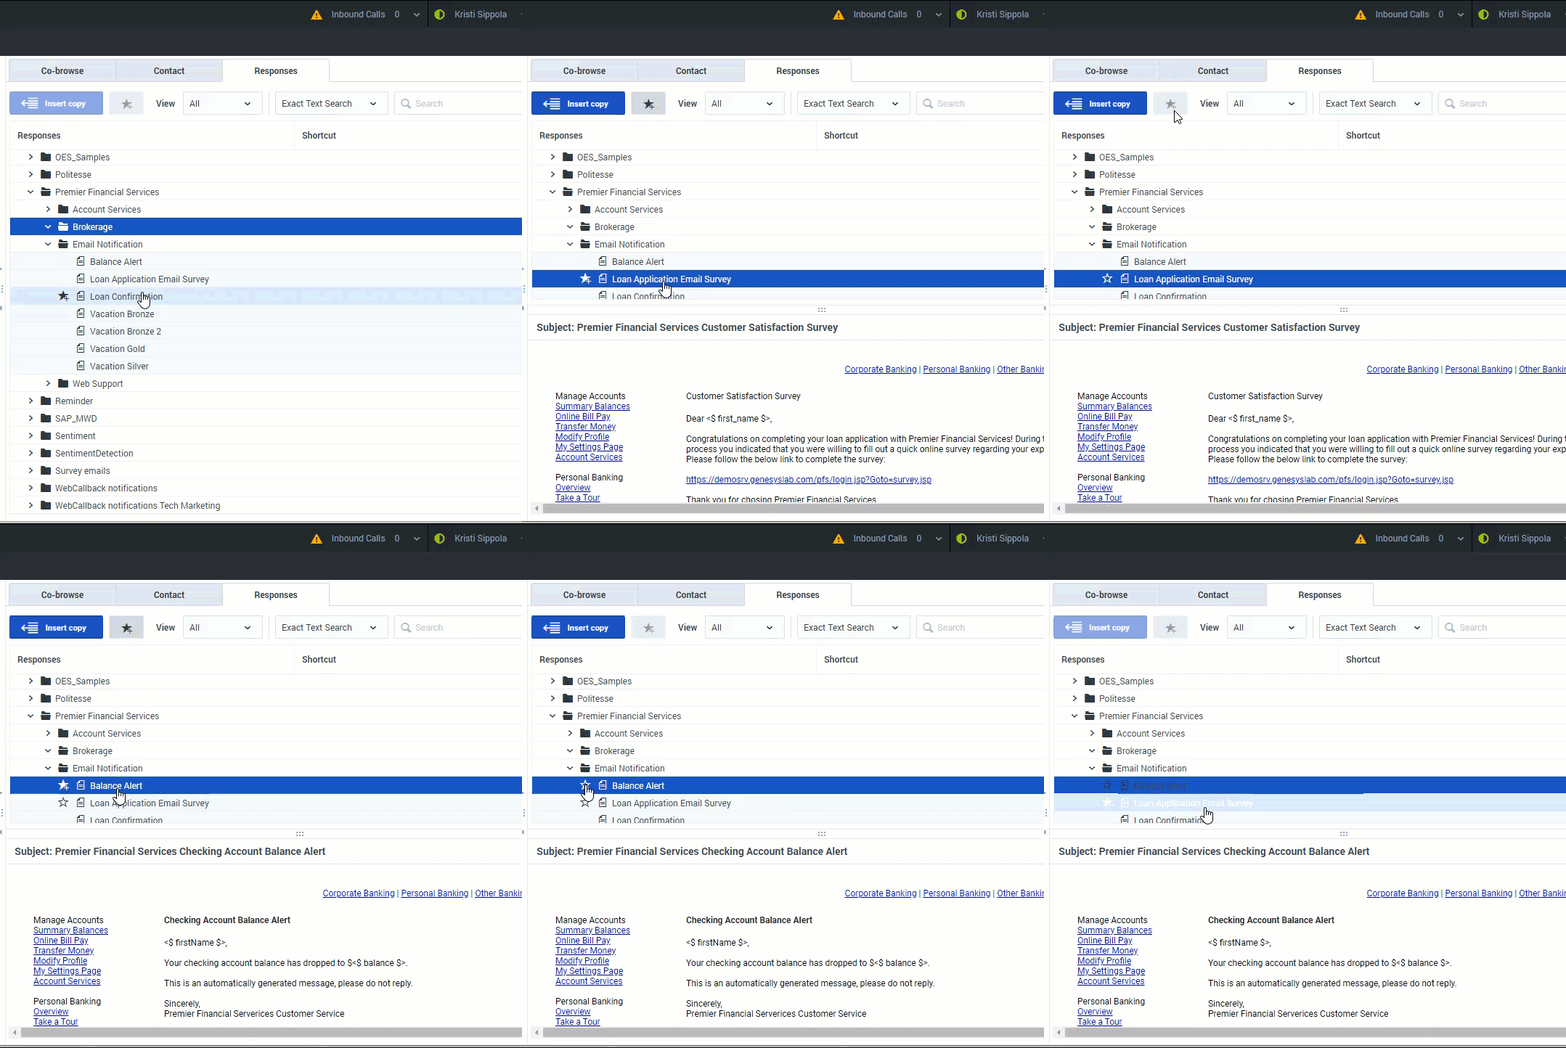
- In the Responses tab, find the response, select it, and then at the top of the tab, click Add Standard Response into Favorite Responses (
 ).
). - In the Responses tab, find the response, and then to the left of the response name, click Add Standard Response into Favorite Responses (
 ).
).
Favorites Filter
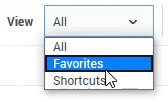
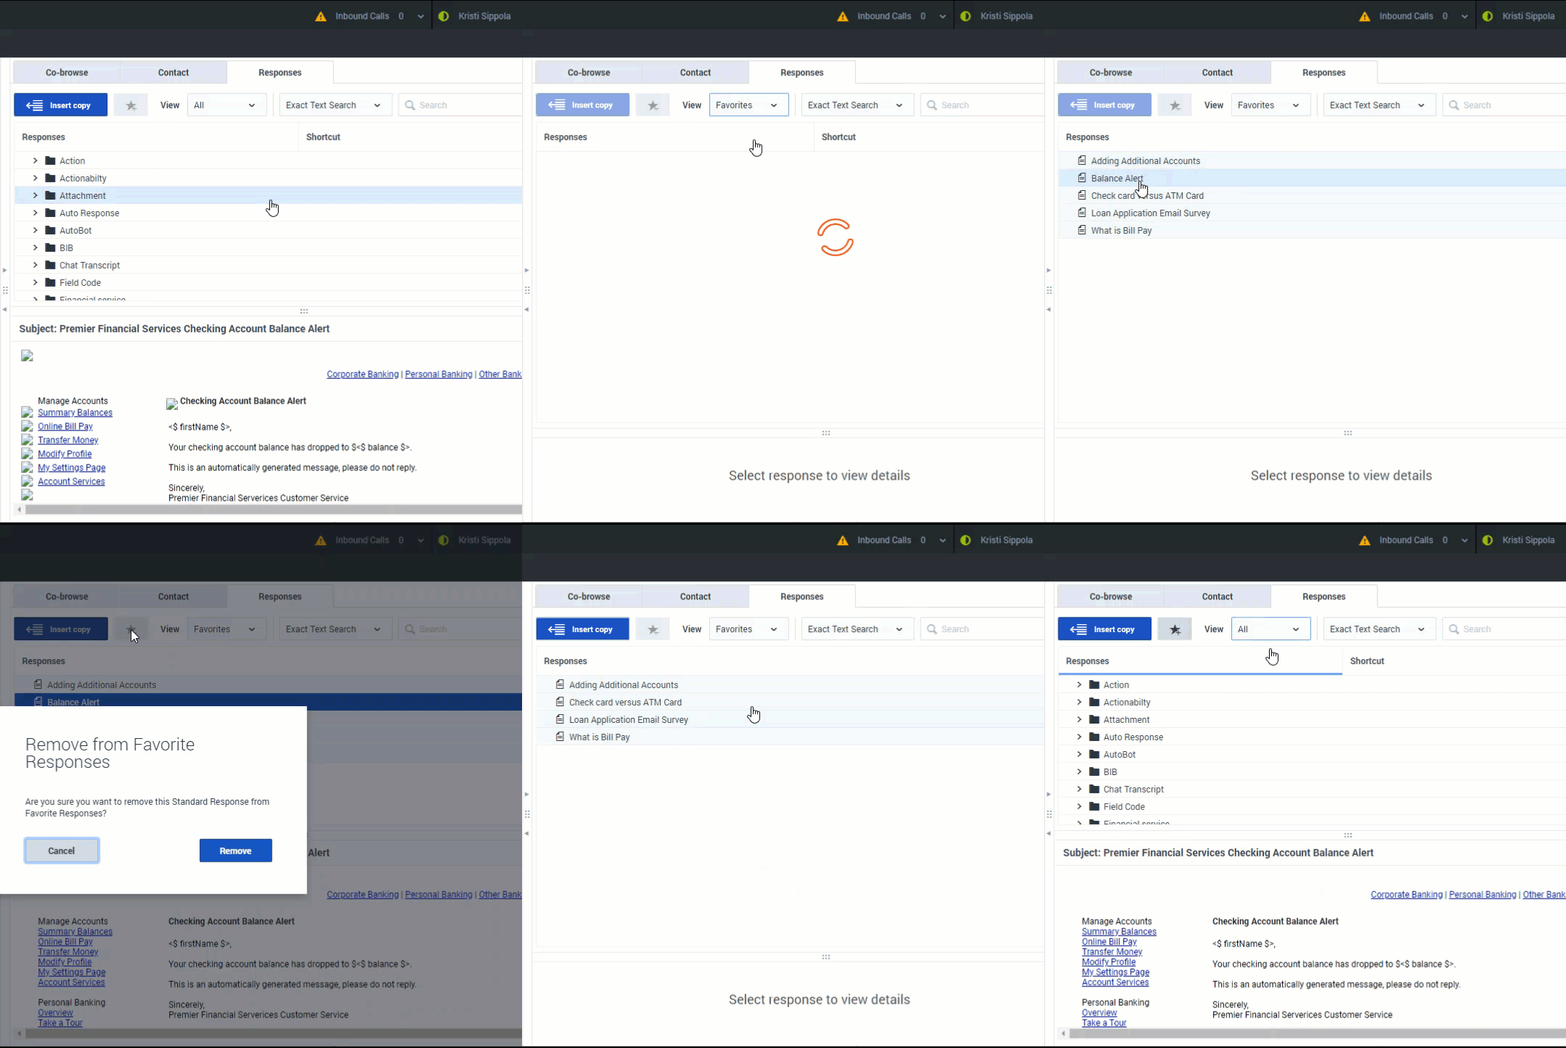
You can filter the Responses tab to show only those responses that you have marked as a favorite. In the View menu, select Favorites to view only your favorites or select All to view all responses.
Removing a Favorite
There are two ways to unmark a favorite response.
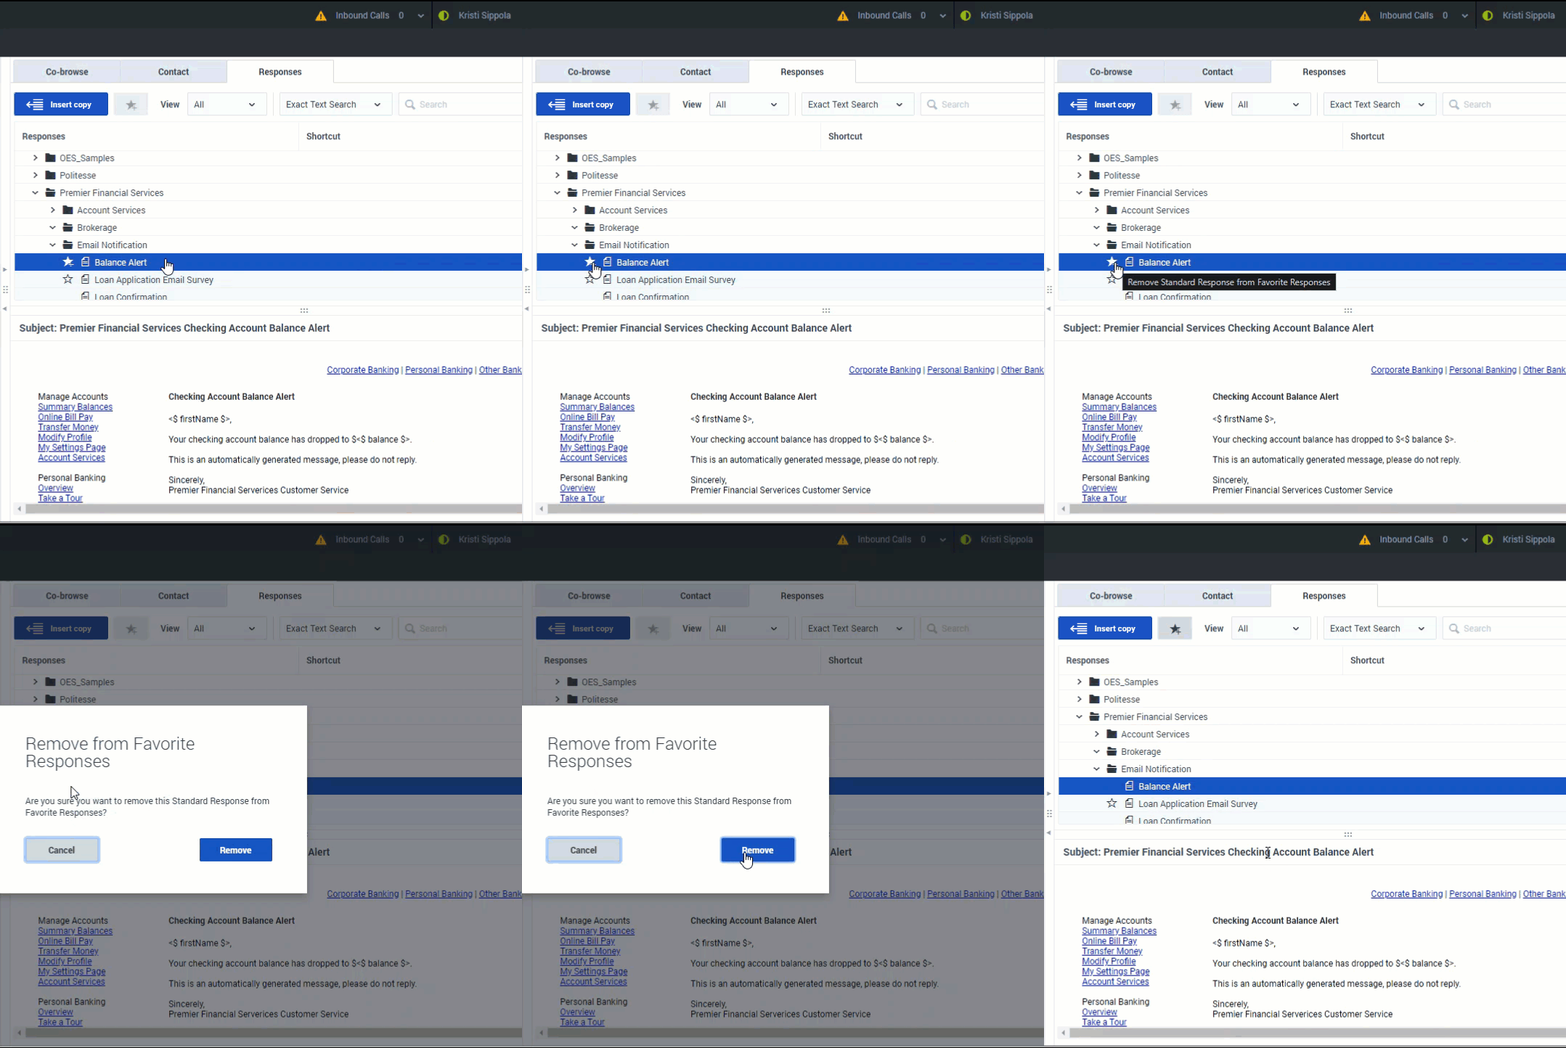
- In the Responses tab, find the response marked as a favorite, then to the left of the response name, click Remove (
 ).
).
- In the Responses tab, open the View menu and select Favorites. The view will change to show only those responses you have marked as favorites. Select the favorite that you want to unmark, then at the top of the tab, click Remove (
 ).
).
How do I use Standard Response Shortcuts?
Your administrator might have created shortcuts that you can use to quickly find responses from the list of Standard Responses in the Responses view. If you already know the shortcut keyword, you can type it in the message field of a chat or email to automatically insert a response.
Shortcuts begin with a prefix, such as "#", followed by a keyword, such as "signature". In this example the shortcut you would type in the message field would be "#signature" then press Ctrl+Space to insert the standard response in place of the shortcut.Ask your supervisor or administrator whether shortcuts have been created for you and what they are.
The body of the standard response is added to the interaction for confirmation before you send it to your contact. You can modify the contents of a standard response after inserting it, but not after you send it.
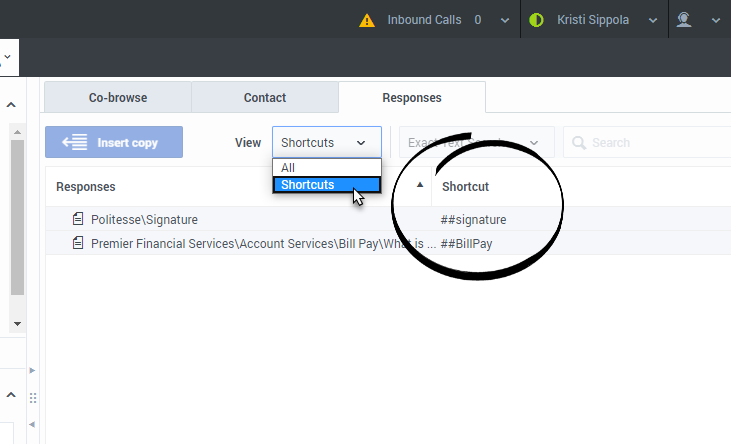
If your company uses shortcuts, when you open the Responses tab a Shortcut column is displayed next to the Responses column. Each response that has a shortcut will have the full shortcut displayed in the shortcut column next to the name of the response.
If it is available in your environment, use the View drop-down menu to toggle the view between all responses and only those responses with shortcuts.

