How to use the Workflow Designer
Workflow Designer features and workings.
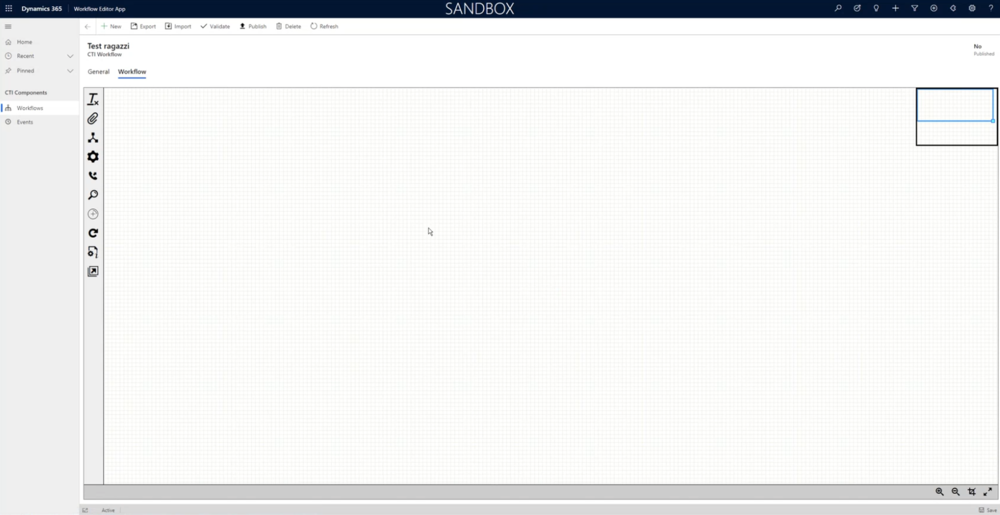
The Workflow Designer is a visualization of Workflows' components: each element is graphically rendered as a square tile, while links are in the form of arrows. Some tiles show several ports (for example true/false, 0/1/N), which can be linked to further tiles.
To start designing your Workflow, drag and drop any Activity you see in the left-side menu in the form of icons on the editor area.
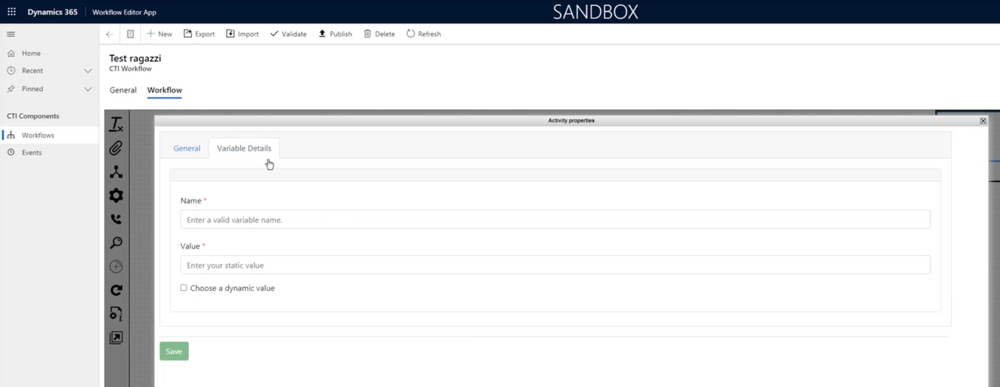
When clicking a tile, it opens in a new dialog box with different tabs according to the Activity it represents. However, all tiles display the same General tab at first, where you can fill the same two fields: Activity name and Description. These names and descriptions should be helpful across your team to immediately recognize every Activity.
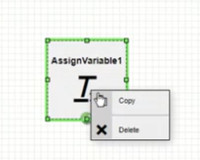
Right-clicking an Activity, you can duplicate it selecting Copy or delete it choosing Delete. Continue reading for in-depth information about Activities.
Creating Workflows and Events
Before starting to use the Workflow Designer, you must get familiar with its two key elements:
- Workflows, where you drag and drop activities and draw their customization;
- Events, which exactly match events described through JavaScript and exchanged between CTI and Microsoft Dynamics 365.
If you want to design a Workflow, first you must create the related Event.
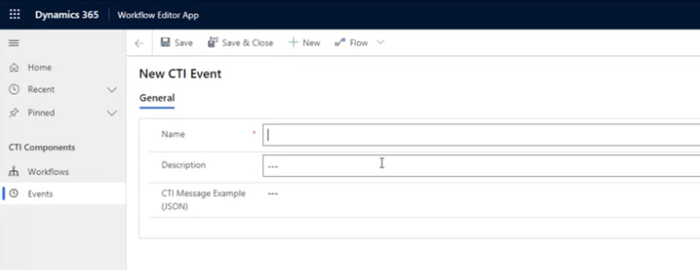
To create a new Event, click + New and the related form will open. Provide a Name, a Description (optional), and a CTI Message Example, then click Save.
You can provide one of the following Events triggered by the Adapter:
| Event | Description |
|---|---|
| onEventRingingInbound | An inbound call enters (before the Agent accepts the interaction). |
| onEventEstablishedInbound | The Agent accepts an inbound call and the connection with the caller is established. |
| onEventReleasedInbound | The Agent ends an inbound call but can still add notes or modify details. |
| onEventMarkDoneInbound | The Agent totally completes an inbound call and the interaction is deleted from the widget. |
| onEventDialingOutbound | The Agent launches an outbound call (before the connection with the Contact is established). |
| onEventEstablishedOutbound | The Contact accepts an outbound call performed by the Agent and the connection is established. |
| onEventReleasedOutbound | The Agent (or the Contact) ends an outbound call but can still add notes or modify details. |
| onEventMarkDoneOutbound | The Agent totally completes an outbound call and the interaction is deleted from the widget. |
| onBeforeOutboundCallStart | Event triggered before an outbound call starts, which means before the onEventDialingOutbound event. Can be leveraged to dial numbers in a different format than the one saved on the CRM or attach custom CRM data before the outgoing call is effectively started. |
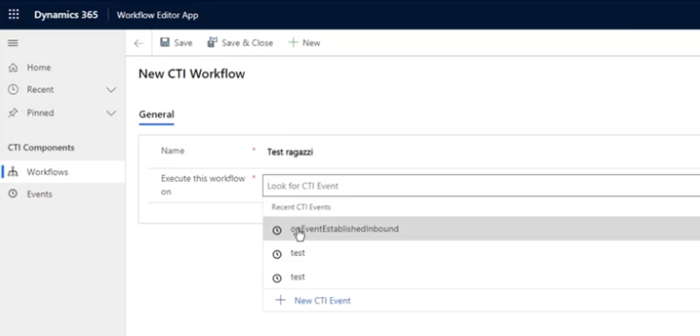
Once you have created the Event, you can proceed with an associated Workflow. To begin, click + New, provide a Name and choose the associated Event.
When you click Save, the Editor appears and displays the Workflow Editor area, where you can drag and drop the Activities. You can now start and design your Workflow.
After designing a Workflow, you can test its functioning with The Workflow Debugger.
The ribbon menu
When you open the actual Workflow Designer, a horizontal menu appears on top of the window: it is the ribbon menu, which displays all actions that can be performed with the Workflow you are designing.
| Name | Description |
|---|---|
| Export | Exports a designed Workflow as an XML file. |
| Import | Imports Workflows previously saved as XML files. The Workflow will directly appear in the Workflow Designer. |
| Validate | Checks that the Workflow is logically accurate and ready to be published. The outcome is displayed in a dialog box. |
| Publish | Publishes the Workflow in the production stage: if the related Event happens, the Workflow is effectively run. |
| Delete | Deletes the Workflow. It is only displayed while the Workflow is still unpublished. |
| Unpublish | Unpublishes the Workflow from the production stage. It is only displayed after its publication. |
| Refresh | Refreshes the Workflow Designer. |
To verify your Workflow's publication status, go into Workflows and make sure to be on the All Workflows view. In the table, you will see the name, associated Event, and publication status for each Workflow.
The Activity menu
The Workflow Designer Activities can be divided into generic and CRM-specific:
Create a Workflow variable. Creates a variable. You can define a variable precisely as if you were coding and choose to assign it a:
- static value: fixed value in the data field, which will appear on every record that references the rule;
- dynamic value: data value that varies depending on the current record running the Workflow rule.
Evaluate a Boolean condition. Inserts a branch (IfThenElse). The value you assign to this variable can return a true value (condition verified, green port) or a false one (condition not verified, red port). Therefore, it divides the Workflow into two branches. You need three elements for every condition: left operand, JS operator, right operand. Multiple conditions are allowed (and/or).
Run a generic code. Allows you to insert your JavaScript code and choose the wanted number of ports. This Activity is essential for all those cases too complicated to be satisfied by standard Activities. Since it is based on JavaScript code, it is more likely to be used by developers.
Start an outbound call. Allows starting an outbound call (equals MakeCall). It enables an outgoing call on the API made available by the Gplus Adapter. The involved telephone number can be static or dynamic. It can be used to run a custom flow or attach data before the call is performed.
Search for a CRM record. Performs a search within Microsoft Dynamics 365. This Activity creates output Workflow parameters and can have different ports: 0 (no match), 1 (single match), N (multiple matches). Therefore, Workflow parameters not only depend on the Activity but also on the exit port. Multiple conditions are allowed (and/or). You can even manually insert your search filter in the form of a JavaScript code. For further information, check the page that Microsoft dedicated to the topic.
Create a CRM record. Creates a record of whichever wanted Entity within Dynamics (for example Phone Call, Task, Email). This Activity creates output Workflow parameters and allows chaining.
Update a CRM record. Updates a record of whichever existing Entity within Dynamics (for example after releasing a call, it can update its duration). It requires the Entity unique identifier to perform the update.
Get information from a specific CRM record using its identifier. Obtains all wanted information about an existing record within Dynamics. If the record’s unique identifier is available, you can get all the wanted information about it.
Display a CRM record. Runs the screen-pop of the wanted Dynamics form.
Here you can find a list of dynamic value types available in the Workflow Designer:
| Type | Description |
|---|---|
| CTI Attachdata | Value of a Property in a specific JSON section. |
| CTI Property | Value of any Property within the JSON. |
| Workflow parameter | Output value of a Workflow. |
| Workflow variable | Value of another variable defined within a Workflow. |
| Global parameter | Values always available within a CRM (for example current user ID, language) |
| Custom JavaScript code | All other values (to be described through JavaScript code). |
After designing a Workflow, you can test its functioning with The Workflow Debugger.

