Time off
Contents
View your time-off request details and customize these views to suit your preferences.
Clicking Time Off in the Menu bar displays a drop-down menu, from which you can select one of two views, Calendar and Details. Use these views to:
- View your requested time off in the calendar, with its status.
- Request time off.
- Edit, recall, or delete time-off requests that have not yet been granted or scheduled.
- View your time-off balance for any desired date.
- View bidding periods for selected dates.
Viewing time off in the calendar
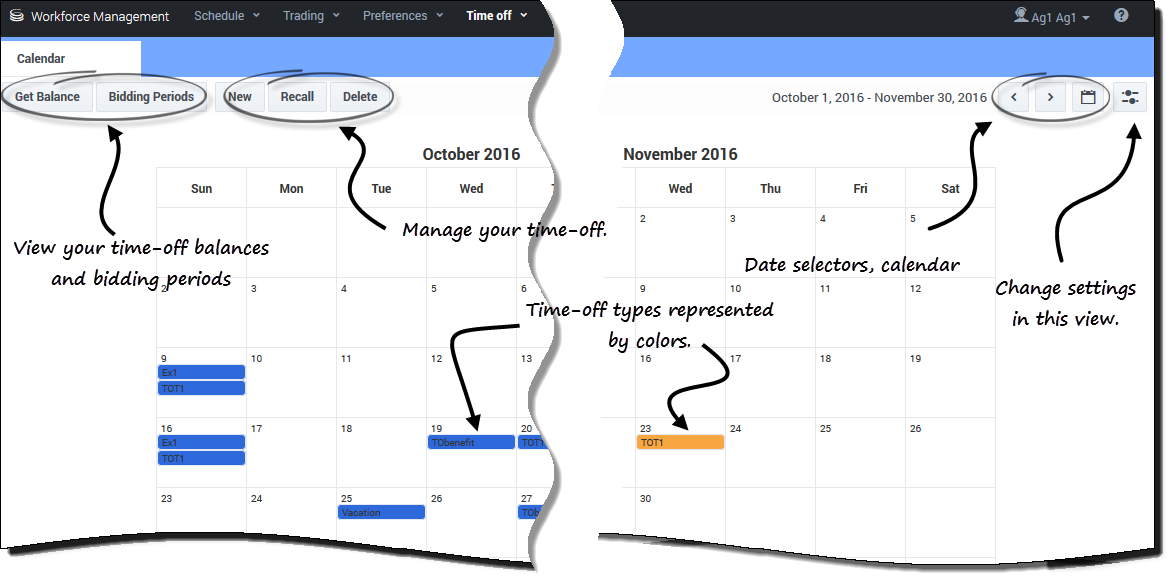
Use the Calendar view to view all of your time-off requests and their statuses. You can perform all of the tasks required to effectively manage your time-off requests in this view.
You'll find the following settings and controls in this view:
- Get Balance—Use this button to open the Balance dialog and view your time-off balances.
- Bidding Period—Use this button to view bidding periods or change your status in the bidding process.
- New, Recall, and Delete—Use these buttons to make, recall, or delete time-off requests.
- Date selectors and Calendar—For a description how to use these controls, see Changing the date.
- Settings—Click this icon to open a dialog box that enables you to change the data display in this view.
- Legend—Each status displayed in the calendar (Declined; Granted; Preferred; Scheduled, Recalled; Scheduled; Not Scheduled; and Recalled) is represented by its own color. To display the legend in this view, see Changing the view settings.
Changing the view settings
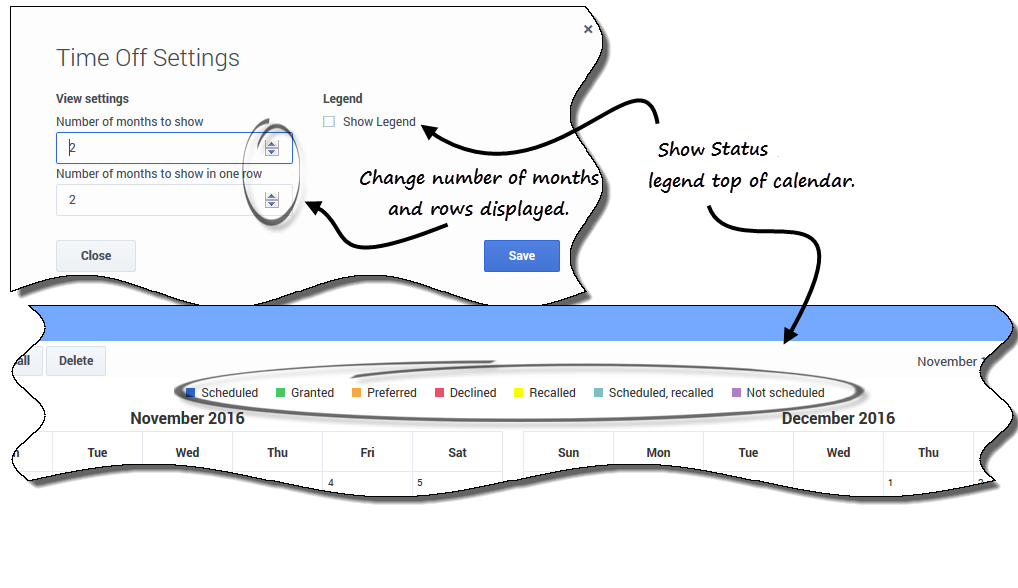
You can change the way you view information in the Calendar view by changing the settings to display only the current month (default) or multiple consecutive months, or display a legend that describes the color-coded statuses.
To change the settings in this view:
- In the upper-right corner, click Settings.
- The Settings dialog box opens.
- To change the number of months and how they are displayed, enter a number in these two fields or use the up or down arrows:
- Number of months to show
- Number of months to show in one row
- To display the statuses legend above the calendar, enter a check mark in the Show Legend check box.
- Save the settings (or discard them by clicking Close).
Viewing time-off details
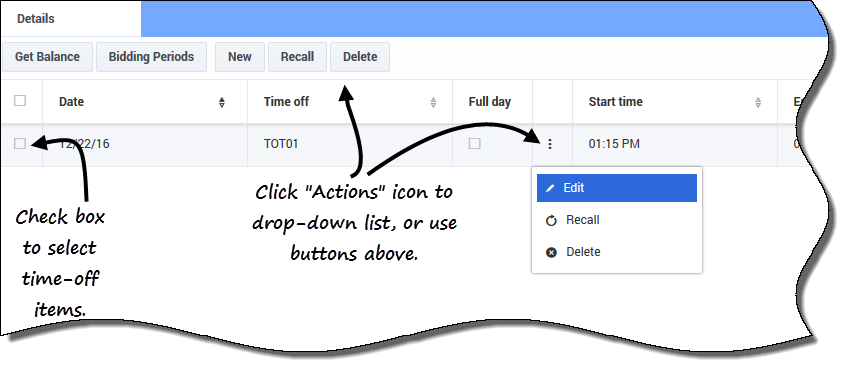
Use this view to see all of the details for each of your time-off requests in a table. In the Details view, the following information is displayed in columns and rows. Each column can be sorted in ascending or descending order by clicking the arrow controls ![]() in the column:
in the column:
- Check boxes—Select the check boxes when you want to take action (recall, or delete a time-off request). Select or clear the check box in the header to operate all check boxes in the column (and thus, all rows) with one click.
- Date—The date that time-off is requested.
- Time off—The time-off type.
- Full day—Indicates whether or not the request is for a full day. If the time-off request is for a full day, the check box is checked. If the request is for a part-day, the check box is unchecked.
 Actions—Click this icon to open a drop-down list of actions, enabling you to edit, recall, or delete the item in that row.
- Start time—The time when the time-off begins.
- End time—The time when the time-off ends.
- Paid hours—The number of paid hours for the time-off period.
- Status/reason—The status of the time-off and the reason why the WFM system set a particular status for this time-off request, such as Declined or Not Scheduled.
- Comments—Comments are notes that you can entered when submitting or editing time-off requests.
Changing the view settings
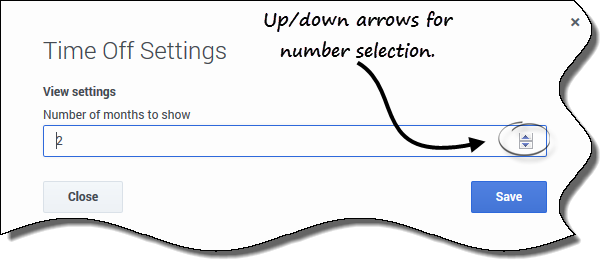
You can change the settings in the Details view to display only the current month (default) or multiple consecutive months.
To change the settings in this view:
- In the upper-right corner, click Settings.
- The Settings dialog box opens.
- To change the number of months that display in this view, enter a number in the Number of months to show field, or use the up or down arrows.
- Save the settings (or discard them by clicking Close).


