Using availability patterns
Contents
Use availability patterns to indicate your preferred shifts for a single week or multiple weeks.
Your availability patterns can specify different start and end times for each day, but once you create the pattern you can reuse it multiple times. Availability patterns are displayed in the Preferences > Availability Patterns view.
Use the Availability Patterns view to:
Creating availability patterns
To create a new availability pattern:
- In the Availability Patterns view, click New.
- The Create Pattern dialog box opens.
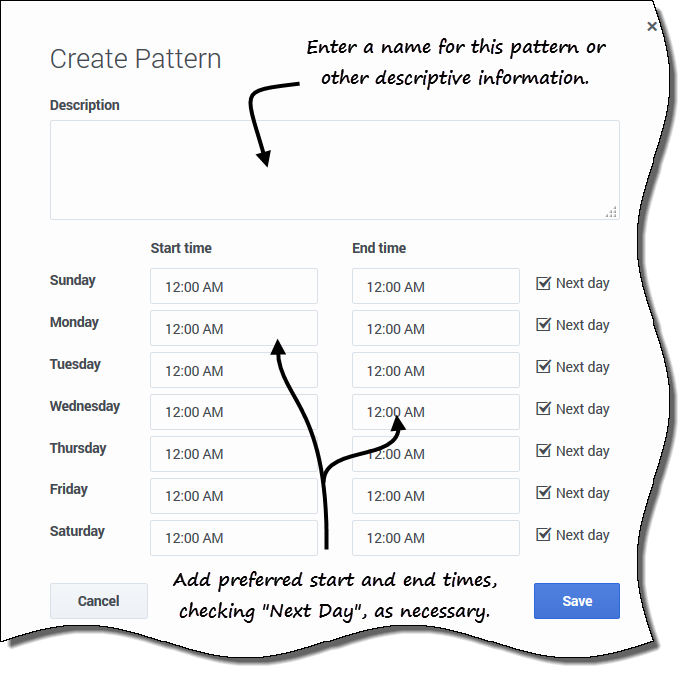
- In the Description field, enter a name for the pattern.
- Enter the Start time and End time (in hours and minutes) for each day of the week.
- Start and end times are displayed in 12- or 24-hour format, depending on your computer's regional settings.
- You cannot leave start and end times blank.
- Select Next Day for any end times that run into the next day.
- Click Save (or Cancel to discard the changes and close the dialog box).
Editing patterns
To edit an existing availability pattern:
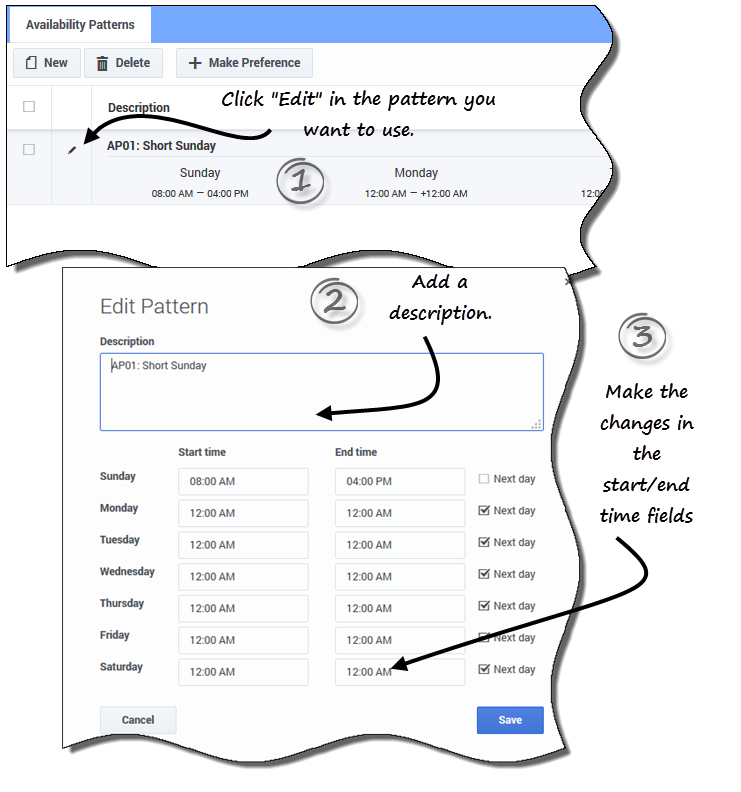
- Click Edit
 beside the Availability Pattern you want to edit.
- The Edit Pattern dialog box opens.
- In the Description field, add a brief description for this pattern.
- Change the start times and end times, selecting Next Day, if applicable.
- Click Save (or Cancel to discard the changes and close the dialog box).
Deleting patterns
To delete an availability pattern:
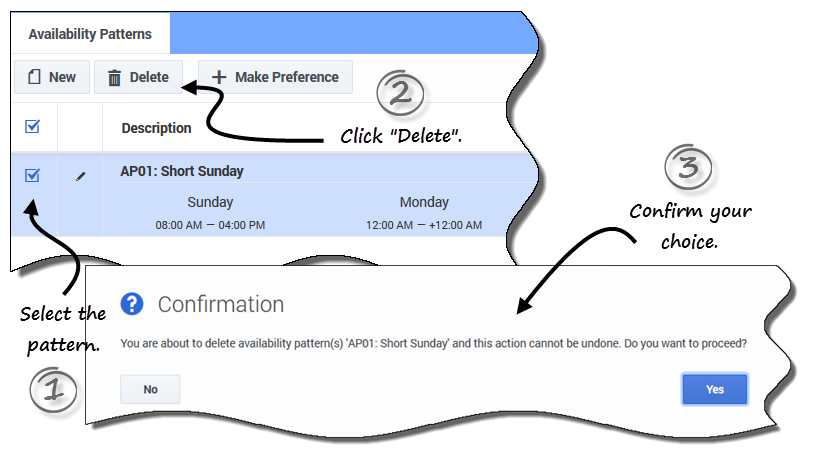
- Click the check box beside the Availability Pattern you want to delete.
- Click Delete.
- When the Confirmation dialog open, click Yes to delete the pattern or No to cancel the action.
Using patterns to make preferences
When you make a preference in this view you are using an existing availability pattern to add your availability preference. You can also add availability preferences for individual days. See Adding availability preferences.
To make an availability preference using an existing pattern:
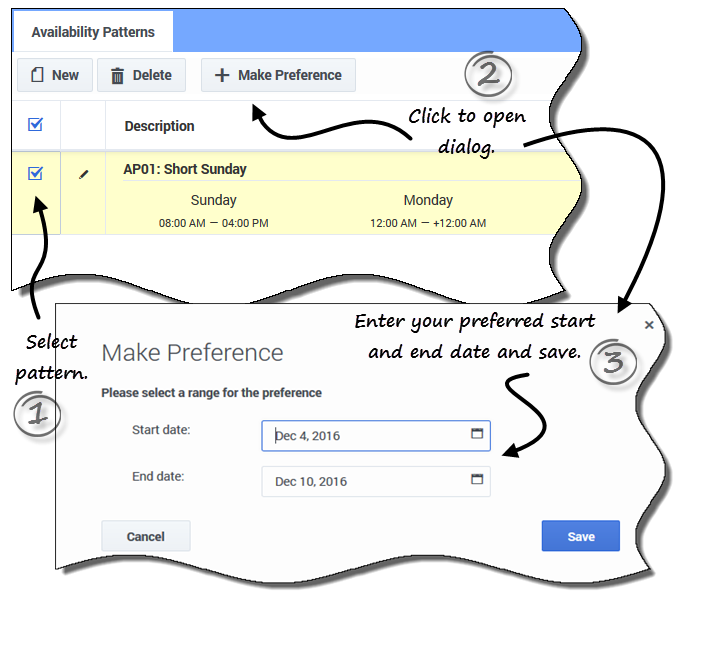
- Select the check box beside the Availability Pattern you want to use for this preference.
- Click Make Preference.
- The Make Preference dialog box opens.
- In the Start date and End date fields, enter the applicable date range for your preference.
- Click Save (or Cancel to discard the preference and close the dialog).


