Viewing proposals and my trades
Contents
View schedule trade details and manage your trade proposals.
The Trading views (Proposals and My Trades) enable you to view schedule trades and their details, accept or decline other agents' trading proposals, and cancel your proposals or responses.
You initiate or Creating trade proposals in the My Schedule or My Schedule Details view.
Viewing proposals
The Proposals view displays all proposals whose first day falls within the selected month. It is sorted by the first date of each proposal. By default, it shows the current month, but you can change it by selecting a different start date in the calendar or by clicking Show more trades.You will use this view to accept or decline proposals.
You can distinguish between community and individual proposals by the action buttons available to you. Community proposals only have the Accept button, whereas individual proposals have both Accept and Decline.
Columns and controls
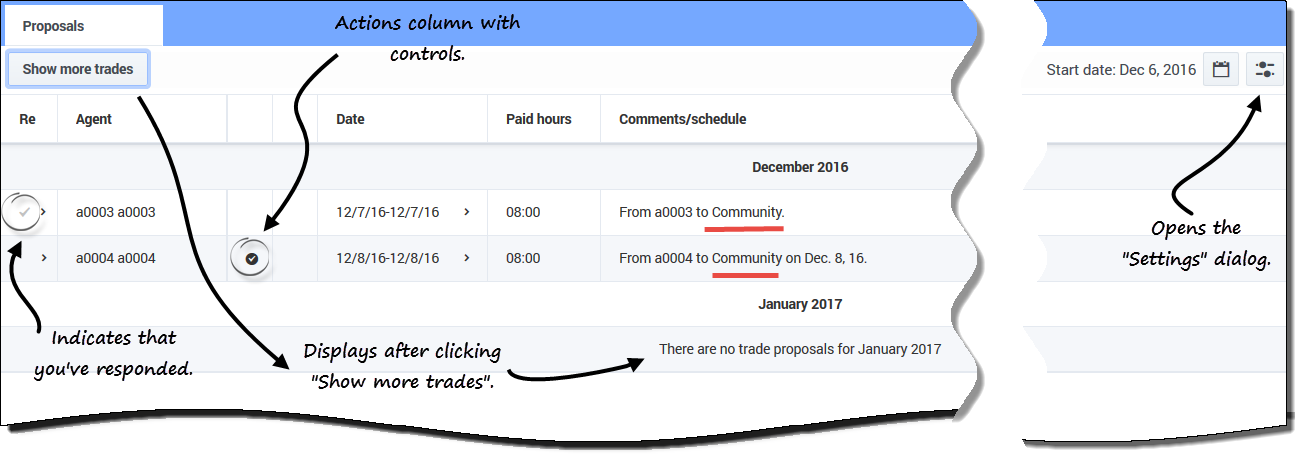
You'll find the following controls and columns in this view:
- Show more trades—When clicked, displays each concurrent month's trade proposals.
- Date selectors—Enables you to change the Start date of the displayed data. WFM will display the trade information for the month, starting on this date.
- Settings—Opens a dialog, enabling you to change the settings in this view.
- Re—A check mark in this column indicates that you have already responded to this trade proposal.
- Agent—Shows the name of the agent who is initiating the trade proposal, and your name if the arrow in Re column is clicked and the rows expanded.
- Action—This column contains buttons to accept or decline an individual proposal or accept a community proposal. To find out what actions you can take in this view, see Reviewing other agents' proposals.
- Dates—Shows the start and end dates involved in the trade proposal or response.
- Paid hours—Shows the total number of paid hours covered by the proposed trade.
- Comments/schedule—Shows any comments attached to the proposal.
Changing the view settings
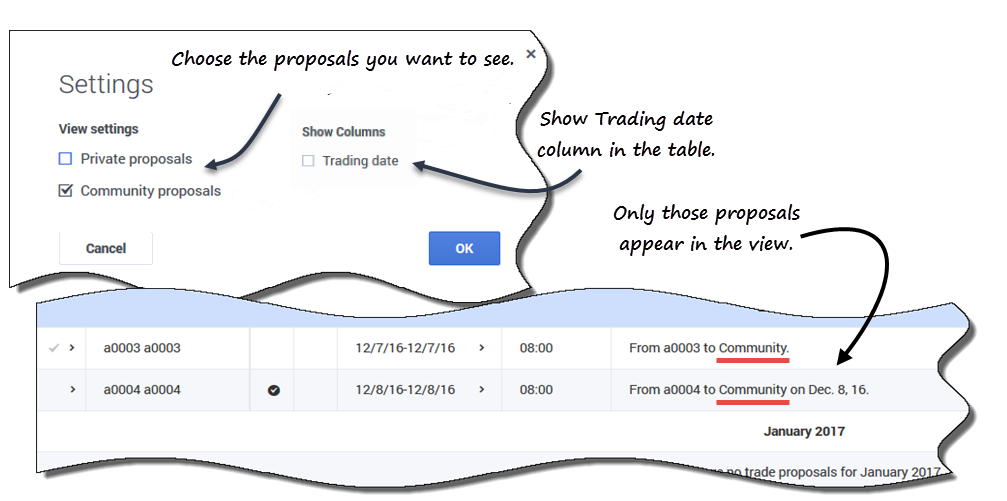
Enables you to to show only those types of proposals you want to view; private proposals, community proposals, or both.
To change the settings in this view:
- Click Settings. The Settings dialog opens.
- Check or clear the Community proposals or Private proposals boxes to change the information that you want to see. If neither check box is selected, no information is displayed.
- Optionally, check the Trading date check box to show the Trading date column in the grid when the agent’s timezone is set (in My Settings) to one, other than the site timezone.
- Click Ok to save the changes (or Cancel to discard them and close the dialog).
Showing more trades
To view trades for months other than the month in the Start date:
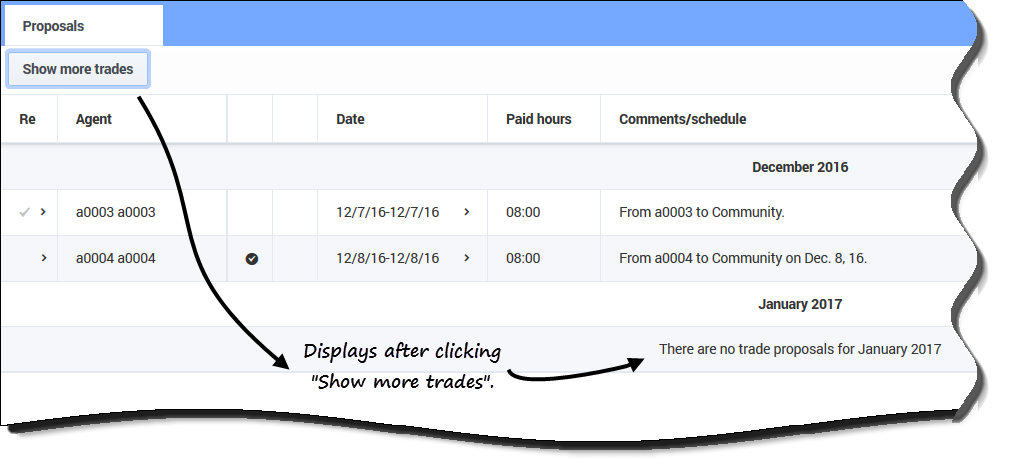
- Click Show more trades. The next month's trade proposals display in the grid.
- Click this button again for as many months as you want to view. Each consecutive month's proposals display in the grid.
Finding details in the grid
You can expand the grid in this view to display more rows containing details about proposals, your schedule, and other agents' schedules.
For example:
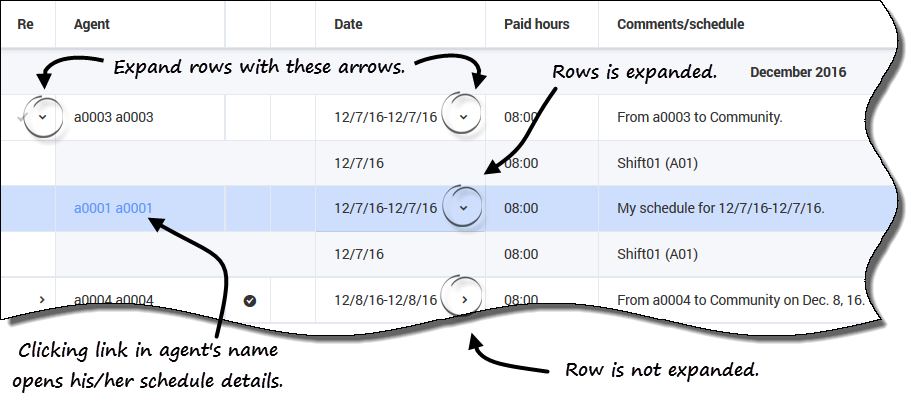
- Clicking the arrow in the Re column adds a row containing your schedule for the date range specified in the proposal.
- In the row that shows your name, clicking the arrow in the Date column adds rows containing all of the shifts in your schedule for the date range specified in the proposal.
- In the row that show the proposing agent's name, clicking the arrow in the Date column adds rows containing all of the shifts in his/her schedule for the date range specified in the proposal.
In addition to being able to expand the rows, you can click the link:
- In your name to open your schedule details for the date range specified in the proposal.
- In the proposing agent's name to open his/her proposal details for the same date range.
Viewing my trades
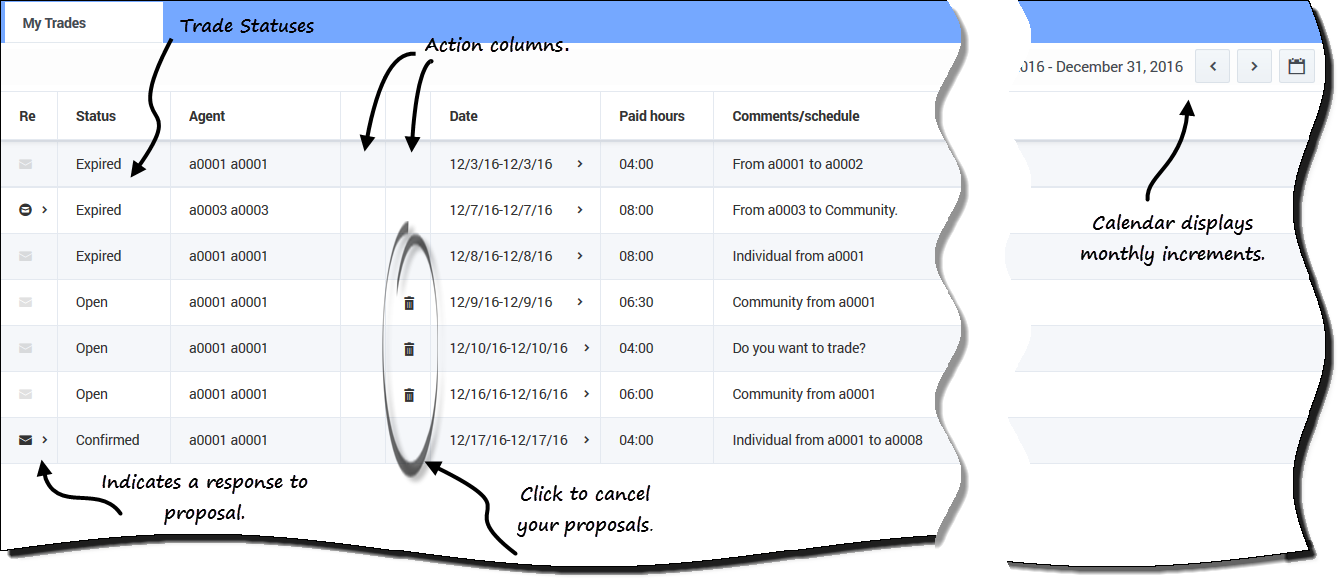
This view displays all of your responses in a table/grid. It has the same columns as shown in the Proposals view, with one additional column (Status), and the Re and Actions columns have different descriptions.
Find the following columns in this view:
- Re—An envelope in this column indicates that agents have responded to this trade proposal. If you initiated the trade proposal, the response icon looks like this
 ; If another agent initiated the trade proposal, it looks like this
  .
. - Status—This column shows the acceptance or approval status of the trading proposal or response. For a descriptions of the types of statuses, see Trade statuses.
- Actions—This column contains buttons to accept or decline responses from other agents, cancel your proposals, or cancel your responses to other agents' proposals. To find out what actions you can take in this view, see Reviewing responses to proposals.
This view displays proposals and responses for a month, based on the date selected in the calendar (or using the date selectors). You will use this view to accept or decline responses from other agents and cancel your own proposals and responses.
The order of rows starts with the proposing agent's name and proposal information in the first row, then if the rows are expanded, the next row shows the responding agent's name and response information.
You can expand the rows and open agent's schedules in the same way as described in the Proposals view. See Finding details in the grid.
In addition to being able to expand the rows, you can:
- Click the link in your name to open your proposal or request details for the date range specified in the proposal.
- Click the link in the proposing agent's name to open his/her proposal or request details for the same date range.

