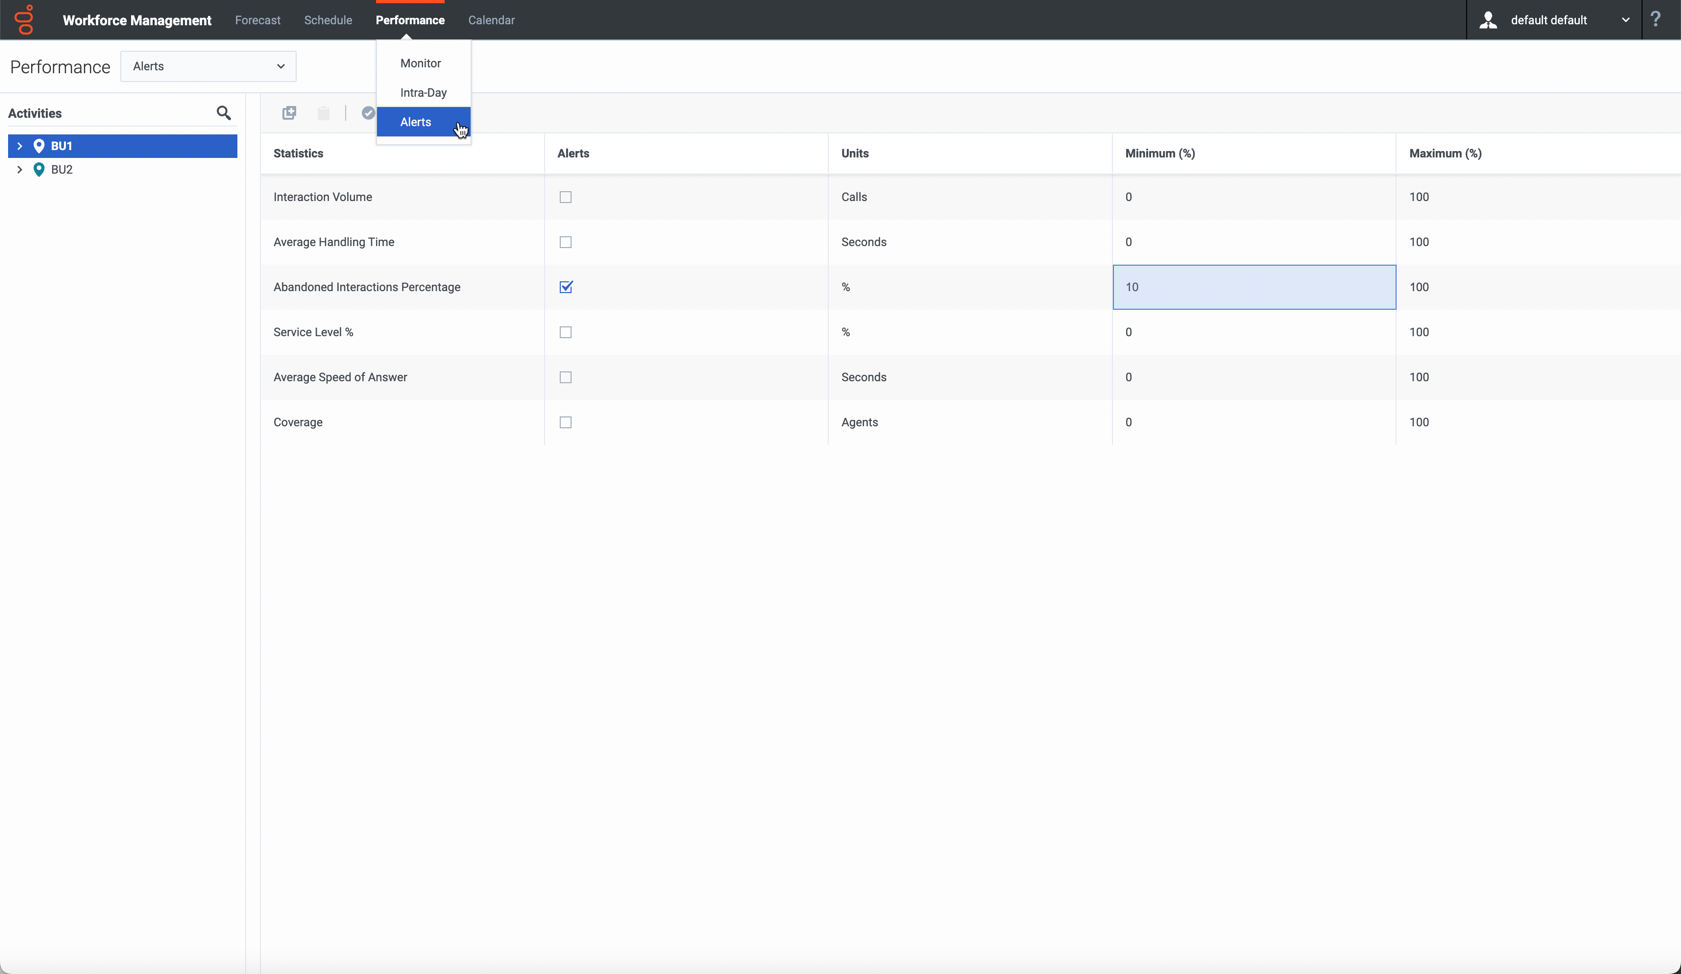
Performance Alerts View
This topic describes how to configure visual alert notifications for unacceptable performance.
You can use the Alerts view to configure visual alert notifications for unacceptable performance. The Alerts function uses Master Forecast and schedule data as a baseline for acceptable performance results. If user-defined performance limits are violated (for example, if too many interactions are being abandoned, or if service levels fall too low), an Alert warning (![]() ) in the Monitor view notifies site managers that action may be necessary.
) in the Monitor view notifies site managers that action may be necessary.
Displaying the Alerts view
To display the Alerts view, click the Performance tab and select Alerts (or choose Alerts from the Performance module dropdown list).
From the Activities tree, select the business unit, multi-site activity, activity group, or site you want to view. If you switched to this view from another Performance view, it retains your earlier Activities tree selection. At right, the deviation details are refreshed with any alert settings that have already been configured for your selection.
Configuring performance alerts
To set an alert on a different business unit, site, or activity, select it in the Activities tree. You can expand business units to show their activity groups and sites and expand sites to show their activities. If you made a new selection, the deviations are updated to match it.
Select the Alerts check box beside each statistic name for which you want an alert. Clear the check box for statistics that should not have alerts.
Set the Minimum (%) and Maximum (%) allowable deviation for each statistic whose check box you selected. Set these limits by double-clicking on the cell and typing in the appropriate columns. These limits define the variance beyond which an alert is displayed. For example, assume that you set 3.0 as the Minimum (%) deviation level for Average Handling Time, and 5.0 (%) as the Maximum (%). In this case, an alert appears when the AHT goes more than 3 percent under, or 5 percent over, the number set in the forecast.
Click Apply (![]() ). Or, to discard your changes, click Cancel (
). Or, to discard your changes, click Cancel (![]() ).
).
If desired, configure alerts for other Business Units, activity groups, sites, or activities. You can repeat these steps for as many Activities tree selections as you like. If you make a new selection without first clicking Apply, a dialog box prompts you to Save your changes, Discard them, or click Cancel to keep working with the same selection.
To exit the Alerts view, select a different view from the Performance menu or module list.

