Deploy Pulse Web Service
From Genesys Documentation
This topic is part of the manual Genesys Pulse Private Edition Guide for version Current of Reporting.
Learn how to deploy Pulse Web Service (Pulse) into a private edition environment.
Related documentation:
RSS:
Assumptions
- The instructions on this page assume you are deploying the service in a service-specific namespace, named in accordance with the requirements on Creating namespaces. If you are using a single namespace for all private edition services, replace the namespace element in the commands on this page with the name of your single namespace or project.
- Similarly, the configuration and environment setup instructions assume you need to create namespace-specific (in other words, service-specific) secrets. If you are using a single namespace for all private edition services, you might not need to create separate secrets for each service, depending on your credentials management requirements. However, if you do create service-specific secrets in a single namespace, be sure to avoid naming conflicts.
Prerequisites
Before you begin, ensure that you have the following information:
- Genesys Pulse access URL.
- Agent Setup access URL, administrator credentials.
- WWE access URL, agent credentials.
Validation steps
- Create a user.
- Use an administrator account to log in to Agent Setup.
- Navigate to the Users tab.
- Click New User.
- Populate required fields, for example:
- First Name: pulsetest
- Last Name: pulsetest
- Username: pulsetest
- Password: Password@1
- Password Confirm: Password@1
- Clear Reset Password.
- Expand the User list on the left side, and switch to Access Group.
- Click Add.
- <Tenant SID> Supervisors to create a Pulse User.
- TipA Pulse Administrator role is also available, which gives the new user the ability to access Dashboard / Wallboard Management, Widget Template Management, and Widget Management pages. To create an Pulse Administrator user, select <Tenant SID> Administrator.
- Click Save.
- Log in to Genesys Pulse as the newly created user, and create a new Widget.
- Pulse displays an option to create Dashboard or Wallboard on the first login; choose the Dashboard option.
- To create a new Widget, click + Add a Widget.
- Select the Agent Login template.
- Select an agent that has access to WWE.
- Switch to the Display Options tab, and scroll down to the Statistics control.
- From the available Statistics, select Current Status.
- Click Save.
- A spinner appears on the Widget to indicate that processing is underway. Wait until some zero data appears (the selected agent appears as Logged Out).
- Log in to WWE with the agent account you selected in the Widget earlier, and change status to Available.
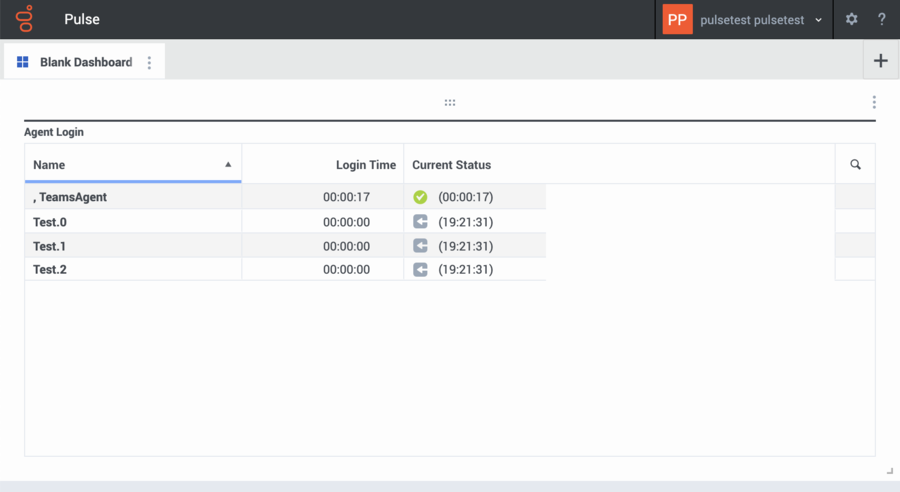
- Return to Genesys Pulse. Verify the current agent status in the Widget:
Comments or questions about this documentation? Contact us for support!


