View, edit, and create Categories and Rules
Contents
Work with the Categories that segment your work items, emails and leads ("work items") and the Rules that control how work items are processed.
View and edit a Category
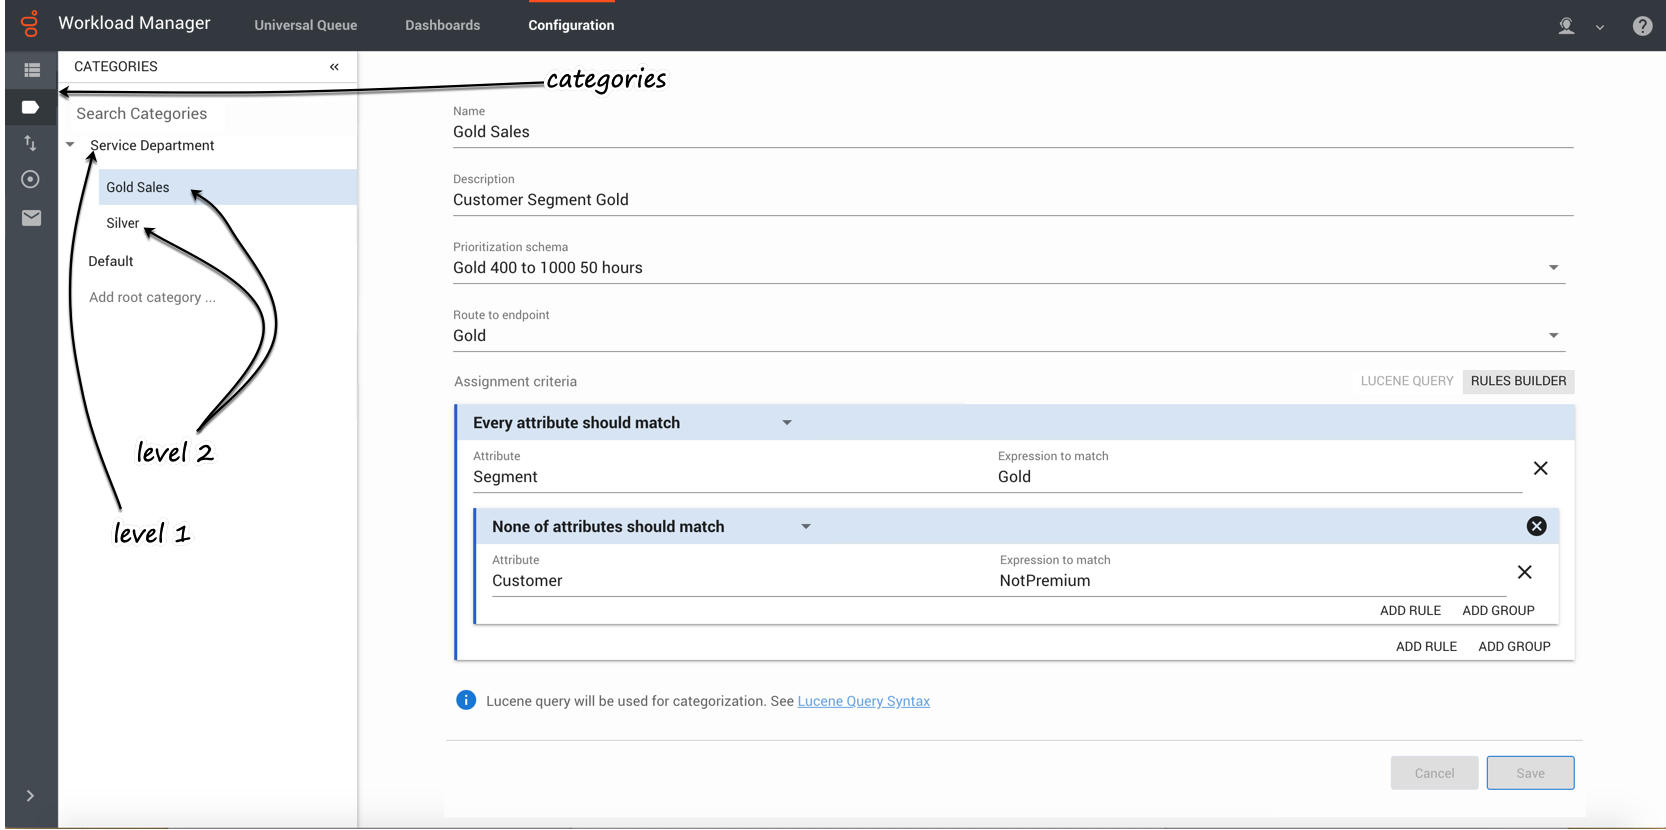
On the Configuration tab, from the collapsible Categories panel, select the Category you want to view or edit.
The Prioritization schema and the Designer Endpoint associated with this Category are displayed. You can edit them if you have the appropriate privileges. Designer applications are loaded on the Designer Endpoint in order to match the segmented work items with employees.Category levels and reporting
The first level of Category (Service Department in the screenshot above) translates to the Department in historical reporting (for example, here).
The second level of Category (Gold Sales, Silver in the screenshot above) translates to the Process in historical reporting (for example, here).
Historical reporting reports up to 10 levels of the IWD Category structure, which correspond to Departments and Processes.
The first level filters all work items that match the Category's criteria. Any sub-levels further filter work items that match the first-level criteria as well as the sub-level's criteria. In this way you can create a hierarchy that funnels work items through to lower levels of specificity so you can handle them in more specific ways.Add/delete controls
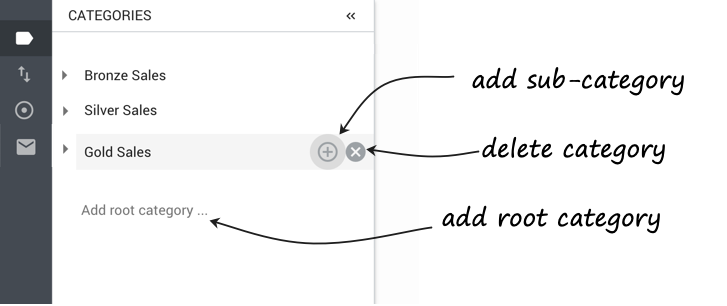
- To add a new root category, at the bottom of the collapsible Categories panel, click Add root category...
- To add a sub-category to an existing category, click the + button to the right of the parent Category's name.
- To delete a Category click the X button to the right of the Category's name.
- WarningYou cannot undo deletion of a Category.
Create a new Category
- Select the Configuration tab.
- Open the collapsible Categories panel.
- Click either Add root category... or, to create a new sub-Category, the + symbol next to an existing Category .
- Give the new Category a name. For a sub-Category, enter a name that follows the naming convention for the root or parent Category, for example:
- [source system] [department][process] high-level criterion
- Give the Category a business-friendly description. Include the rule intention if possible (see the examples below).
- From the drop-down list, select a Prioritization schema for this Category.
- From the Route to Endpoint drop-down list, select a Designer Endpoint for this Category.
- In the Assignment criteria section, create a rule or group of rules, or a Lucene query, that will determine which work items IWD assigns to this Category. The examples below illustrate some relatively simple rules and rule groups.
- TipYou can use Lucene query syntax in describing Categories and creating rules and rule groups.
- Click Save when you're done.
Rules
Rules examples
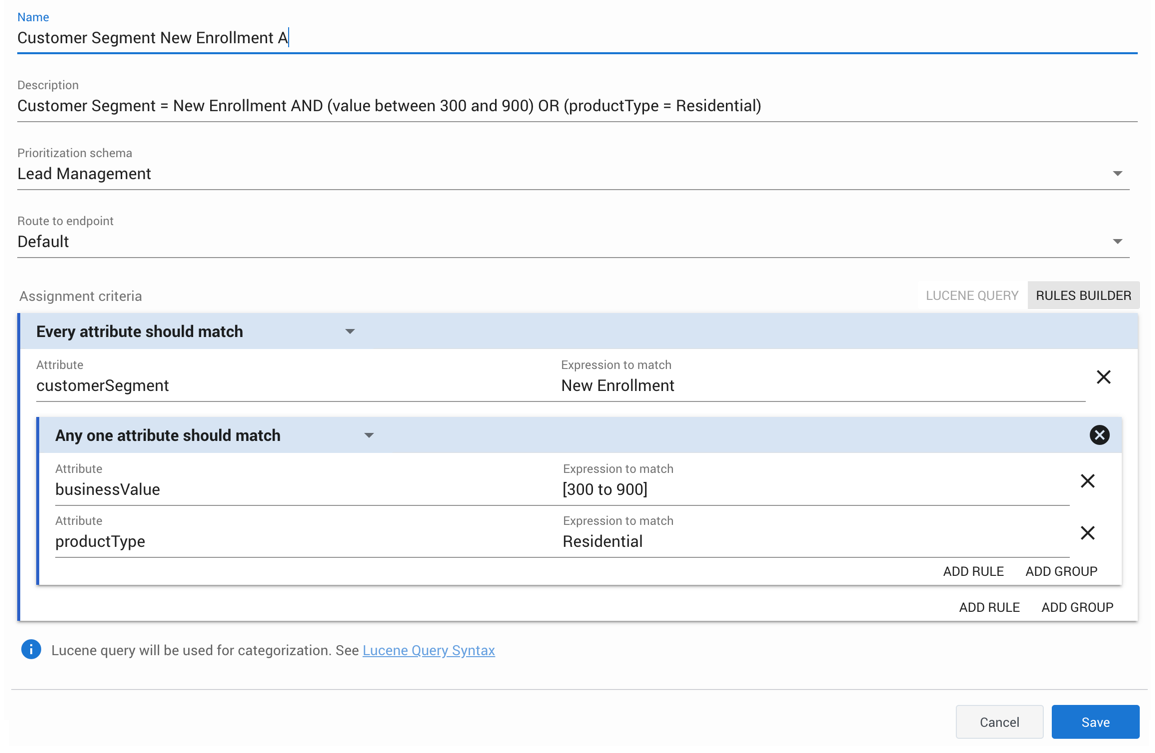
Example 1
This rule assigns work items to this Category if they meet the following conditions:
The value of their customerSegment attribute is New Enrollment
AND
EITHER
the value of their businessValue attribute is between 300 and 900
OR
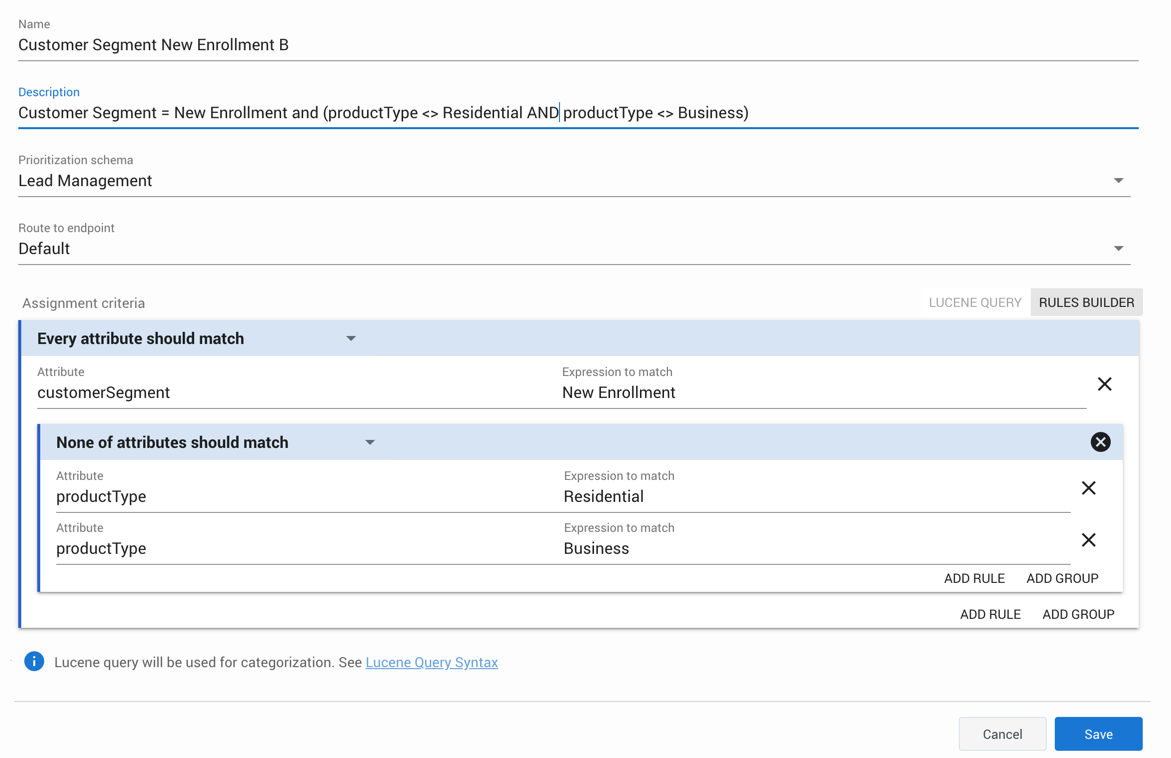
Example 2
This rule assigns work items to this Category if they meet the following conditions:
The value of their customerSegment attribute is New Enrollment
AND
NEITHER
the value of their productType attribute is Residential
NOR
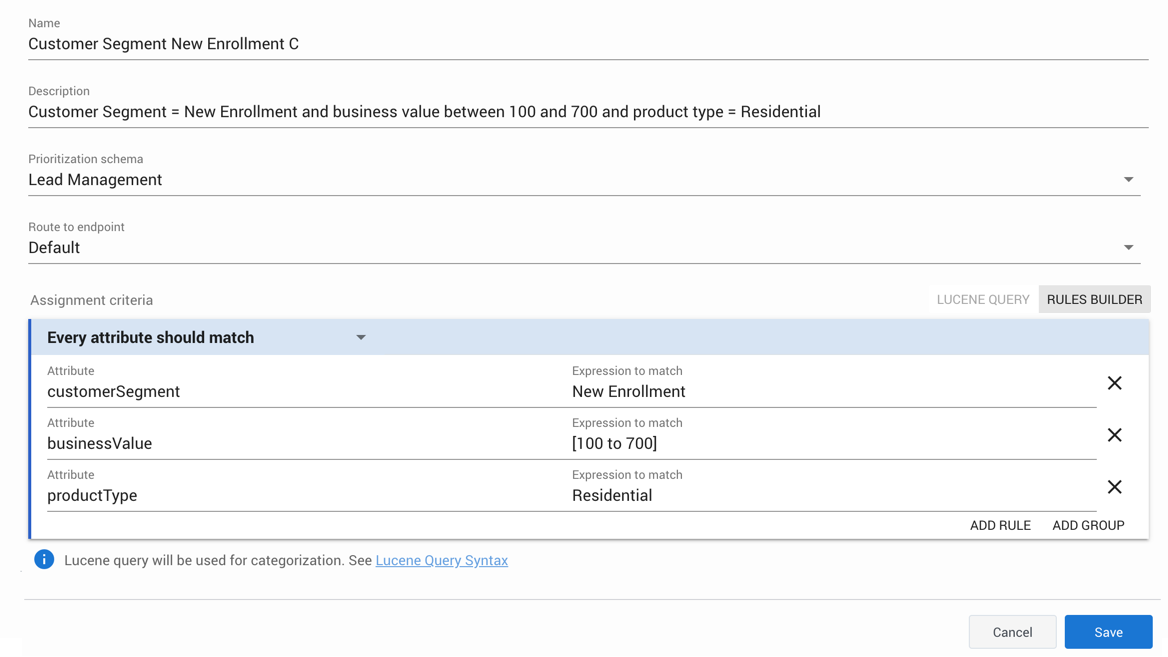
Example 3
This rule assigns work items to this Category if they meet the following conditions:
The value of their customerSegment attribute is New Enrollment
AND
the value of their businessValue attribute is between 100 and 700
AND
Test assignment criteria
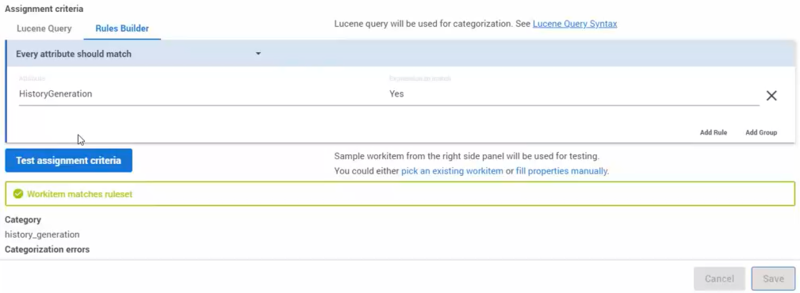
You can validate a Category and its rules (configured via Rules Builder or Lucene query) against an existing work item or a manually created work item. By this way, you can find out whether the ruleset matches the work item or not and if there are any errors with categorization in relation to the sample work item.
Process
- Select the Configuration tab.
- Open the collapsible Categories panel.
- Select a Category and click pick an existing workitem in the Assignment criteria section. The Universal Queue page is displayed. TipAlternatively, you can also choose to fill in properties of the sample workitem manually using the fill properties manually option.
- Select an existing work item and click
 . The Categories panel is displayed again with the selected work item as the sample work item in the right pane.
 - [Optional] You can make changes to the rules and sample work item attributes as needed.
- Click Test assignment criteria. The result contains the following information:
- Indicates if the ruleset matches the sample work item or not.
- Shows the first Category in the Categories list that matches the sample work item attributes.
- It also indicates if there are any categorization errors.
The sample work item can either be an existing work item that you select from the Universal Queue or a manually created work item for Categories testing. If you use an existing work item for testing, any change you make to the attributes in the Sample Workitem panel will not affect the original work item. However, the changes that you make in the Category itself are captured if you click Save.
Configure a Category-level email auto-acknowledgement
ImportantAuto-acknowledgements configured at the mailbox level will negate any corresponding configurations at the Category level.Prerequisite
The content of auto-acknowledgement emails is created and stored in a Standard Response Library (SRL). To set up an SRL you need either eServices Manager or Designer, depending on your implementation.
Process
The process for setting up a Category-level auto-acknowledgement email is as follows:
- You create an IWD Category tree (for incoming email) that:
- Contains rules that segments email(s) into specific groups for a particular auto-acknowledgement.
- Is named indentically to the category tree path configured in the SRL that contains the required auto-acknowledgment content. Spelling and punctuation must match exactly. If there are any discrepancies, no auto-acknowledgement is sent.
- If a matching category path is found, IWD selects from that category the Active standard response that has usage marked for Acknowledgement.
If no match is found, or no standard response is configured in that category, no auto-acknowledgement email is generated.
Reorder Categories
You can drag and drop categories in the Categories panel to arrange them in a specific order.
- Select the Configuration tab.
- Open the collapsible Categories panel.
- Drag a Category to change its position in the list. To increase its level, drag the Category to the right of another Category. To decrease its level, drag the Category to the left. While performing drag-and-drop, the entire impacted Category tree is highlighted in blue color to assist you.
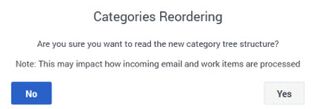
- Drop the selected Category in the required position and click Save. If you must cancel the changes, click Cancel. A confirmation message appears if you click Save.
- Click Yes on the Categories Reordering window to update the Categories tree.
