View, edit, and create Genesys Multicloud CX Email boxes
Contents
- 1 Before you start
- 2 View all mailboxes
- 3 View or edit a Gmail or Office365 mailbox
- 4 Add a Gmail or Office365 mailbox
- 5 View, edit, or add generic mailbox
- 6 Set up auto-acknowledgement emails
- 7 Field descriptions
- 8 Handling unparsable emails
- 9 Language detection
- 10 Attachments
- 11 Best practices for signing in to mailboxes
- 12 Best practices for mailbox maintenance
Display and change details of all Genesys Multicloud CX Email boxes ("mailboxes") and add new ones.
Before you start
- Workload Manager displays the Mailboxes page only if Genesys has provisioned the relevant email service.
- You can add up to 100 mailboxes per tenant.
- Access privileges control access to this feature.
- You can configure and store auto-acknowledgement emails in a Standard Response Library (SRL). To do this, you need either eServices Manager or Designer, depending on your implementation.
- Readability of the High Priority/Importance email mark depends on the email client in use. Please note the following:
- For email sent via Outlook to either Microsoft or Google mailboxes, this mark can be read by Email for Multicloud CX.
- For email sent via Google to Google mailboxes, this mark can be read by Email for Multicloud CX.
- For email sent via Google to Microsoft mailboxes, this mark CANNOT be read by Email for Multicloud CX.
So, when a customer has Microsoft mailboxes, the High Priority/Importance mark is unreliable.
- You must perform the instructions specified in Prepare for Office 365 integration before configuring your Office 365 mailbox.
View all mailboxes
In the Configuration tab of Workload Manager, click the email tool in the left-hand toolbar to display all configured mailboxes. From this summary screen you can:
- Enable/disable all mailboxes.
- Search the list of mailboxes.
- Edit, copy and delete mailboxes.
- View incoming and outgoing connection statuses.
- Add a new mailbox.
- Set the default outbound mailbox via the Default outbound mailbox option. This mailbox is used if the outbound email From address is not specified or does not match any mailboxes.
View or edit a Gmail or Office365 mailbox
From the Mailboxes screen:
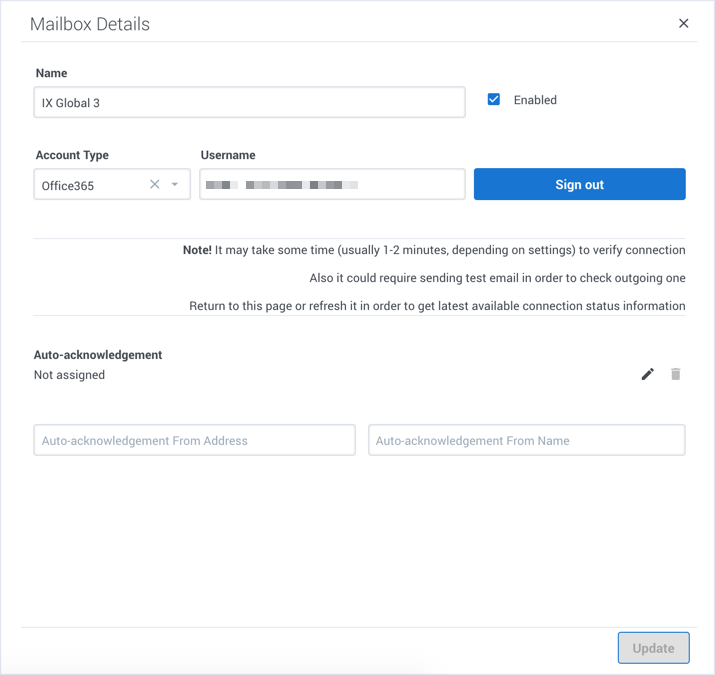
- Click the mailbox (of type Gmail or Office365) you want to view or edit. A summary of the mailbox details appears (blank for a new mailbox).
- Optionally, sign in to the mailbox.
- View and/or edit the mailbox details.
- Optionally, add an auto-acknowledgement email, and address and sender details.
- Click Update to save any changes.
- Optionally, sign out.
Add a Gmail or Office365 mailbox
From the Mailboxes screen:
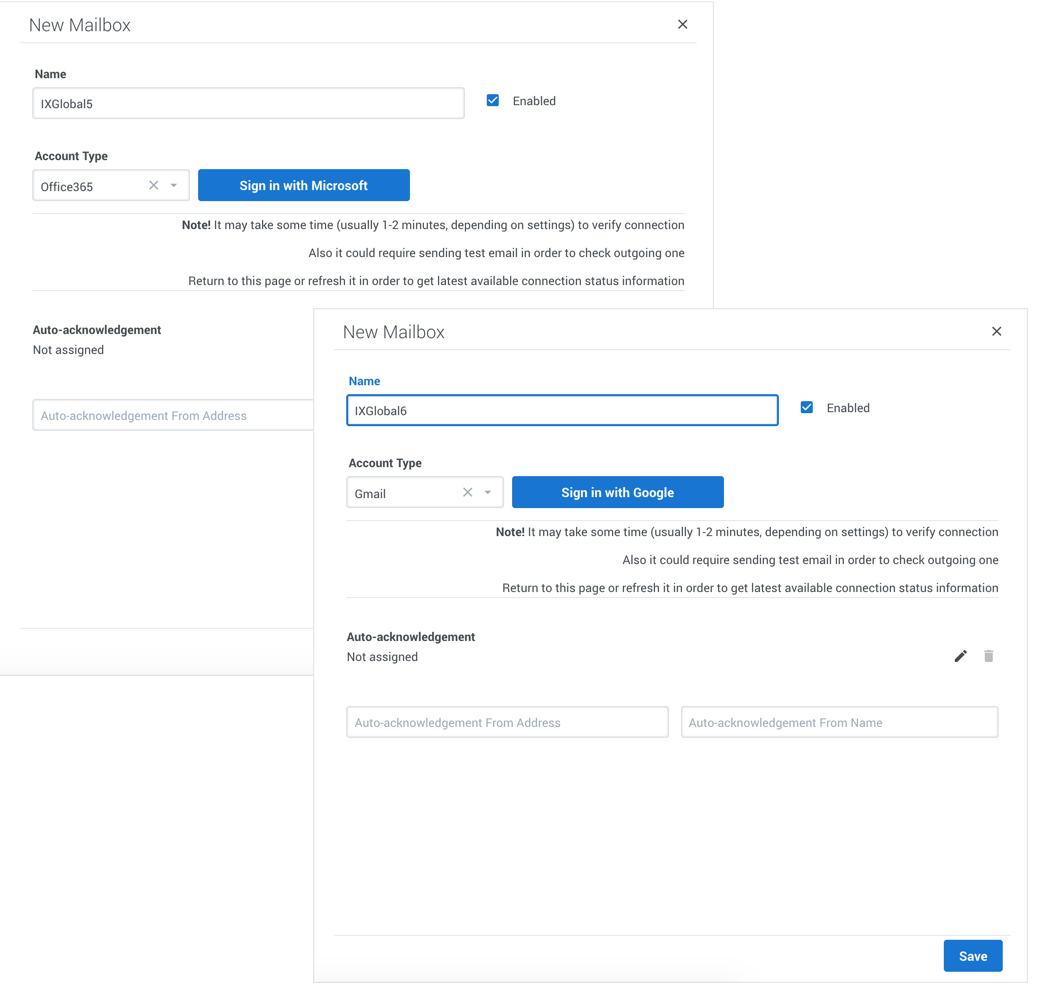
- Click Add Mailbox.
- In the Account Type drop-down menu, select Gmail for a Gmail account, or Office365 for an Office365 account.
- In the Name field add the name of the new mailbox. At this stage you can save the new mailbox without any further changes or signing in.
- Optionally, sign in, by clicking the relevant Sign in with... button.
- Follow any authentication prompts that may be displayed. Once you are successfully signed in, your new mailbox is automatically saved, and you can edit its details.
- Optionally, add an auto-acknowledgement email, and address and sender details.
- Click Update to save any changes.
- Optionally, sign out.
View, edit, or add generic mailbox
From the Mailboxes screen:
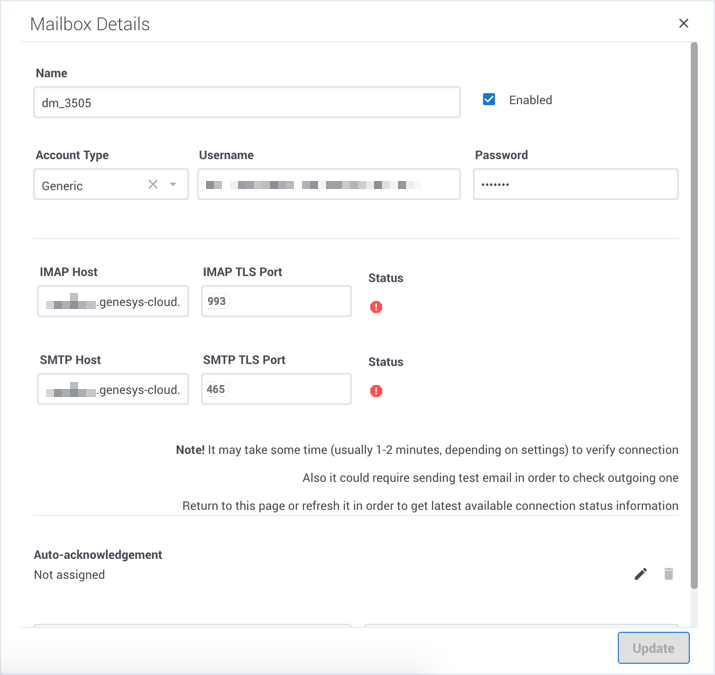
- Click the mailbox (of type Generic) you want to view or edit, or click Add Mailbox to create a new one.
- A summary of the mailbox details appears (blank for a new mailbox).
- Select Generic for the Account Type.
- Complete or edit the details for the mailbox using the field descriptions on this page.
- Click Update to save changes.
Set up auto-acknowledgement emails
There are two ways to configure auto-acknowledgement emails:
- At the Mailbox level, using the auto-acknowledgement feature.
- At the IWD Category level.
Note: If auto-acknowledgements are configured at the mailbox level, configurations at the IWD Category level are ignored.
To select or change an auto-acknowledgement email:
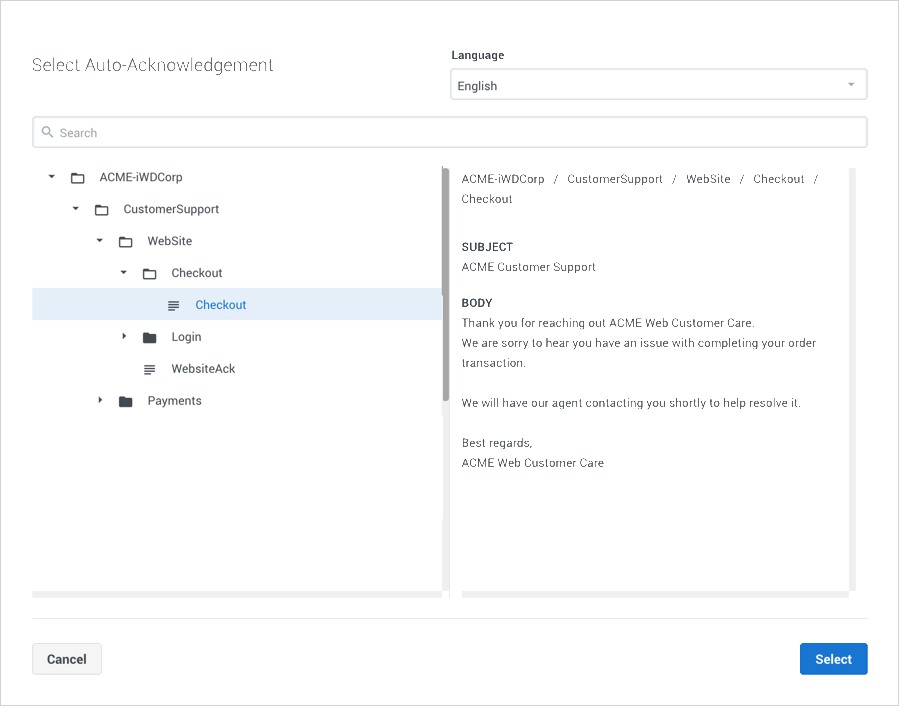
- Click the pencil icon to the right of the Auto-acknowledgement field. This displays the Standard Response Library (SRL) category tree.
- Navigate the tree, select an item and click it. Note that SRL contents must not have field codes configured.
Field descriptions
Handling unparsable emails
If an unrecoverable email error is identified when processing an email, the system marks the email as read and skips it. The email will not be processed during the next cycle.
If a recoverable email error is found, the system keeps the email unread and attempts to process it during the next cycle.
Language detection
- detectedLanguage – A two-letter ISO language code matching the email language such as en, fr, and es.
Additionally, the Header_Content-Language attribute is available for the corresponding email header.
Supported languages
| ISO language name | Language code |
|---|---|
| Albanian | sq |
| Arabic | ar |
| Azeri | az |
| Bengali | bn |
| Bulgarian | bg |
| Croatian | hr |
| Czech | cs |
| Danish | da |
| Dutch | nl |
| English | en |
| Estonian | et |
| Farsi | fa |
| Finnish | fi |
| French | fr |
| German | de |
| Hausa | ha |
| Hindi | hi |
| Hungarian | hu |
| Icelandic | is |
| Indonesian | id |
| Italian | it |
| Kazakh | kk |
| Kyrgyz | ky |
| Latin | la |
| Latvian | lv |
| Lithuanian | lt |
| Macedonian | mk |
| Mongolian | mn |
| Nepali | ne |
| Norwegian | no |
| Pashto | ps |
| Polish | pl |
| Portuguese | pt |
| Romanian | ro |
| Russian | ru |
| Serbian | sr |
| Slovak | sk |
| Slovene | sl |
| Somali | so |
| Spanish | es |
| Swahili | sw |
| Swedish | sv |
| Tagalog | tl |
| Turkish | tr |
| Ukrainian | uk |
| Urdu | ur |
| Uzbek | uz |
| Vietnamese | vi |
| Welsh | cy |
Attachments
Supported attachment types
Administrators can configure which attachment types are supported in outbound emails by <provide configuration procedure?>
Allowed file types in outbound emails
- Images — jpg, jpeg, png, gif, tif, bmp, heic
- Documents — pdf, docx, xlsx, pptx, doc, xls, ppt
- Audio — aac, m4a, amr, mp3, ogg, oga, opus
- Video — mp4, 3gpp
- Other — zip
Attachment size limitations
<The maximum allowed file size is 100 MB.?>
Best practices for signing in to mailboxes
When you are signing in to Gmail or Office365 accounts, you must ensure that any previously cached sign-in data is cleared from your browser. It is possible that the cached sign-in data from the browser is reused when you attempt to create mailboxes in Genesys Multicloud CX Email. As a result, you might be signing in to a different mailbox account than the required account, leading to all unread emails from the incorrect mailbox account (for example, your department mailbox) entering the system.
Follow one of these guidelines to avoid the above situation:
- Use a private or Incognito browser window to sign in to a Gmail or Office365 account. When you are finished with creating a mailbox and you are required to create another one, close the current private browser window and open a separate private window to proceed with the next account.
- Sign in to a cached email account and sign out of the account using a separate browser window to clear the cache. After you clear the cache, proceed with your mailbox sign-in. This does not require you to use a private browser window.
Best practices for mailbox maintenance
Most email providers process emails in the following way:
- An incoming email is marked as read and submitted to IWD for processing but remains within the mailbox.
- When an outbound email is sent, a copy is usually stored in the Sent folder.
Over a period of time, these processed emails require an increasing amount of space, which could exceed the configured limit supported by your email provider. When a mailbox reaches the configured limit, IWD cannot receive or send further emails. To address this, Genesys recommends regular maintenance of these emails, including the following:
- Perform and enforce a regular mailbox clean up schedule within your organization for all mailboxes configured with Genesys Email. It can be either manual or automatic by using various tools.
- Archive old emails safely for future reference. Don’t forget the Sent and Drafts folders!
- Delete unwanted emails.
- Empty the Trash and Spam folders.


