View, edit, and create Prioritization schemas
Contents
Set up and work with the Prioritization schemas that control the initial prioritization and subsequent reprioritization of work items, emails and leads ("work items").
View and edit Prioritization schema
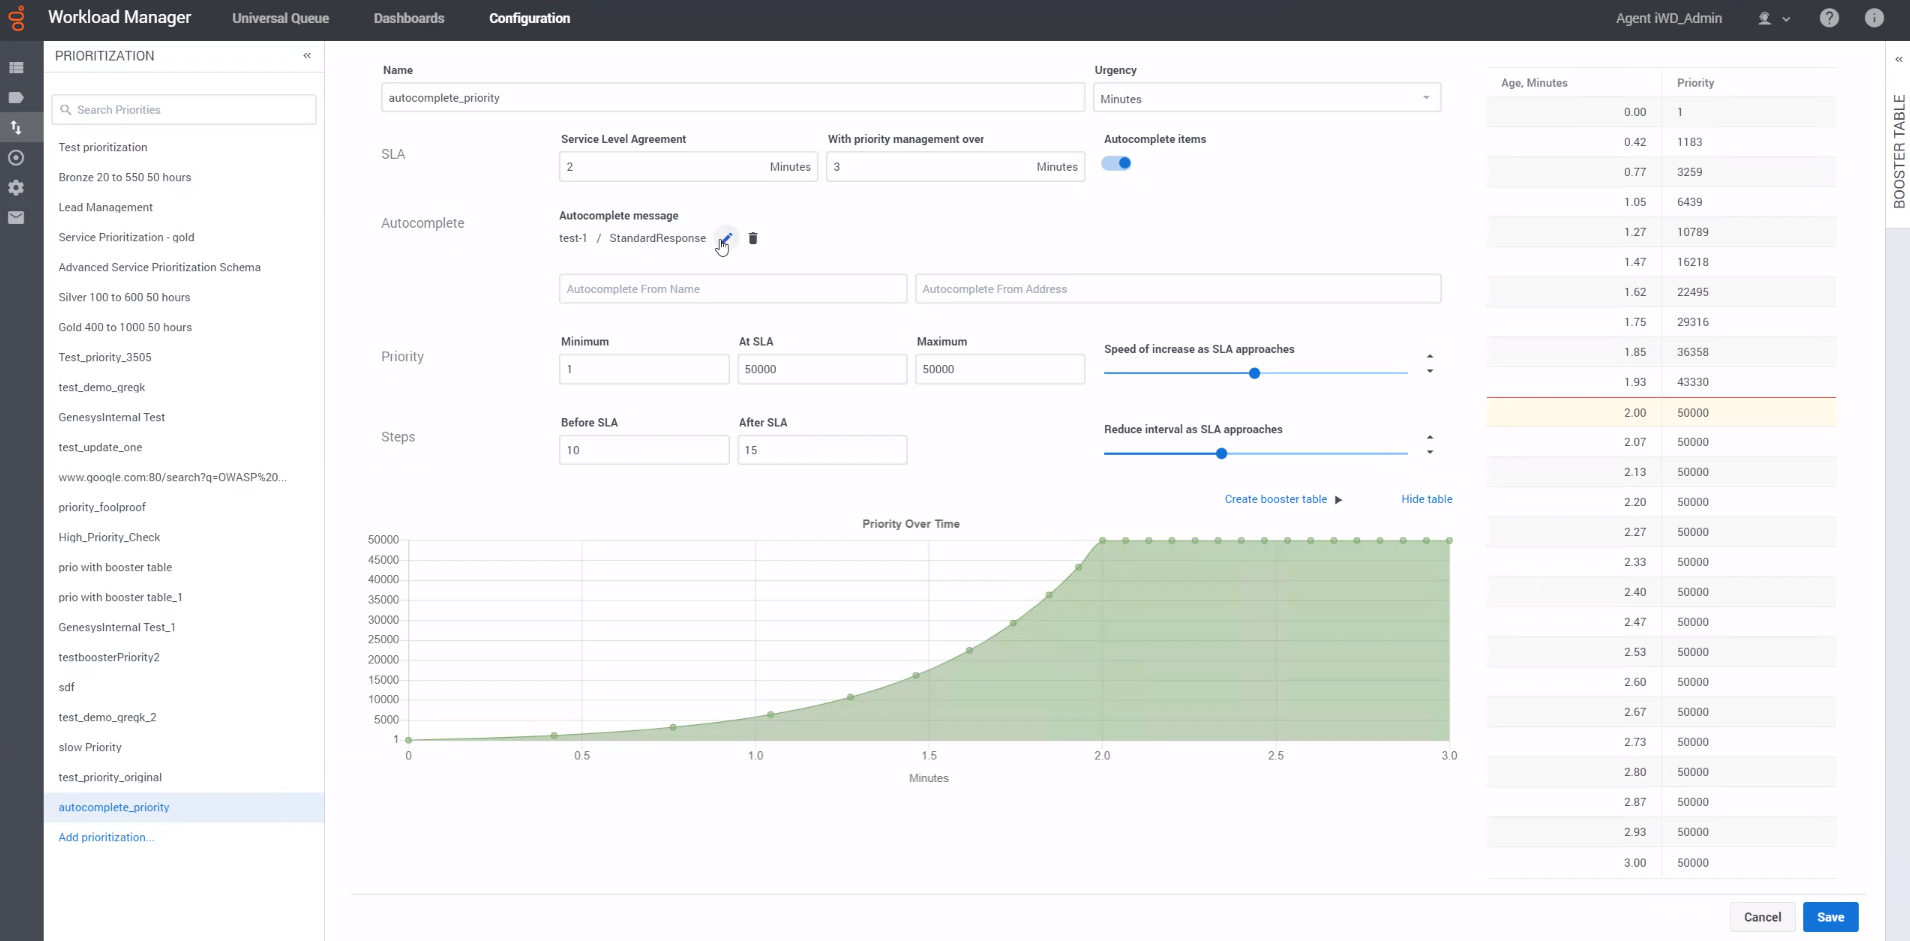
On the Configuration tab, select the Prioritization tool from the left toolbar. This displays Prioritization schema details. You can edit them if you have the appropriate privileges.
You can edit the schema by:
- Changing the values in any of the fields in the top part of the panel.
- Changing the priority values directly in the hideable table on the right of the panel.
- Dragging the individual data points up or down on the Priority over time graph.
Use the Cancel button to abandon all changes entered on the page.
Use the Reset button to reset changes made in the graph and priority tables.Field names
- Name—The schema name.
- Urgency—The units in which the intervals for calculation are denominated: Days, Hours or Minutes.
- SLA—The interval (Days, Hours or Minutes) by the end of which work items must be completed.
- With priority management over—The duration of managing and monitoring an email or a work item. This period includes the time to reach the SLA. For example, if an email is set to reach SLA by 2 minutes and it is to be managed for an additional minute post SLA, you must set the With priority management over value to 3 minutes.
- Autocomplete items—Enable this option to automatically complete a work item or email at the end of the period specified in the With priority management over setting. The work item or email is cancelled in the Universal Queue after this period.
- Autocomplete message—If the Autocomplete items option is enabled, you can configure a Standard Response that must be sent to the customer upon an email auto-completion. You can also set the From Name and From Address from which the message must be sent. This message is not applicable for work items.
- Priority—Minimum, SLA and Maximum priorities for the work items.
- Speed of increase as SLA approaches—Use the slider bar to accelerate or decelerate the change in priority when work items under this schema are reprioritized before their SLA. As you move the slider bar, the curvature of the Priority over time graph changes dynamically to reflect the changes. A straighter line indicates a more single-speed regime. A more curved line indicates acceleration as the SLA approaches.
- Steps—The number of times the work items under this schema are reprioritized, both before and after their SLA.
- Reduce interval as SLA approaches—Use the slider bar to alter the interval between reprioritization steps as the SLA approaches.
Add a new Prioritization schema
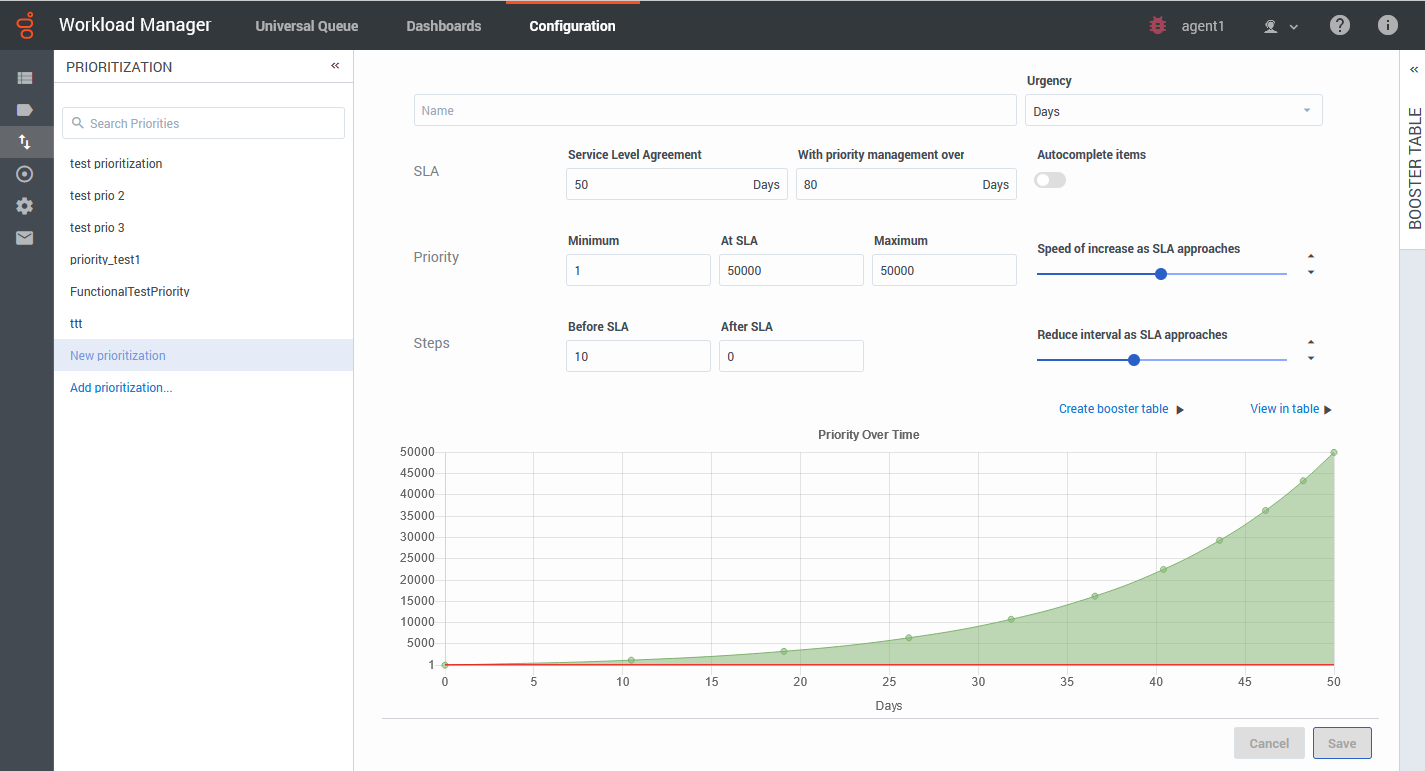
To create a new Prioritization schema, on the Configuration tab, select the Prioritization tool from the left toolbar and click Add prioritization...
Use the field definitions above to set up your new schema. Some fields have default values, listed here:
- Urgency—Days
- SLA—50
- With priority management over—80
- Autocomplete items—disabled
- Priority
- Minimum—1
- At SLA—50000
- Maximum—50000
- Steps
- Before SLA—10
- After SLA—0
Booster Table
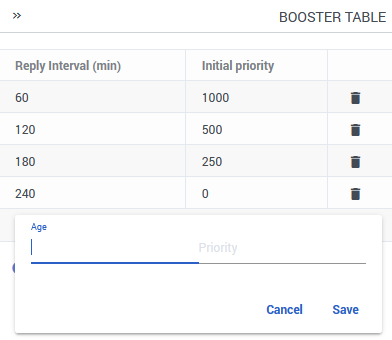
The priority booster table allows you to boost the initial priority of a customer’s reply email to an agent when the customer replies to the agent quickly. Initial priority is added to the priority value calculated from the prioritization schema.
For example, you can set a high initial priority of the reply email when a customer replies to an agent’s email within 20 minutes. You can set different boost priorities for different reply intervals.
To add boost priority for a reply interval,
- Open the collapsible Booster Table on the right-side of the prioritization schema.
- Click Add reply interval.
- Set a priority value for an email age and Click Save.


