
Deploy Designer
Contents
Learn how to deploy Designer into a private edition environment.
Assumptions
- The instructions on this page assume you are deploying the service in a service-specific namespace, named in accordance with the requirements on Creating namespaces. If you are using a single namespace for all private edition services, replace the namespace element in the commands on this page with the name of your single namespace or project.
- Similarly, the configuration and environment setup instructions assume you need to create namespace-specific (in other words, service-specific) secrets. If you are using a single namespace for all private edition services, you might not need to create separate secrets for each service, depending on your credentials management requirements. However, if you do create service-specific secrets in a single namespace, be sure to avoid naming conflicts.
Preparation
Before you deploy Designer and DAS using Helm charts, complete the following preparatory steps:
- Ensure the Helm client is installed.
- Set up an Ingress Controller, if not already done.
- Setup an NFS server, if not already done.
- Create Persistent Volumes - a sample YAML file is provided in the Designer manifest package.
- Download the Designer and DAS docker images and push to the local docker registry.
- Download the Designer package and extract to the current working directory.
- Configure Designer and DAS value overrides (designer-values.yaml and das-values.yaml); ensure the mandatory settings are configured. If the Blue-Green deployment process is used, Ingress settings are explained in the Blue-Green deployment section.
Set up Ingress
Given below are the requirements to set up an Ingress for the Designer UI:
- Cookie name - designer.session.
- Header requirements - client IP & redirect, passthrough.
- Session stickiness - enabled.
- Allowlisting - optional.
- TLS for ingress - optional (should be able to enable or disable TLS on the connection).
Set up Application Gateway (WAF) for Designer
Designer Ingress must be exposed to the internet using Application Gateway enabled with WAF.
When WAF is enabled, consider the following exception in the WAF rules for Designer:
- Designer sends a JSON payload with data, for example,
{profile . {} }. Sometimes, this is detected asOSFileAccessAttempt, which is a false positive detection. Disable this rule if you encounter a similar issue in your WAF setup.
Storage
Designer storage
Designer requires storage to store designer application workspaces. Designer storage is a shared file storage that will be used by the Designer and DAS services.- Capacity - 1 TiB
- Tier - Premium
- Baseline IO/s - 1424
- Burst IO/s - 4000
- Egress Rate - 121.4 MiBytes/s
- Ingress Rate - 81.0 MiBytes/s
DAS storage
If the Designer workspace is stored in a cloud storage system such as Azure Files, then the data must be synced to the DAS pods using the Designer-Sync service. In this case, DAS must use the StatefulSet deployment type. In the DAS StatefulSet pods, each pod must be attached to a premium SSD disk to store the workspace.
- Size - > 500GiB
- Max IOPS (Max IOPS w/ bursting) - 2,300 (3,500)
- Max throughput (Max throughput w/ bursting) - 150 MB/second (170 MB/second)
Permission considerations for Designer and DAS storage
NFS
For NFS RWX storages, the mount path should be owned by genesys:genesys, that is, 500:500 with 0777 permissions. It can be achieved by one of the below methods:
- From the NFS server, execute the chmod -R 777 <export_path> and chown -R 500:500 <export_path> commands to set the required permissions.
- Create a dummy Linux based pod that mounts the NFS storage. From the pod, execute the chmod -R 777 <mount_path> and chown -R 500:500 <mount_path> commands. This sets the required permissions. However, this method might require the Linux based pods to be run as privileged.
SMB / CIFS
For SMB / CIFS based RWX storages, for instance, Azure file share, the below mountOptions must be used in the StorageClass or the PersistentVolume template:
mountOptions- dir_mode=0777
- file_mode=0777
- uid=500
- gid=500
- mfsymlinks
- cache=strictSet up Secrets
Secrets are required by the Designer service to connect to GWS and Redis (if you are using them).
GWS Secrets:
- GWS provides a Client ID and secrets to all clients that can be connected. You can create Secrets for the Designer client as specified in the Set up secrets for Designer section below.
Redis password:
- If Designer is connected to Redis, you must provide the Redis password to Designer to authenticate the connection.
Set up Secrets for Designer
Use the designer.designerSecrets parameter in the values.yaml file and configure Secrets as follows:
designerSecrets:
  enabled: true
  secrets:
    DES_GWS_CLIENT_ID: xxxx
    DES_GWS_CLIENT_SECRET: xxxx
    DES_REDIS_PASSWORD: xxxxx
    DES_ELASTIC_USERNAME: "xxxx"
    DES_ELASTIC_PASSWORD: "xxxxx"
Set up Secrets for DAS
Use thedas.dasSecrets parameter in the values.yaml file and configure Secrets as follows:dasSecrets:
enabled: true
secrets:
DAS_ELASTIC_USERNAME : "xxxxx"
DAS_ELASTIC_PASSWORD : "xxxxx"
DAS_ELASTIC_USERNAME_1 : "xxxxx"
DAS_ELASTIC_PASSWORD_1 : "xxxxx"
DAS_ELASTIC_USERNAME_2 : "xxxxx"
DAS_ELASTIC_PASSWORD_2 : "xxxxx"Deployment strategies
Designer supports the following deployment and upgrade strategies:
- Rolling Update (default).
- Blue-Green (recommended).
DAS (Designer Application Server) supports the following deployment and upgrade strategies:
- Rolling Update (default).
- Blue-Green (recommended).
- Canary (must be used along with Blue-Green and is recommended in production).
For full descriptions of the deployment and upgrade strategies, see Upgrade strategies in the Setting up Genesys Multicloud CX Private Edition guide.
Rolling Update deployment
The rolling deployment is the standard default deployment to Kubernetes. It works slowly, one by one, replacing pods of the previous version of your application with pods of the new version without any cluster downtime. It is the default mechanism of upgrading for both Designer and DAS.
Designer
To perform the initial deployment for a rolling upgrade in Designer, use the Helm command given below. The values.yaml file can be created as required.
helm upgrade --install --namespace designer designer -f designer-values.yaml designer-100.0.112+xxxx.tgz --set designer.image.tag=9.0.1xx.xx.xx
The values.yaml overrides passed as an argument to the above Helm upgrade command:
designer.image.tag=9.0.1xx.xx.xx - This is the new Designer version to be installed, for example, 9.0.111.05.5.
If you are using the --set flag in the helm install to populate the designer.designerConfig.envs values, use --set-string, for example:
--set-string designer.designerConfig.envs.DES_ES_PORT="8080".
DAS
To perform the initial deployment for a rolling upgrade in DAS, use the Helm command given below. The values.yaml file can be created as required.
helm upgrade --install --namespace designer designer-das -f designer-das-values.yaml designer-das-100.0.112+xxxx.tgz --set das.image.tag=9.0.1xx.xx.xx
The values.yaml overrides passed as an argument to the above Helm upgrade command:
das.image.tag=9.0.1xx.xx.xx - This is the new DAS version to be installed, for example, 9.0.111.05.5.
If you are using the --set flag in the helm install to populate the das.dasConfig.envs values, values, use --set-string, for example:
--set-string das.dasConfig.envs.DAS_SERVICES_ELASTICSEARCH_PORT="9200".
Blue-Green deployment
Blue-Green deployment is a release management technique that reduces risk and minimizes downtime. It uses two production environments, known as Blue and Green or active and inactive, to provide reliable testing, continuous no-outage upgrades, and instant rollbacks. When a new release needs to be rolled out, an identical deployment of the application will be created using the Helm package and after testing is completed, the traffic is moved to the newly created deployment which becomes the active environment, and the old environment becomes inactive. This ensures that a fast rollback is possible by just changing route if a new issue is found with live traffic. The old inactive deployment is removed once the new active deployment becomes stable.
Service cutover is done by updating the Ingress rules. The diagram below shows the high-level approach to how traffic can be routed to Blue and Green deployments with Ingress rules.

Designer
Before you deploy Designer using the blue-green deployment strategy, complete the following preparatory steps:
- Create 3 hostnames as given below. The blue service hostname must contain the string blue. For example, designer.blue.example.com or designer-blue.example.com. The green service hostname must contain the string green. For example, designer.green.example.com or designer-green.example.com. The blue/green services can be accessed separately with the blue/green hostnames:
designer.example.com- For the production host URL, this is used for external access.designer.blue.example.com- For the blue service testing.designer.green.example.com- For the green service testing.
- Configure the hostnames in the designer-values.yaml file under
ingress. Annotations and paths can be modified as required.ingress: enabled: true annotations: {} paths: [/] hosts: - designer.example.com - designer.blue.example.com - designer.green.example.com
Deployment
The resources - ingress and persistent volume claims (PVC) - must be created initially before deploying the Designer service as these resources are shared between blue/green services and they are required to be created at the very beginning of the deployment. These resources are not required for subsequent upgrades. The required values are passed using the -- set flag in the following steps. Values can also be directly changed in the values.yaml file.
- Create Persistent Volume Claims required for the Designer service (assuming the volume service name is
designer-volume).
helm upgrade --install --namespace designer designer-volume -f designer-values.yaml designer-9.0.xx.tgz --set designer.deployment.strategy=blue-green-volume
The values.yaml overrides passed as an argument to the above Helm upgrade command:
designer.deployment.strategy=blue-green-volume- This denotes that the Helm install will create a persistent volume claim in the blue/green strategy. - Create Ingress rules for the Designer service (assuming the ingress service name will be designer-ingress):
helm upgrade --install --namespace designer designer-ingress -f designer-values.yaml designer-100.0.112+xxxx.tgz --set designer.deployment.strategy=blue-green-ingress --set designer.deployment.color=green
The values.yaml overrides passed as an argument to the above Helm upgrade command:
designer.deployment.strategy=blue-green-ingress- This denotes that the Helm install will create ingress rules for the Designer service.
designer.deployment.color=green- This denotes that the current production (active) color is green. - Deploy the Designer service color selected in step 2. In this case, green is selected and assuming the service name is
designer-green:
helm upgrade --install --namespace designer designer-green -f designer-values.yaml designer-100.0.112+xxxx.tgz --set designer.deployment.strategy=blue-green --set designer.image.tag=9.0.1xx.xx.xx --set designer.deployment.color=green
DAS
As with Designer, the Blue-Green strategy can be adopted for DAS as well. The Blue-Green architecture used for DAS is given below. Here, the cutover mechanism is controlled by Service, the Kubernetes manifest responsible for exposing the pods. The Ingress, when enabled, will point to the appropriate service based on the URL.

Deployment
The Ingress must be created initially before deploying the DAS service since it is shared between blue/green services and it is required to be created at the very beginning of the deployment. The Ingress is not required for subsequent upgrades. The required values are passed using the -- set flag in the following steps. Values can also be directly changed in the values.yaml file.
- Deploy initial DAS pods and other resources by choosing an active color, in this example, green. Use the below command to create a
designer-das-greenservice:
helm upgrade --install --namespace designer designer-das-green -f designer-das-values.yaml designer-das-100.0.106+xxxx.tgz --set das.deployment.strategy=blue-green --set das.image.tag=9.0.1xx.xx.xx --set das.deployment.color=green
The values.yaml overrides passed as an argument to the above Helm upgrade command:
das.deployment.strategy=blue-green- This denotes that the DAS service will be installed using the blue-green deployment strategy.
das.image.tag=9.0.1xx.xx.xx- This denotes the DAS version to be installed, for example,9.0.111.04.4.
das.deployment.color=green- This denotes that the green color service is installed. - Once the initial deployment is done, the pods have to be exposed to the
designer-dasservice. Execute the following command to create thedesigner-dasservice:
helm upgrade --install --namespace designer designer-das designer-das-100.0.106+xxx.tgz -f designer-das-values.yaml --set das.deployment.strategy=blue-green-service --set das.deployment.color=green
The values.yaml overrides passed as an argument to the above helm upgrade
das.deployment.strategy=blue-green-service- This denotes that the designer-das service will be installed and exposed to the active color pods.
das.deployment.color=green- This denotes that the designer-das service will point to green pods.
NodePort Service
The designer-das-green release creates a service called designer-das-green and the designer-das-blue release creates a service called designer-das-blue. If you are using NodePort services, ensure that the value of designer.service.nodePort is not the same for both the releases. In other words, you should assign dedicated node ports for the releases. The default value for designer.service.nodePort is 30280. If this was applied to designer-das-green, use a different value for designer-das-blue, for example, 30281. Use the below helm command to achieve this:
helm upgrade --install --namespace designer designer-das designer-das-100.0.106+xxx.tgz -f designer-das-values.yaml --set das.deployment.strategy=blue-green-service --set das.deployment.color=green --set das.service.nodePort=30281
Canary
Canary is optional and is only used along with Blue-Green. It is recommended in production. Canary pods are generally used to test new versions of images with live traffic. When you are installing the Designer and DAS services for the first time, you will not use Canary pods. Only when upgrading the services after initial deployment, you will use Canary pods for testing the new versions.
Deployment
- Identify the current production color by checking the
designer-dasservice selector labels (kubectl describe service designer-das). Green is the production color in the below example as the selector label iscolor=green.

- To deploy canary pods, the
das.deployment.strategyvalue must be set tocanaryin the designer-das-values.yaml file or using the-- setflag as shown in the command below:
helm upgrade --install --namespace designer designer-das-canary -f das-values.yaml designer-das-100.0.106+xxxx.tgz --set das.deployment.strategy=canary --set das.image.tag=9.0.1xx.xx.xx --set das.deployment.color=green
The values.yaml overrides passed as an argument to the above Helm upgrade command:
das.deployment.strategy=canary- This denotes that the Helm install will create canary pods.
das.deployment.color=green- This denotes that the current production (active) color is green.ImportantTo make sure Canary pods receive live traffic, they have to be exposed to thedesigner-dasservice by settingdas.deployment.color=<active_color>, which is obtained from step 1. - Once canary pods are up and running, ensure that the designer-das service points to the canary pods using the
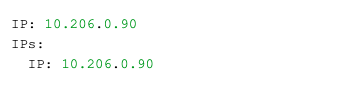
kubectl describe svc designer-dascommand.

The IP address present in the Endpoints must match the IP address of the canary pod. The canary pod's IP address is obtained using thekubectl describe pod <canary_pod_name>command.


Cleaning up
After completing canary testing, the canary pods must be cleaned up.
The das.deployment.replicaCount must be made zero and the release is upgraded. It can be changed in the designer-das-values.yaml file or through the --set flag as follows:
helm upgrade --install --namespace designer designer-das-canary -f das-values.yaml designer-das-100.0.106+xxxx.tgz --set das.deployment.strategy=canary --set das.image.tag=9.0.1xx.xx.xx --set das.deployment.color=blue --set das.deployment.replicaCount=0
Validations and checks
Here are some common validations and checks that can be performed to know if the deployment was successful.
- Check if the application pods are in running state by using the
kubectl get podscommand.
- Try to connect to the Designer or DAS URL as per the ingress rules from your browser. You must be able to access the Designer and DAS webpages.
Post deployment procedures
Updating the flowsettings file
Post deployment, the flowsettings.json file can be modified through a Helm install as follows:
- Extract the Designer Helm Chart and find the flowsettings.yaml file under the Designer Chart > Config folder.
- Modify the necessary settings (refer to the Post deployment configuration settings reference table for the different settings and their allowed values).
- Execute the below Helm upgrade command on the non-production color service. It can be done as part of the Designer upgrade by passing the flowsettings.yaml file using the
--valuesflag. In this case, a new Designer version can be used for the upgrade. If it is only a flowsettings.json update, the same Designer version is used.
helm upgrade --install --namespace designer designer-blue -f designer-values.yaml -f flowsettings.yaml designer-9.0.xx.tgz --set designer.deployment.strategy=blue-green --set designer.image.tag=9.0.1xx.xx.xx --set designer.deployment.color=blue - Once testing is completed on the non-production service, perform the cutover step as mentioned in the Cutover section (Designer Blue-Green deployment). After cutover, the production service will contain the updated settings. The non-active color Designer must also be updated with the updated settings after the cutover.