
Setting up an OpenShift Container Registry
Contents
Instructions to set up an OpenShift Container Registry in your environment.
This page describes only the procedure to set up an OpenShift Container Registry with generic examples. You still have to manually download the artifacts of your Genesys Multicloud CX service from the JFrog Artifactory Edge repository.
What is OpenShift Container Registry?
OpenShift Container Registry is an in-built container image registry that is available by default as an integrated solution with OpenShift Container Platform. You can configure OpenShift Container Registry to maintain the source images of all Genesys Multicloud CX services running in your clusters.
To get started with OpenShift Container Registry, refer to the OpenShift documentation.
How to set up an OpenShift Container Registry in Genesys Multicloud CX private edition environment?
You can set up an OpenShift Container Registry by exposing its default route and connecting the registry.
Exposing OpenShift Container Registry
The first step in setting up an OpenShift Container Registry is to expose the registry through the default or customized route. You can do so by running the following command.
oc patch configs.imageregistry.operator.openshift.io/cluster --patch '{"spec":{"defaultRoute":true}}' --type=merge
Once you run the above command, you can find the default route getting updated in the Host field. The default route is the location of the image registry which you can connect to perform image related operations such as pull, push, etc.
See an example screenshot showing default route in the Host field for openshift-image-registry project below.
Additional information on 'Exposing the registry' is available at OpenShift documentation.
Connecting the registry
Once you expose the registry, you can connect to it by using the docker login command given below by providing the Host value.
docker login -u << Username >> << Default route host >>
Running the above command prompts for password. Provide the password details and proceed further.
Logging into Docker using the example registry and its results are shown in the following screenshot.
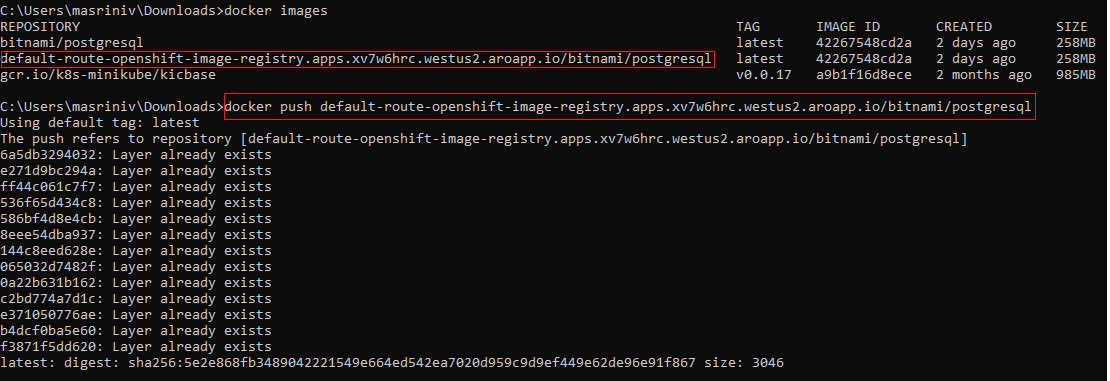
How to push an image into the registry?
docker push command.- Tagging - the first step is to tag the image with appropriate version name.
docker tag << local_image >>:<< version >> << default_route >>/<< ocp_project_name >>/<< image_name >>:<< version >> - Pushing - the second step is to push the tagged image into the registry.
docker push << default_route >>/<< ocp_project_name >>/<< image_name >>:<< version >>


You can see the image pushed into the registry on the Image Streams tab of the corresponding project. An example pushed image is shown in the following screenshot.
How to pull images from the registry?
Pulling images from registry during Helm installations
You can pull the image from the OpenShift Container Registry during Helm installations. You can do so by overriding the corresponding Helm parameter with the internal registry details. The internal registry value is highlighted in the example screenshot given below.

Pulling images across projects
You can refer the image created under one project across different projects by creating policies. https://access.redhat.com/documentation/en-us/openshift_container_platform/4.1/html/images/managing-images#images-allow-pods-to-reference-images-across-projects_using-image-pull-secrets.
The command to create policy is as follows:
oc policy add-role-to-user system:image-puller system:serviceaccount:<<current-project>>:default --namespace=<<project-from-which-you-want-to-pull>>
oc describe pod in the command line.