How to configure the Gplus Adapter
From Genesys Documentation
This topic is part of the manual Gplus Adapter for ServiceNow Administrator's Guide for version Current of Gplus Adapter for ServiceNow.
Contents
This section explains how to set up the Gplus Adapter for ServiceNow.
Deploy the Connector System Update Set in ServiceNow
To install the System Update Set, you should perform the following steps:
- Elevate your user's roles as described in the procedure to Deploy the Adapter Web Resources in ServiceNow.
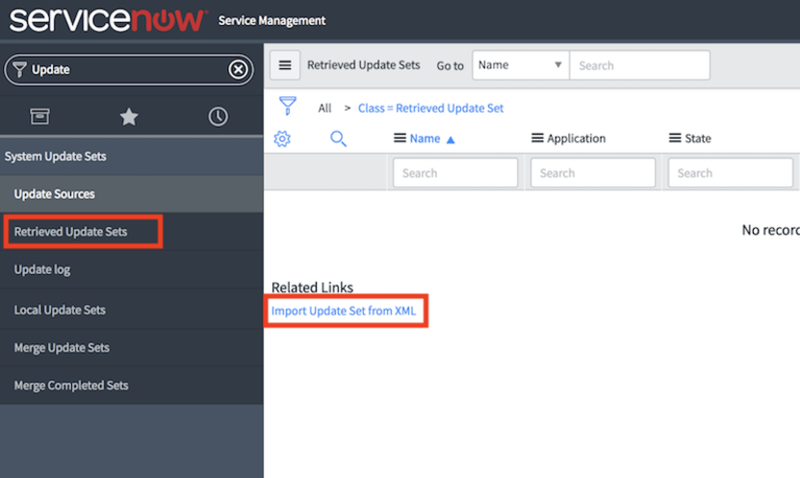
- Type "update" in the search area and expand the Retrieved Updates Sets menu, then click Import Update Set from XML.
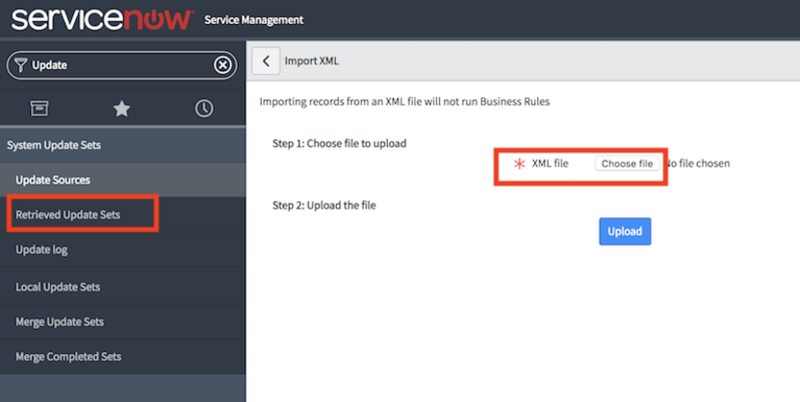
- Choose and upload the XML file provided by Genesys.
- After importing the file, click Preview Update Set and then Commit Update Set.
At this stage, the CTI-Connector-ServiceNow application is deployed and visible after clicking the System Applications menu and then Application.
Configure the OpenFrame page in ServiceNow
Follow this procedure to configure the OpenFrame page in ServiceNow:
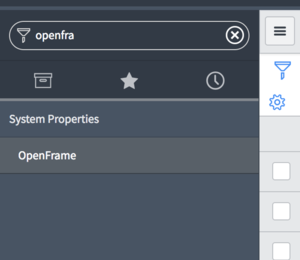
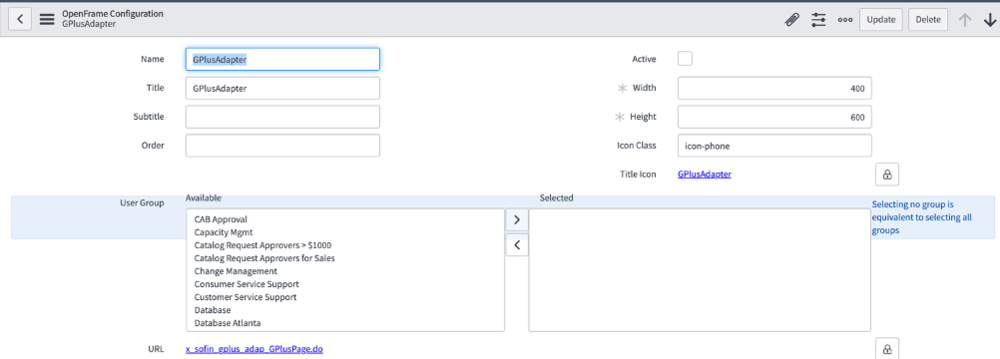
- Enter the OpenFrame menu.
Important
If the OpenFrame menu is not visible, it means the Customer Service plugin is missing. Before performing the following steps, the OpenFrame plugin must be installed. To enable the OpenFrame menu, check Enable OpenFrame menu in ServiceNow.- Fill the URL field with the following one: x_sofin_gplus_adap_GPlusPage.do.
- Add the following parameters in the configuration tab:
{"instance": "https://localhost:7777", "branding": "genesys_logo.png", "language": "en-US", "screenpopnew": false, "defaultEntity": "sn_customerservice_case", "defaultContact": "customer_contact"}| Key | Value | Description |
|---|---|---|
| Screenpopnew | default: false | Search for associated Cases or Incidents for every new interaction:
|
| defaultEntity | possible values:
|
|
| defaultContact | default: customer_contact
possible values:
|
|
- Assign the "sn_openframe_user" role to any user or group that will use the Gplus Adapter.
Configure the Gplus Adapter CSS images
Follow this procedure to configure the CSS images for the Gplus Adapter.
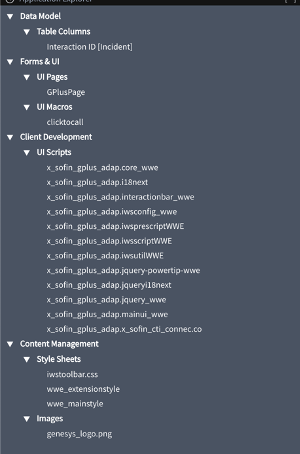
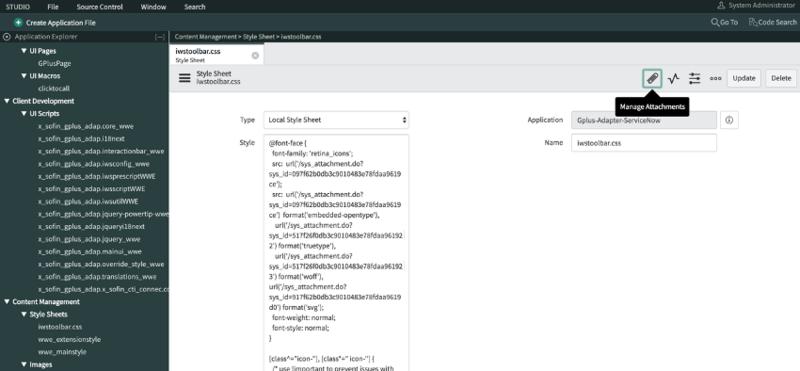
- Open ServiceNow Studio.
- Select the Gplus-Adapter-ServiceNow application.
- Choose the required file in the left-hand panel.
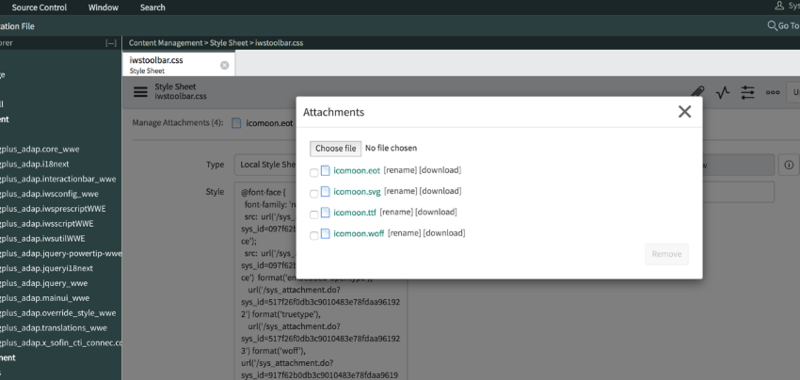
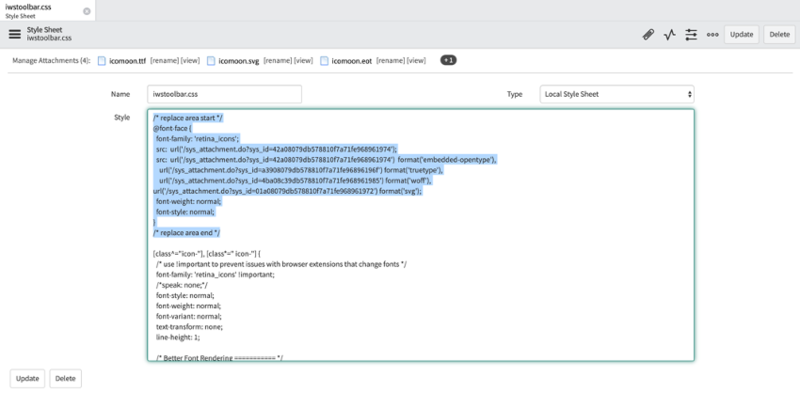
- Select iwstoolbar.css and click Manage Attachment.
- Choose the files in the Attachments folder provided with the installation package as shown in the image below.
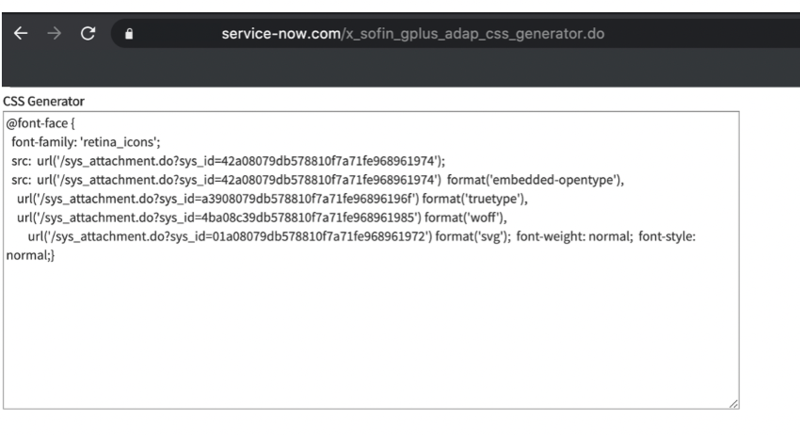
- To retrieve the CSS code snippet, rename the ServiceNow instance adding "/x_sofin_gplus_adap_css_generator.do" in its end (https://<servicenowinstance>.service-now.com/x_sofin_gplus_adap_css_generator.do).
- Replace the code into the iwstoolbar.css style under the /* replace area start */ tag in ServiceNow Studio.
- Click Update to save the configuration.
Relevant links
Comments or questions about this documentation? Contact us for support!

