How to configure the Gplus Adapter
Contents
Procedure to configure the Adapter with ServiceNow.
If you have already installed the Gplus Adapter , the following procedure explains how to import the Gplus Adapter in ServiceNow.
Deploy the Adapter System Update Set in ServiceNow
To install the System Update Set, follow this procedure:
- Elevate your user’s roles as described in the procedure used to deploy the Adapter Web Resources in ServiceNow.
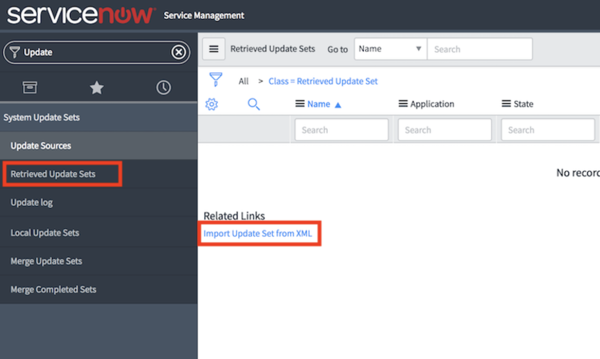
- Search for Update Sets and go to Retrieved Update Sets.
- Click Import Update Set from XML.
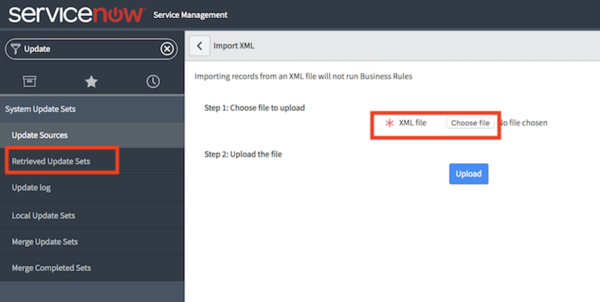
- Choose and upload the XML file provided (Gplus_Adapter_ServiceNow_<VERSION>.xml).
- Once it is uploaded, open it and click Preview Update Set in the upper right to deploy the environment changes.
- Click Commit Update Set.
You have imported the solution into ServiceNow. Check it searching for the Studio section and clicking it. It will open in a new tab and display the Gplus-Adapter-ServiceNow under the available applications.
Configure the OpenFrame page in ServiceNow
Before proceeding and checking the instance, you need to fully enable the solution by creating the configuration that will load it for any desired user.
- Search for OpenFrame in the search area and choose Configurations.
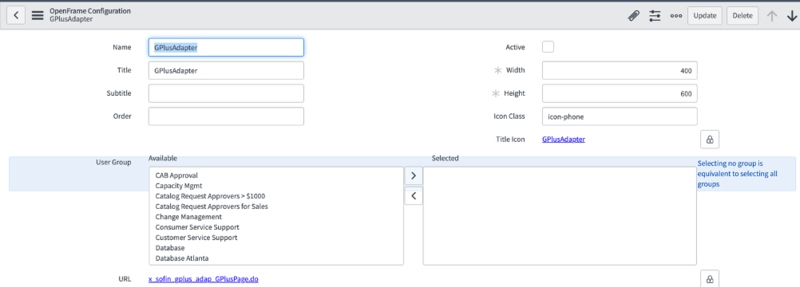
- Click New and fill all required fields.
- Fill in the following URL in the dedicated field: x_inics_gplus_adap_gpluspage.do
- Provide the following parameters in the configuration tab:
{"instance": "https://<ServiceNow Instance>", "branding": "genesys_logo.png", "language": "en-US", "screenpopnew": false, "defaultEntity": "incident", "defaultContact": "sys_user" , "customContactField": "<contact table field to be searched>", "customContactValue": "<genesys attach data key name to be used to search the contact>"}
| Key | Value | Description |
|---|---|---|
| instance | default: none | The full Genesys Engage Cloud GWS toolkit url including full path to api.js.
AWS: https://<ServiceNow Instance>/ui/wwe/api.js Azure: https://<ServiceNow Instance>/api.js |
| screenpopnew | default: false | Search for associated Cases or Incidents for every new interaction:
|
| defaultEntity | default: incident
possible values:
|
|
| defaultContact | default: sys_user
possible values:
|
|
| customContactField | default: none | This parameter enable the customer search based on specific contact table fields.
It can be a custom parameter or a standard parameter. The value must match the contact table column name (technical name used for identification) for example the employee_number |
| customContactValue | default: none | This parameter take effect when the previous customContactField is configured.
It must contain the Genesys attached data key name that stores the information to perform the custom search. for example EMP_NUMBER must contain the employee number collected by the IVR before routing the interaction to the Agent using the Gplus. |
To save the configuration, right-click the upper bar and select Save from the drop-down menu.
Now refresh the page: if a telephone icon appears in the upper right, you are all set. Click it for the OpenFrame area to appear.
While the system administrator has all required permissions, users do not. Therefore, you have to assign the OpenFrame user role (sn_openframe_user) to any user or group that will work with the Gplus Adapter for ServiceNow.
- Click the Role module in the User Administration application menu.
- Select New to create a new role.
- Fill the Name field with sn_openframe_user and optionally enter a description.
- Click Submit and the role is created.
- Choose the Contains Role tab and then Edit.
- Assign it to the desired agent or group of agents and click Save.
This will grant the selected users or groups to work with the Adapter.
Configure the Gplus Adapter CSS images
The following procedure helps you configuring the CSS images for the Gplus Adapter:
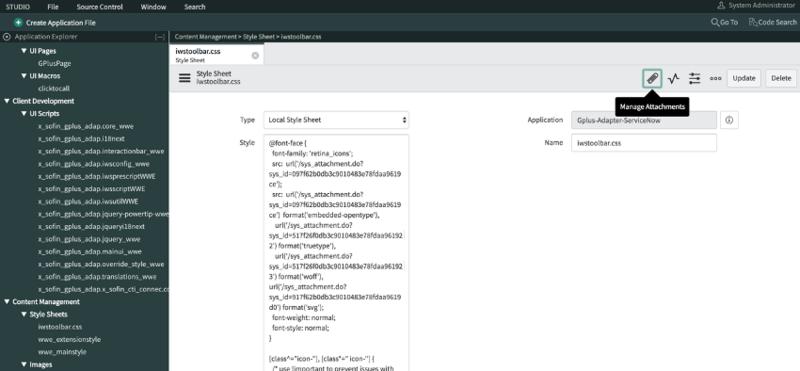
- Open the ServiceNow Studio.
- Select the Gplus-Adapter-ServiceNow application.
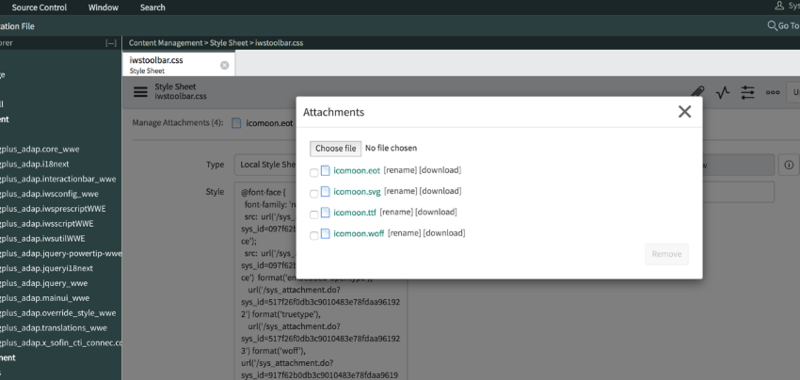
- Pick iwstoolbar.css in the left-hand panel and click Manage Attachment in the upper right.
- Choose all files in the Attachments folder provided with the installation package as shown in the image below, then close the pop-up window.
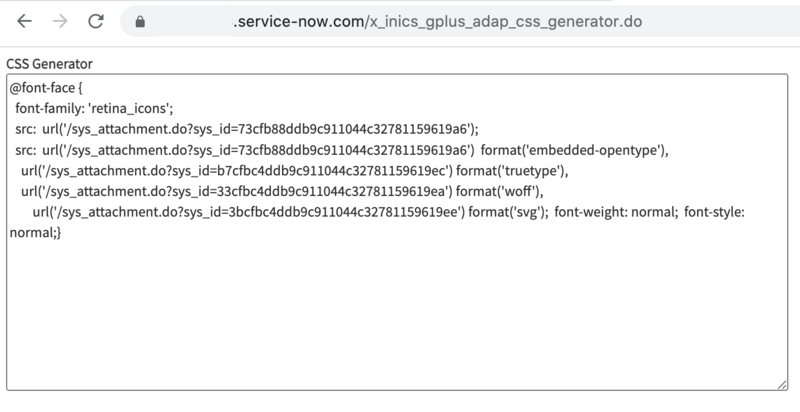
- In the URL field, provide the ServiceNow instance adding "/x_inics_gplus_adap_css_generator.do" in its end (https://<ServiceNow Instance>.service-now.com/x_inics_adap_css_generator.do) to retrieve the CSS code snippet.
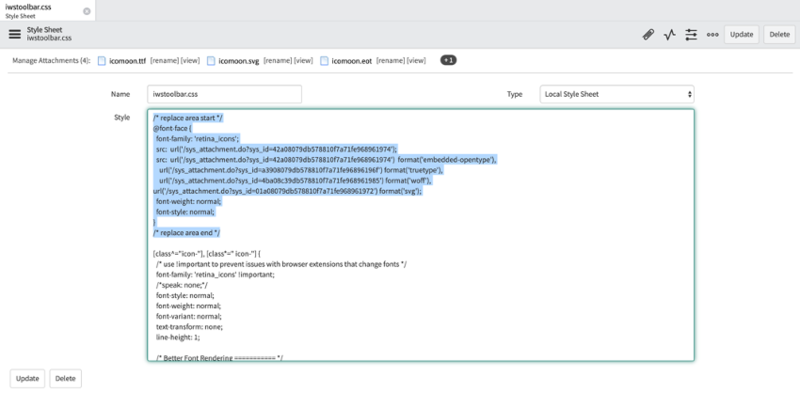
- In the ServiceNow Studio, replace the code into the iwstoolbar.css style under the /* replace area start */ tag.
- Click Update to save the configuration.

