Difference between revisions of "WID/Current/SDK/WebChat-combined"
(Published) |
|||
| (19 intermediate revisions by 5 users not shown) | |||
| Line 5: | Line 5: | ||
|Context=Learn how to enable live chats between customers and agents. | |Context=Learn how to enable live chats between customers and agents. | ||
|ComingSoon=No | |ComingSoon=No | ||
| − | |Platform= | + | |Platform=GenesysEngage-cloud |
| − | | | + | |Role=Developer |
|Section={{Section | |Section={{Section | ||
| + | |alignment=Vertical | ||
| + | |structuredtext={{Video|id=545672854}}<br /> | ||
| + | |Status=No | ||
| + | }}{{Section | ||
|sectionHeading=Overview | |sectionHeading=Overview | ||
| − | |anchor= | + | |anchor=overview |
|alignment=Horizontal | |alignment=Horizontal | ||
|Media=Image | |Media=Image | ||
|image=WebChat-Main-new.PNG | |image=WebChat-Main-new.PNG | ||
| − | |structuredtext=The WebChat Widget allows a customer to start a live chat with a customer service agent. The UI appears within the page and follows the customer as they traverse your website | + | |AltText=Example of the WebChat Widget in dark theme |
| + | |structuredtext=The WebChat Widget allows a customer to start a live chat with a customer service agent. The UI appears within the page and follows the customer as they traverse your website. Other features include minimize/maximize, auto-reconnect, and a built-in invite feature. | ||
===Usage=== | ===Usage=== | ||
You can launch WebChat manually by using the following methods: | You can launch WebChat manually by using the following methods: | ||
*Call the '''WebChat.open''' {{Link-SomewhereInThisVersion|manual=SDK|topic=WebChat-combined|anchor=commands|display text=command}} | *Call the '''WebChat.open''' {{Link-SomewhereInThisVersion|manual=SDK|topic=WebChat-combined|anchor=commands|display text=command}} | ||
| − | *Configure {{Link-SomewhereInThisVersion|manual=SDK|topic=ChannelSelector-combined | + | *Configure {{Link-SomewhereInThisVersion|manual=SDK|topic=ChannelSelector-combined}} to show WebChat as a channel |
*Enable the built-in launcher button for WebChat that appears on the right side of the screen | *Enable the built-in launcher button for WebChat that appears on the right side of the screen | ||
| − | *Create your own custom button or link to open WebChat (using the '''WebChat.open''' command) | + | *Create your own custom button or link to open WebChat (using the '''WebChat.open''' {{Link-SomewhereInThisVersion|manual=SDK|topic=WebChat-combined|anchor=commands|display text=command}}) |
===Customization=== | ===Customization=== | ||
| − | You can customize and {{Link- | + | You can customize and {{Link-AnywhereElse|product=WID|version=Current|manual=Developer|topic=GWCInternat|display text=localize}} all of the static text shown in the WebChat Widget by adding entries to your {{Link-SomewhereInThisVersion|manual=SDK|topic=WebChat-combined|anchor=config|display text=configuration}} and {{Link-SomewhereInThisVersion|manual=SDK|topic=WebChat-combined|anchor=localize|display text=localization}} options. |
| − | WebChat supports | + | WebChat supports themes. You can create and register your own themes for Genesys Widgets. |
<br /> | <br /> | ||
|structuredtextwide====Namespace=== | |structuredtextwide====Namespace=== | ||
| − | The WebChat plugin has the following namespaces tied | + | The WebChat plugin has the following namespaces tied to each of the following types: |
{{{!}} class="wikitable" style="width: auto;" | {{{!}} class="wikitable" style="width: auto;" | ||
{{!}}- | {{!}}- | ||
| Line 41: | Line 46: | ||
{{!}}{{!}}webchat | {{!}}{{!}}webchat | ||
{{!}}- | {{!}}- | ||
| − | {{!}}{{!}}CXBus—{{Link-SomewhereInThisVersion|manual=SDK|topic=WebChat-combined|anchor=commands|display text=API | + | {{!}}{{!}}CXBus—{{Link-SomewhereInThisVersion|manual=SDK|topic=WebChat-combined|anchor=commands|display text=API commands}} & {{Link-SomewhereInThisVersion|manual=SDK|topic=WebChat-combined|anchor=events|display text=API events}} |
{{!}}{{!}}WebChat | {{!}}{{!}}WebChat | ||
{{!}}- | {{!}}- | ||
| Line 48: | Line 53: | ||
{{!}}} | {{!}}} | ||
===Mobile support=== | ===Mobile support=== | ||
| − | WebChat supports both desktop and mobile devices. Like all Genesys Widgets, there are two main modes: Desktop & Mobile. Desktop is employed for monitors, laptops, and tablets. Mobile is employed for smartphones. When a smartphone is detected, WebChat switches to special | + | WebChat supports both desktop and mobile devices. Like all Genesys Widgets, there are two main modes: Desktop & Mobile. Desktop is employed for monitors, laptops, and tablets. Mobile is employed for smartphones. When a smartphone is detected, WebChat switches to special full-screen templates that are optimized for both portrait and landscape orientations. |
Switching between desktop and mobile mode is done automatically by default. You may configure Genesys Widgets to switch between Desktop and Mobile mode manually if necessary. | Switching between desktop and mobile mode is done automatically by default. You may configure Genesys Widgets to switch between Desktop and Mobile mode manually if necessary. | ||
| Line 54: | Line 59: | ||
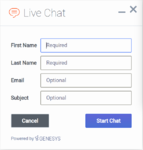
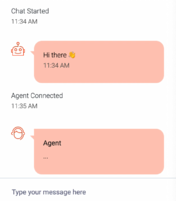
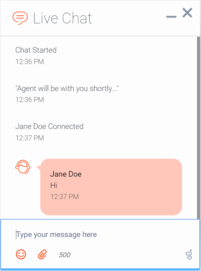
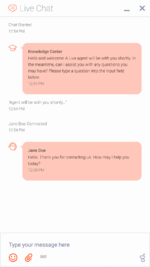
'''Dark theme''' | '''Dark theme''' | ||
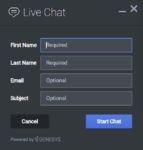
| − | [[File:WebChat_Form_Desktop_Dark.png|150x150px]] | + | [[File:WebChat_Form_Desktop_Dark.png|150x150px|alt=The WebChat widget in dark theme in desktop view]] |
| − | [[File:WebChat_Form_Portrait_Dark.png|150x150px]] | + | [[File:WebChat_Form_Portrait_Dark.png|150x150px|alt=The WebChat widget in dark theme in mobile portrait view]] |
| − | [[File:WebChat_Form_Landscape_Dark.png|150x150px]] | + | [[File:WebChat_Form_Landscape_Dark.png|150x150px|alt=The WebChat widget in dark theme in mobile landscape view]] |
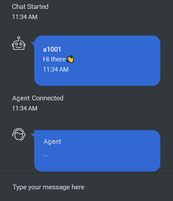
| − | [[File:WebChat_Transcript_Desktop_Dark-without-cobrowse.PNG|201x201px]] | + | [[File:Widgets_WebChat_Typing_Indicator_Dark_0721.png|201x201px|alt=The WebChat widget in dark theme with initial chat bot interaction]] |
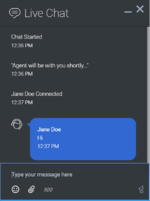
| − | [[File:WebChat Transcript Portrait Dark-without-cobrowse.png|267x267px]] | + | [[File:WebChat_Transcript_Desktop_Dark-without-cobrowse.PNG|201x201px|alt=The WebChat widget in dark theme with agent interaction]] |
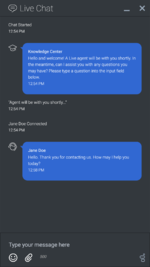
| − | [[File:WebChat Transcript Landscape Dark without-cobrowse.png|150x150px]] | + | [[File:WebChat Transcript Portrait Dark-without-cobrowse.png|267x267px|alt=The WebChat widget in dark theme with Knowledge Center interaction]] |
| + | [[File:WebChat Transcript Landscape Dark without-cobrowse.png|150x150px|alt=The WebChat widget in dark theme displaying the chat field with emojis and attachments options]] | ||
'''Light theme''' | '''Light theme''' | ||
| − | [[File:WebChat_Form_Desktop_Light.png||150x150px]] | + | [[File:WebChat_Form_Desktop_Light.png||150x150px|alt=The WebChat widget in light theme in desktop view]] |
| − | [[File:WebChat_Form_Portrait_light.png|150x150px]] | + | [[File:WebChat_Form_Portrait_light.png|150x150px|alt=The WebChat widget in light theme in mobile portrait view]] |
| − | [[File:WebChat_Form_Landscape_light.png|150x150px]] | + | [[File:WebChat_Form_Landscape_light.png|150x150px|alt=The WebChat widget in light theme in mobile landscape view]] |
| − | [[File:WebChat_Transcript_Desktop_light-without-cobrowse.PNG| | + | [[File:Widgets_WebChat_Typing_Indicator_0721.png|201x201px|alt=The WebChat widget in light theme with initial chat bot interaction]] |
| − | [[File:WebChat Transcript Portrait Light without cobrowse.png|267x267px]] | + | [[File:WebChat_Transcript_Desktop_light-without-cobrowse.PNG|201x2012px|alt=The WebChat widget in light theme with agent interaction]] |
| − | [[File:WebChat Transcript Landscape Light without cobrowse.png|150x150px]] | + | [[File:WebChat Transcript Portrait Light without cobrowse.png|267x267px|alt=The WebChat widget in light theme with Knowledge Center interaction]] |
| − | | | + | [[File:WebChat Transcript Landscape Light without cobrowse.png|150x150px|alt=The WebChat widget in light theme displaying the chat field with emojis and attachments options]] |
| + | |||
| + | {{NoteFormat|The dark theme is active by default. You may also change colors/themes for widgets by following the instructions on the {{Link-SomewhereInThisVersion|manual=Developer|topic=GWCCustomize|display text=Customize appearance}} page.|}}<br /> | ||
|Status=No | |Status=No | ||
}}{{Section | }}{{Section | ||
| Line 75: | Line 83: | ||
|anchor=config | |anchor=config | ||
|alignment=Vertical | |alignment=Vertical | ||
| − | | | + | |structuredtext={{Video|id=441169402}} |
| − | | | + | |
| − | + | WebChat and WebChatService share the '''_genesys.widgets.webchat''' configuration namespace. WebChat has UI options while WebChatService has connection options. | |
{{AnchorDiv|example}} | {{AnchorDiv|example}} | ||
===Example=== | ===Example=== | ||
| Line 103: | Line 111: | ||
enabled: true, | enabled: true, | ||
| − | template: "< | + | template: '<div class="cx-widget cx-webchat-chat-button cx-side-button" role="button" |
| + | tabindex="0" data-message="ChatButton" data-gcb-service-node="true"><span class="cx-icon" data-icon="chat"> | ||
| + | </span><span class="i18n cx-chat-button-label" data-message="ChatButton"></span></div>', | ||
effect: 'fade', | effect: 'fade', | ||
openDelay: 1000, | openDelay: 1000, | ||
| Line 116: | Line 126: | ||
ariaCharRemainingIntervals:[75, 25, 10] | ariaCharRemainingIntervals:[75, 25, 10] | ||
}; | }; | ||
| − | </pre> | + | </pre>{{AnchorDiv|options}} |
| − | |||
===Options=== | ===Options=== | ||
| Line 187: | Line 196: | ||
{{!}}{{!}}autoInvite.enabled | {{!}}{{!}}autoInvite.enabled | ||
{{!}}{{!}}boolean | {{!}}{{!}}boolean | ||
| − | {{!}}{{!}}Enable/disable auto-invite feature. Automatically invites user to chat after user idles on page for preset time. | + | {{!}}{{!}}Enable/disable auto-invite feature. Automatically invites user to chat after user idles on page for preset time.{{NoteFormat|When running Widgets in lazy load mode, this option requires that you {{Link-SomewhereInThisVersion|manual=SDK|topic=App-combined|anchor=MP|display text=pre-load}} the WebChat plugin. |1}} |
| − | |||
| − | |||
| − | {{NoteFormat|When running Widgets in lazy load mode, this option requires that you {{Link-SomewhereInThisVersion|manual=SDK|topic=App-combined|anchor= | ||
{{!}}{{!}}false | {{!}}{{!}}false | ||
{{!}}{{!}}n/a | {{!}}{{!}}n/a | ||
| Line 211: | Line 217: | ||
{{!}}{{!}}chatButton.enabled | {{!}}{{!}}chatButton.enabled | ||
{{!}}{{!}}boolean | {{!}}{{!}}boolean | ||
| − | {{!}}{{!}}Enable/disable chat button on screen. | + | {{!}}{{!}}Enable/disable chat button on screen.{{NoteFormat|When running Widgets in lazy load mode, this option requires that you {{Link-SomewhereInThisVersion|manual=SDK|topic=App-combined|anchor=MP|display text=pre-load}} the WebChat plugin. |1}} |
| − | |||
| − | |||
| − | {{NoteFormat|When running Widgets in lazy load mode, this option requires that you {{Link-SomewhereInThisVersion|manual=SDK|topic=App-combined|anchor= | ||
{{!}}{{!}}false | {{!}}{{!}}false | ||
{{!}}{{!}}n/a | {{!}}{{!}}n/a | ||
| Line 275: | Line 278: | ||
{{!}}{{!}}9.0.016.11 | {{!}}{{!}}9.0.016.11 | ||
{{!}}} | {{!}}} | ||
| − | |||
| − | |||
|Status=No | |Status=No | ||
}}{{Section | }}{{Section | ||
| Line 282: | Line 283: | ||
|anchor=localize | |anchor=localize | ||
|alignment=Vertical | |alignment=Vertical | ||
| − | |||
| − | |||
|structuredtext=You can define string key names and values to match the system messages that are received from the chat server. If a customer system message is received as '''SYS001''' in the message body, Webchat checks to determine if any keys match in the language pack, and then replaces the message body accordingly. '''SYS001''' is an example format. There are no format restrictions on custom message keys. The purpose of this feature is to allow localization for the User Interface and Server to be kept in the same file. | |structuredtext=You can define string key names and values to match the system messages that are received from the chat server. If a customer system message is received as '''SYS001''' in the message body, Webchat checks to determine if any keys match in the language pack, and then replaces the message body accordingly. '''SYS001''' is an example format. There are no format restrictions on custom message keys. The purpose of this feature is to allow localization for the User Interface and Server to be kept in the same file. | ||
| Line 294: | Line 293: | ||
Customers can define their own error messages in the '''Errors''' section found in the above Webchat Localization. If no error messages are defined, default error messages are used. | Customers can define their own error messages in the '''Errors''' section found in the above Webchat Localization. If no error messages are defined, default error messages are used. | ||
| − | {{NoteFormat|For information on how to set up localization, refer to | + | {{NoteFormat|For information on how to set up localization, refer to {{Link-AnywhereElse|product=WID|version=Current|manual=Developer|topic=GWCInternat|display text=Localize widgets and services}}.|1}} |
===Usage=== | ===Usage=== | ||
| Line 351: | Line 350: | ||
"AriaChatFormSubmit": "Start Chat", | "AriaChatFormSubmit": "Start Chat", | ||
"ChatFormCancel": "Cancel", | "ChatFormCancel": "Cancel", | ||
| − | "AriaChatFormCancel": "Cancel | + | "AriaChatFormCancel": "Cancel", |
"ChatFormClose": "Close", | "ChatFormClose": "Close", | ||
"ChatInputPlaceholder": "Type your message here", | "ChatInputPlaceholder": "Type your message here", | ||
| Line 360: | Line 359: | ||
"ChatEndConfirm": "End chat", | "ChatEndConfirm": "End chat", | ||
"AriaChatEndCancel": "Cancel", | "AriaChatEndCancel": "Cancel", | ||
| − | "AriaChatEndConfirm": "End", | + | "AriaChatEndConfirm": "End chat", |
"ConfirmCloseWindow": "Are you sure you want to close chat?", | "ConfirmCloseWindow": "Are you sure you want to close chat?", | ||
"ConfirmCloseCancel": "Cancel", | "ConfirmCloseCancel": "Cancel", | ||
| Line 369: | Line 368: | ||
"ActionsEmail": "Email transcript", | "ActionsEmail": "Email transcript", | ||
"ActionsPrint": "Print transcript", | "ActionsPrint": "Print transcript", | ||
| − | |||
| − | |||
"ActionsSendFile": "Attach Files", | "ActionsSendFile": "Attach Files", | ||
"AriaActionsSendFileTitle": "Opens a file upload dialog", | "AriaActionsSendFileTitle": "Opens a file upload dialog", | ||
"ActionsEmoji": "Send Emoji", | "ActionsEmoji": "Send Emoji", | ||
| − | |||
"ActionsVideo": "Invite to Video Chat", | "ActionsVideo": "Invite to Video Chat", | ||
"ActionsTransfer": "Transfer", | "ActionsTransfer": "Transfer", | ||
| Line 384: | Line 380: | ||
"InviteReject": "No thanks", | "InviteReject": "No thanks", | ||
"InviteAccept": "Start chat", | "InviteAccept": "Start chat", | ||
| − | "AriaInviteAccept": " | + | "AriaInviteAccept": "Start chat", |
| − | "AriaInviteReject": " | + | "AriaInviteReject": "No thanks", |
"ChatError": "There was a problem starting the chat session. Please retry.", | "ChatError": "There was a problem starting the chat session. Please retry.", | ||
"ChatErrorButton": "OK", | "ChatErrorButton": "OK", | ||
| Line 394: | Line 390: | ||
"AriaChatErrorDefaultButton": "No", | "AriaChatErrorDefaultButton": "No", | ||
"DownloadButton": "Download", | "DownloadButton": "Download", | ||
| − | "AriaDownloadButton": "Download | + | "AriaDownloadButton": "Download", |
"FileSent": "has sent:", | "FileSent": "has sent:", | ||
"FileTransferRetry": "Retry", | "FileTransferRetry": "Retry", | ||
| − | "AriaFileTransferRetry": "Retry | + | "AriaFileTransferRetry": "Retry", |
"FileTransferError": "OK", | "FileTransferError": "OK", | ||
"AriaFileTransferError": "OK", | "AriaFileTransferError": "OK", | ||
"FileTransferCancel": "Cancel", | "FileTransferCancel": "Cancel", | ||
| − | "AriaFileTransferCancel": "Cancel | + | "AriaFileTransferCancel": "Cancel", |
"RestoreTimeoutTitle": "Chat ended", | "RestoreTimeoutTitle": "Chat ended", | ||
"RestoreTimeoutBody": "Your previous chat session has timed out. Would you like to start a new one?", | "RestoreTimeoutBody": "Your previous chat session has timed out. Would you like to start a new one?", | ||
"RestoreTimeoutReject": "No thanks", | "RestoreTimeoutReject": "No thanks", | ||
"RestoreTimeoutAccept": "Start chat", | "RestoreTimeoutAccept": "Start chat", | ||
| − | "AriaRestoreTimeoutAccept": " | + | "AriaRestoreTimeoutAccept": "Start chat", |
| − | "AriaRestoreTimeoutReject": " | + | "AriaRestoreTimeoutReject": "No thanks", |
"EndConfirmBody": "Would you really like to end your chat session?", | "EndConfirmBody": "Would you really like to end your chat session?", | ||
"EndConfirmAccept": "End chat", | "EndConfirmAccept": "End chat", | ||
| Line 429: | Line 425: | ||
"AriaEmojiStatusClose": "Emoji picker dialog is closed", | "AriaEmojiStatusClose": "Emoji picker dialog is closed", | ||
"AriaEmoji": "emoji", | "AriaEmoji": "emoji", | ||
| − | |||
"AriaCharRemaining": "Characters remaining", | "AriaCharRemaining": "Characters remaining", | ||
"AriaMessageInput": "Message box", | "AriaMessageInput": "Message box", | ||
| Line 501: | Line 496: | ||
} | } | ||
} | } | ||
| − | }</source> | + | }</source><br /> |
| − | |||
| − | |||
|Status=No | |Status=No | ||
}}{{Section | }}{{Section | ||
| Line 509: | Line 502: | ||
|anchor=commands | |anchor=commands | ||
|alignment=Vertical | |alignment=Vertical | ||
| − | |||
| − | |||
|structuredtext=Once you've registered your plugin on the bus, you can call commands on other registered plugins. Here's how to use the global bus object to register a new plugin on the bus. | |structuredtext=Once you've registered your plugin on the bus, you can call commands on other registered plugins. Here's how to use the global bus object to register a new plugin on the bus. | ||
| − | {{NoteFormat|The global bus object is a debugging tool. When implementing Widgets on your own site, do not use the global bus object to register your custom plugins. Instead, see {{Link- | + | {{NoteFormat|The global bus object is a debugging tool. When implementing Widgets on your own site, do not use the global bus object to register your custom plugins. Instead, see {{Link-SomewhereInThisVersion|manual=SDK|topic=GWCBusExtensions|display text=Genesys Widgets Extensions}} for more information about extending Genesys Widgets.|1}} |
<source lang="javascript">var oMyPlugin = window._genesys.widgets.bus.registerPlugin('MyPlugin'); | <source lang="javascript">var oMyPlugin = window._genesys.widgets.bus.registerPlugin('MyPlugin'); | ||
| Line 588: | Line 579: | ||
{{!}}formJSON | {{!}}formJSON | ||
{{!}}object | {{!}}object | ||
| − | {{!}}An object containing a custom registration form definition. See {{Link-SomewhereInThisVersion|manual=SDK|topic=WebChat-combined|anchor=ccrf|display text=Customizable | + | {{!}}An object containing a custom registration form definition. See {{Link-SomewhereInThisVersion|manual=SDK|topic=WebChat-combined|anchor=ccrf|display text=Customizable chat registration form}}. |
{{!}}- | {{!}}- | ||
{{!}}userData | {{!}}userData | ||
| Line 882: | Line 873: | ||
{{!}}- | {{!}}- | ||
{{!}}bubble.radius | {{!}}bubble.radius | ||
| − | {{!}}string of valid CSS border radius | + | {{!}}string of valid CSS border radius value |
{{!}}The border radius you'd like for the bubble. | {{!}}The border radius you'd like for the bubble. | ||
{{!}}- | {{!}}- | ||
| Line 1,125: | Line 1,116: | ||
{{!}}- | {{!}}- | ||
{{!}}} | {{!}}} | ||
| − | |||
| − | |||
|Status=No | |Status=No | ||
}}{{Section | }}{{Section | ||
| Line 1,132: | Line 1,121: | ||
|anchor=events | |anchor=events | ||
|alignment=Vertical | |alignment=Vertical | ||
| − | |||
| − | |||
|structuredtext=Once you've registered your plugin on the bus, you can subscribe to and listen for published events. Here's how to use the global bus object to register a new plugin on the bus. | |structuredtext=Once you've registered your plugin on the bus, you can subscribe to and listen for published events. Here's how to use the global bus object to register a new plugin on the bus. | ||
| − | {{NoteFormat|The global bus object is a debugging tool. When implementing Widgets on your own site, do not use the global bus object to register your custom plugins. Instead, see {{Link- | + | {{NoteFormat|The global bus object is a debugging tool. When implementing Widgets on your own site, do not use the global bus object to register your custom plugins. Instead, see {{Link-SomewhereInThisVersion|manual=SDK|topic=GWCBusExtensions|display text=Genesys Widgets Extensions}} for more information about extending Genesys Widgets.|1}} |
<source lang="javascript">var oMyPlugin = window._genesys.widgets.bus.registerPlugin('MyPlugin'); | <source lang="javascript">var oMyPlugin = window._genesys.widgets.bus.registerPlugin('MyPlugin'); | ||
| Line 1,193: | Line 1,180: | ||
{{!}}- | {{!}}- | ||
{{!}}} | {{!}}} | ||
| − | |||
| − | |||
|Status=No | |Status=No | ||
}}{{Section | }}{{Section | ||
| Line 1,200: | Line 1,185: | ||
|anchor=metadata | |anchor=metadata | ||
|alignment=Vertical | |alignment=Vertical | ||
| − | |||
| − | |||
|structuredtext====Interaction Lifecycle=== | |structuredtext====Interaction Lifecycle=== | ||
| Line 1,233: | Line 1,216: | ||
ready -> opened -> started -> submitted -> completed -> closed | ready -> opened -> started -> submitted -> completed -> closed | ||
| − | {{NoteFormat|For a list of all WebChat events, see {{Link-SomewhereInThisVersion|manual=SDK|topic=WebChat-combined|anchor=events|display text=API | + | {{NoteFormat|For a list of all WebChat events, see {{Link-SomewhereInThisVersion|manual=SDK|topic=WebChat-combined|anchor=events|display text=API events}}.|2}} |
===Metadata=== | ===Metadata=== | ||
| Line 1,260: | Line 1,243: | ||
{{!}}boolean | {{!}}boolean | ||
{{!}}Indicates the registration form was submitted automatically, usually after being prefilled. | {{!}}Indicates the registration form was submitted automatically, usually after being prefilled. | ||
| − | |||
| − | |||
| − | |||
| − | |||
{{!}}- | {{!}}- | ||
{{!}}filesUploaded | {{!}}filesUploaded | ||
| Line 1,338: | Line 1,317: | ||
{{!}}- | {{!}}- | ||
{{!}}} | {{!}}} | ||
| − | |||
| − | |||
|Status=No | |Status=No | ||
}}{{Section | }}{{Section | ||
| Line 1,345: | Line 1,322: | ||
|anchor=ccrf | |anchor=ccrf | ||
|alignment=Vertical | |alignment=Vertical | ||
| − | |||
| − | |||
|structuredtext=WebChat allows you to customize the registration form shown to users prior to starting a session. The following form inputs are currently supported: | |structuredtext=WebChat allows you to customize the registration form shown to users prior to starting a session. The following form inputs are currently supported: | ||
| Line 1,355: | Line 1,330: | ||
*Textarea | *Textarea | ||
| − | Customization is done through a JSON object structure that defines the layout, input type, label, and attributes for each input. You can set the default registration form definition in the | + | Customization is done through a JSON object structure that defines the layout, input type, label, and attributes for each input. You can set the default registration form definition in the '''_genesys.widgets.webchat.form''' {{Link-SomewhereInThisVersion|manual=SDK|topic=WebChat-combined|anchor=config|display text=configuration }} option. Alternately, you can pass a new registration form definition through the <tt>WebChat.open</tt> command: |
<source lang="JAVASCRIPT"> | <source lang="JAVASCRIPT"> | ||
| Line 1,409: | Line 1,384: | ||
This JSON definition generates the following output: | This JSON definition generates the following output: | ||
| − | [[File:WebChat CustomForm 001.png|400px]] | + | [[File:WebChat CustomForm 001.png|400px|alt=WebChat widget output using the JSON definition above]] |
===Properties=== | ===Properties=== | ||
| − | Each input definition can contain any number of properties. These are categorized in two groups: "Special | + | Each input definition can contain any number of properties. These are categorized in two groups: "Special properties", which are custom properties used internally to handle rendering logic, and "HTML attributes" which are properties that are applied directly as HTML attributes on the input element. |
====Special properties==== | ====Special properties==== | ||
| Line 1,475: | Line 1,450: | ||
{{NoteFormat|The default input type is "text", so type does not need to be defined if you intend to make a text input. |1}} | {{NoteFormat|The default input type is "text", so type does not need to be defined if you intend to make a text input. |1}} | ||
| − | '''HTML | + | '''HTML output''' |
<pre> | <pre> | ||
| Line 1,564: | Line 1,539: | ||
</source> | </source> | ||
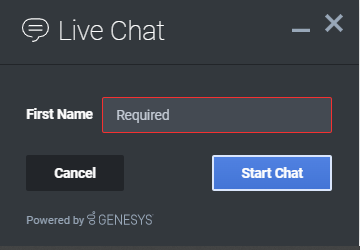
| − | You must return <tt>true</tt> or <tt>false</tt> to indicate that validation has passed or failed, respectively. If you return false, the WebChat form will not submit, and the input will be highlighted in red. This is achieved by adding the CSS class "cx-error" to the input. | + | You must return <tt>true</tt> or <tt>false</tt> to indicate that validation has passed or failed, respectively. If you return false, the WebChat form will not submit, and the input will be highlighted in red. This is achieved by adding the CSS class "cx-error" to the input. The image below displays the the field where a user input validation error has occurred, with the field highlighted in red. |
| + | |||
| + | [[File:Validation failure.png]] | ||
====Validation function arguments==== | ====Validation function arguments==== | ||
| Line 1,605: | Line 1,582: | ||
===Form submit=== | ===Form submit=== | ||
| − | Custom | + | Custom input field form values are submitted to the server as key value pairs under the userData section of the form submit request, where input field names will be the property keys. During the submit, this data is merged along with the userData defined in the {{Link-SomewhereInThisVersion|manual=SDK|topic=WebChat-combined|anchor=commands|display text=WebChat.open}} command.{{NoteFormat|Depending on the API used (PureEnagage V2 API or Genesys Cloud CX) the payload structure in the request can vary for each, but the section below explains how the form data is submitted by the WebChat UI plugin when using custom forms.|}}Below is the internal form data object defined in the WebChat plugin by default. Since firstname, lastname, nickname, email, and subject are reserved keywords, users are not allowed to have custom fields with the same name.<source lang="javascript"> |
{ | { | ||
firstname: '', | firstname: '', | ||
| Line 1,614: | Line 1,591: | ||
userData: {} | userData: {} | ||
} | } | ||
| − | </source> | + | </source>{{NoteFormat|Once the Chat is started, the customer messages display either the <tt>nickname</tt> or the <tt>firstname</tt> specified during registration as the '''Name'''.|}}<br /> |
| − | ===Example=== | + | ====Example==== |
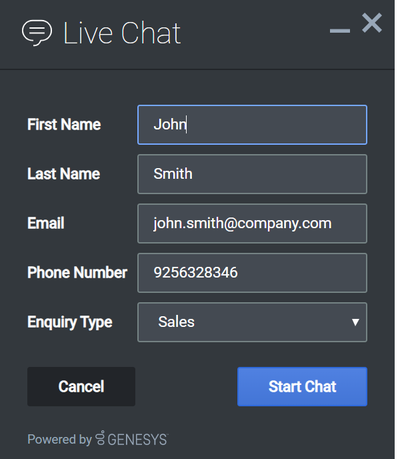
| − | The example below shows how the custom form data given in the | + | The example below shows how the custom form data given in the WebChat form fields have been mapped as a form data object. |
| − | The form fields with reserved keywords like firstname, lastname, and email will be sent as top level and rest of the fields will be sent under userData to the WebChatService | + | The form fields with reserved keywords like firstname, lastname, and email will be sent as top level and the rest of the fields will be sent under userData to the WebChatService plugin. |
| − | Once the form data object sent to the WebChatService | + | Once the form data object is sent to the WebChatService plugin, it will parse and send in the payload request. |
| + | <source lang="JAVASCRIPT"> | ||
| + | { | ||
| + | "wrapper":"<table></table>", | ||
| + | "inputs":[ | ||
| + | { | ||
| + | "id":"cx_webchat_form_firstname", | ||
| + | "name":"firstname", | ||
| + | "type":"text", | ||
| + | "maxlength":"100", | ||
| + | "placeholder":"@i18n:webchat.ChatFormPlaceholderFirstName", | ||
| + | "label":"@i18n:webchat.ChatFormFirstName", | ||
| + | "value":"John" | ||
| + | }, | ||
| + | { | ||
| + | "id":"cx_webchat_form_lastname", | ||
| + | "name":"lastname", | ||
| + | "type":"text", | ||
| + | "maxlength":"100", | ||
| + | "placeholder":"@i18n:webchat.ChatFormPlaceholderLastName", | ||
| + | "label":"@i18n:webchat.ChatFormLastName", | ||
| + | "value":"Smith" | ||
| + | }, | ||
| + | { | ||
| + | "id":"cx_webchat_form_email", | ||
| + | "name":"email", | ||
| + | "type":"text", | ||
| + | "maxlength":"100", | ||
| + | "placeholder":"@i18n:webchat.ChatFormPlaceholderEmail", | ||
| + | "label":"Email", | ||
| + | "value":"john.smith@company.com" | ||
| + | }, | ||
| + | { | ||
| + | "id":"cx_webchat_form_phonenumber", | ||
| + | "name":"phonenumber", | ||
| + | "type":"text", | ||
| + | "maxlength":"100", | ||
| + | "placeholder":"Phone Number", | ||
| + | "label":"Phone Number", | ||
| + | "value":"9256328346" | ||
| + | }, | ||
| + | { | ||
| + | "id":"cx_webchat_form_enquirytype", | ||
| + | "name":"enquirytype", | ||
| + | "type":"select", | ||
| + | "label":"Enquiry Type", | ||
| + | "options":[ | ||
| + | { | ||
| + | "text":"Account", | ||
| + | "group":true | ||
| + | }, | ||
| + | { | ||
| + | "text":"Sales", | ||
| + | "value":"Sales", | ||
| + | "selected":true | ||
| + | }, | ||
| + | { | ||
| + | "text":"Credit Card", | ||
| + | "value":"credit card" | ||
| + | }, | ||
| + | { | ||
| + | "text":"General", | ||
| + | "group":true | ||
| + | }, | ||
| + | { | ||
| + | "text":"Warranty", | ||
| + | "value":"warranty" | ||
| + | }, | ||
| + | { | ||
| + | "text":"Return policy", | ||
| + | "value":"returns" | ||
| + | } | ||
| + | ] | ||
| + | } | ||
| + | ] | ||
| + | } | ||
| + | </source> | ||
| + | [[ File:WebChat_CustomForm_Dark_v1.png|frameless|400px|left|alt=The WebChat window displaying top level information and user data]]<source lang="javascript"> | ||
{ | { | ||
firstname: 'John', | firstname: 'John', | ||
| Line 1,631: | Line 1,685: | ||
} | } | ||
</source><br /> | </source><br /> | ||
| − | |||
| − | |||
|Status=No | |Status=No | ||
}}{{Section | }}{{Section | ||
|sectionHeading=Customizable emoji menu | |sectionHeading=Customizable emoji menu | ||
| − | |||
|alignment=Vertical | |alignment=Vertical | ||
| − | | | + | |structuredtext={{AnchorDiv|cem}} |
| − | | | + | ===Introduction=== |
| − | |||
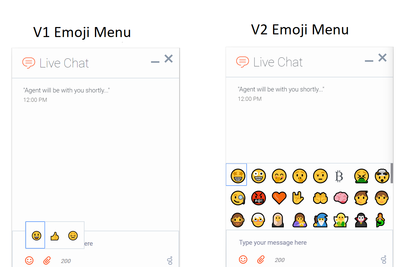
WebChat offers a v2 emoji menu that lets you choose which emojis to include in the emoji menu. | WebChat offers a v2 emoji menu that lets you choose which emojis to include in the emoji menu. | ||
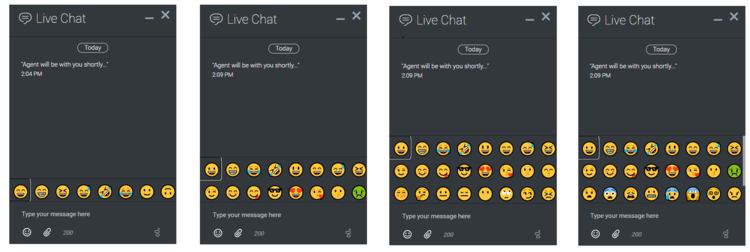
| − | [[File:WebChat-Emoji-menu.png| | + | [[File:WebChat-Emoji-menu.png|401x401px|alt=The WebChat V1 and V2 emoji menus]] |
===Differences between v1 and v2=== | ===Differences between v1 and v2=== | ||
| Line 1,660: | Line 1,710: | ||
*When 25 or more emojis are configured, the menu has three rows, and a scrollbar appears. | *When 25 or more emojis are configured, the menu has three rows, and a scrollbar appears. | ||
| − | [[File:Emoji | + | [[File:Emoji-screenshot-dark-themed.PNG|frameless|750x750px|alt=The WebChat emoji menu in dark theme displayed with and without the scrollbar]] |
Configure the v2 emoji menu by passing a string containing emoji into the WebChat configuration or through localization.{{NoteFormat|If you define an emoji list in the WebChat configuration, it will override any emoji lists defined in localization files.|1}}You configure the emoji list by specifying a string of emoji characters, like "🤩🤪🤭🤫". WebChat will parse this string and arrange them in the emoji menu.<source lang="JAVASCRIPT"> | Configure the v2 emoji menu by passing a string containing emoji into the WebChat configuration or through localization.{{NoteFormat|If you define an emoji list in the WebChat configuration, it will override any emoji lists defined in localization files.|1}}You configure the emoji list by specifying a string of emoji characters, like "🤩🤪🤭🤫". WebChat will parse this string and arrange them in the emoji menu.<source lang="JAVASCRIPT"> | ||
// Configure a flat list of emoji characters | // Configure a flat list of emoji characters | ||
| − | _genesys.widgets.webchat.emojiList = " | + | _genesys.widgets.webchat.emojiList = "🤩🤪🤭🤫🤨₿🤮🤯🧐🤬🧡🤟🤲🧠🧒🧑🧔🧓🧕🤱₿🧙🧚🧛🧜🧝🧞🧟🧖🧗🧘🦓🦒🦔🦕🦖🦗🥥🥦🥨🥩 |
| + | 🇦🇺🇫🇷🎂🛍🇨🇦🇧🇷🐉🎅🇲🇽🕯🇨🇳🐰🎥🍂👨💪🎓🔥🎃🕎💕🕉🇺🇸👩🎊🏊🏳️🌈👑☪🌱☘☀🏈🦃💘👰⛄🎿⚽🌎"; | ||
</source> | </source> | ||
====Add emoji display names==== | ====Add emoji display names==== | ||
| Line 1,673: | Line 1,724: | ||
You can only add one name to an emoji. The following sample shows the format for configuring several emojis.<source lang="JAVASCRIPT"> | You can only add one name to an emoji. The following sample shows the format for configuring several emojis.<source lang="JAVASCRIPT"> | ||
// Configure an emoji list with emoji names | // Configure an emoji list with emoji names | ||
| − | _genesys.widgets.webchat.emojiList = "🤩:Star-Struck;🤪:Zany Face;🤭:Face With Hand Over Mouth;🤫:Shushing Face;🤨:Face With Raised Eyebrow;₿:Bitcoin;🤮:Face Vomiting;🤯:Exploding Head;🧐:Face With Monocle;🤬:Face With Symbols on Mouth;🧡:Orange Heart;🤟:Love-You Gesture;🤲:Palms Up Together;🧠:Brain;🧒:Child;🧑:Person;🧔:Man: Beard;🧓:Older Person;🧕:Woman With Headscarf;🤱:Breast-Feeding;🧙:Mage;🧚:Fairy;🧛:Vampire;🧜:Merperson;🧝:Elf;🧞:Genie;🧟:Zombie;🧖:Person in Steamy Room;🧗:Person Climbing;🧘:Person in Lotus Position;🦓:Zebra;🦒:Giraffe;🦔:Hedgehog;🦕:Sauropod;🦖:T-Rex;🦗:Cricket;🥥:Coconut;🥦:Broccoli;🥨:Pretzel;🥩:Cut of Meat;🇦🇺:Australia Day;🇫🇷:Bastille Day;🎂:Birthday;🛍:Black Friday;🇨🇦:Canada Day;🇧🇷: | + | _genesys.widgets.webchat.emojiList = "🤩:Star-Struck;🤪:Zany Face;🤭:Face With Hand Over |
| + | Mouth;🤫:Shushing Face;🤨:Face With Raised Eyebrow;₿:Bitcoin;🤮:Face Vomiting; | ||
| + | 🤯:Exploding Head;🧐:Face With Monocle;🤬:Face With Symbols on Mouth;🧡:Orange Heart; | ||
| + | 🤟:Love-You Gesture;🤲:Palms Up Together;🧠:Brain;🧒:Child;🧑:Person;🧔:Man: Beard; | ||
| + | 🧓:Older Person;🧕:Woman With Headscarf;🤱:Breast-Feeding;🧙:Mage;🧚:Fairy;🧛:Vampire; | ||
| + | 🧜:Merperson;🧝:Elf;🧞:Genie;🧟:Zombie;🧖:Person in Steamy Room;🧗:Person Climbing; | ||
| + | 🧘:Person in Lotus Position;🦓:Zebra;🦒:Giraffe;🦔:Hedgehog;🦕:Sauropod;🦖:T-Rex;🦗:Cricket; | ||
| + | 🥥:Coconut;🥦:Broccoli;🥨:Pretzel;🥩:Cut of Meat;🇦🇺:Australia Day;🇫🇷:Bastille | ||
| + | Day;🎂:Birthday;🛍:Black Friday;🇨🇦:Canada Day;🇧🇷:Carnival;🐉:Chinese New Year;🎅:Christmas; | ||
| + | 🇲🇽:Cinco de Mayo;🕯:Diwali;🇨🇳:Dragon Boat Festival;🐰:Easter;🎥:Emoji Movie;🍂:Fall/Autumn; | ||
| + | 👨:Father’s Day;💪:Festivus;🎓:Graduation;🔥:Guy Fawkes;🎃:Halloween;🕎:Hanukkah; | ||
| + | 💕:Hearts;🕉:Holi;🇺🇸:Independence Day;👩:Mother’s Day;🎊:New Year’s Eve;🏊:Olympics; | ||
| + | 🏳️🌈:Pride;👑:Queen’s Birthday;☪:Ramadan;🌱:Spring;☘:St Patrick’s Day;☀:Summer; | ||
| + | 🏈:SuperBowl;🦃:Thanksgiving;💘:Valentine’s Day;👰:Wedding / Marriage;⛄:Winter;🎿:Winter | ||
| + | Olympics;⚽:World Cup;🌎:World Emoji Day;"; | ||
</source> | </source> | ||
====Partially named lists==== | ====Partially named lists==== | ||
You don't have to add names for every emoji. You can add titles to only a select few.<source lang="JAVASCRIPT"> | You don't have to add names for every emoji. You can add titles to only a select few.<source lang="JAVASCRIPT"> | ||
// Configure an emoji list with only a few emoji names | // Configure an emoji list with only a few emoji names | ||
| − | _genesys.widgets.webchat.emojiList = "🤩🤪🤭🤫🤨₿🤮🤯🧐🤬🧡🤟;🤲:Palms Up Together;🧠🧒🧑🧔🧓🧕🤱₿🧙🧚🧛🧜🧝🧞🧟🧖🧗🧘🦓🦒🦔🦕🦖🦗🥥🥦🥨🥩🇦🇺🇫🇷🎂;🛍:Black Friday;🇨🇦🇧🇷🐉🎅🇲🇽🕯🇨🇳🐰🎥🍂👨💪🎓🔥🎃🕎💕🕉🇺🇸👩🎊🏊🏳️🌈👑☪🌱☘☀🏈🦃💘👰;⛄:Snowman;🎿⚽🌎"; | + | _genesys.widgets.webchat.emojiList = "🤩🤪🤭🤫🤨₿🤮🤯🧐🤬🧡🤟;🤲:Palms Up Together; |
| + | 🧠🧒🧑🧔🧓🧕🤱₿🧙🧚🧛🧜🧝🧞🧟🧖🧗🧘🦓🦒🦔🦕🦖🦗🥥🥦🥨🥩🇦🇺🇫🇷🎂;🛍:Black Friday; | ||
| + | 🇨🇦🇧🇷🐉🎅🇲🇽🕯🇨🇳🐰🎥🍂👨💪🎓🔥🎃🕎💕🕉🇺🇸👩🎊🏊🏳️🌈👑☪🌱☘☀🏈🦃💘👰;⛄:Snowman;🎿⚽🌎"; | ||
</source> | </source> | ||
===Localization=== | ===Localization=== | ||
| Line 1,692: | Line 1,759: | ||
} | } | ||
</source><br /> | </source><br /> | ||
| − | | | + | |Status=No |
| − | | | + | }}{{Section |
| + | |sectionHeading=Terminate Chat session on contact side | ||
| + | |anchor=Terminate | ||
| + | |alignment=Vertical | ||
| + | |structuredtext=To prevent a contact from sending another chat message using the Widget after the chat session is terminated in Designer, you must add a customization to the widget to notify it to close. | ||
| + | |||
| + | First, set up a text message informing the contact that the chat is terminated by using a {{Link-AnywhereElse|product=DES|version=Current|manual=Designer|topic=PlayMessage|display text=Play Message Block}}. | ||
| + | [[File:WidgetsWebChat_PlayMessageBlock2_042022.png||alt=The Play Message Block Properties window]] | ||
| + | |||
| + | Next, set up the Widget Register Handler for '''WebChatService.messageReceived''' (or look for the '''messageAdded''' event) to get notifications about messages received, then send the '''<code>endChat</code>''' command when the text message is received. For information about Genesys Widgets events and commands, refer to [https://docs.genesys.com/Documentation/GWC/Current/WidgetsAPI/WebChatServiceEvents Genesys Widget API Events] and [https://docs.genesys.com/Documentation/GWC/latest/WidgetsAPI/WebChatServiceCommands Genesys Widget API Commands]. | ||
| + | |||
| + | Finally, add the following customized script: | ||
| + | |||
| + | <source lang="JAVASCRIPT"> | ||
| + | window._genesys.widgets.onReady = function(CXBus){ | ||
| + | |||
| + | var oWH = CXBus.registerPlugin("WebChatHandler"); | ||
| + | |||
| + | oWH.subscribe("WebChatService.messageReceived", function (e) { | ||
| + | |||
| + | if(e.data) { | ||
| + | |||
| + | /** | ||
| + | * Extract the sample data (can be the Playback message configured in Designer) | ||
| + | * and look for a specific condition to end the chat | ||
| + | */ | ||
| + | |||
| + | const {messages} = e.data || {}; | ||
| + | let sPlayMessage = (messages) ? messages.find(message => message.type == 'Message' && message.text == 'play message') : ""; | ||
| + | |||
| + | if(sPlayMessage) { | ||
| + | |||
| + | oWH.command("WebChatService.endChat"); | ||
| + | |||
| + | /** | ||
| + | * Check for the chat session data stored in localStorage and clear it | ||
| + | */ | ||
| + | |||
| + | (window.localStorage.getItem("WebChatSessionData")) ? window.localStorage.removeItem("WebChatSessionData") : ""; | ||
| + | } | ||
| + | } | ||
| + | }); | ||
| + | }; | ||
| + | </source> | ||
|Status=No | |Status=No | ||
}} | }} | ||
}} | }} | ||
Latest revision as of 10:16, July 14, 2022
Contents
Learn how to enable live chats between customers and agents.
Overview
The WebChat Widget allows a customer to start a live chat with a customer service agent. The UI appears within the page and follows the customer as they traverse your website. Other features include minimize/maximize, auto-reconnect, and a built-in invite feature.
Usage
You can launch WebChat manually by using the following methods:
- Call the WebChat.open command
- Configure ChannelSelector to show WebChat as a channel
- Enable the built-in launcher button for WebChat that appears on the right side of the screen
- Create your own custom button or link to open WebChat (using the WebChat.open command)
Customization
You can customize and localize all of the static text shown in the WebChat Widget by adding entries to your configuration and localization options.
WebChat supports themes. You can create and register your own themes for Genesys Widgets.
Namespace
The WebChat plugin has the following namespaces tied to each of the following types:
| Type | Namespace |
|---|---|
| Configuration | webchat |
| i18n—Localization | webchat |
| CXBus—API commands & API events | WebChat |
| CSS | .cx-webchat |
Mobile support
WebChat supports both desktop and mobile devices. Like all Genesys Widgets, there are two main modes: Desktop & Mobile. Desktop is employed for monitors, laptops, and tablets. Mobile is employed for smartphones. When a smartphone is detected, WebChat switches to special full-screen templates that are optimized for both portrait and landscape orientations.
Switching between desktop and mobile mode is done automatically by default. You may configure Genesys Widgets to switch between Desktop and Mobile mode manually if necessary.
Screenshots
Dark theme
Light theme
Configuration
WebChat and WebChatService share the _genesys.widgets.webchat configuration namespace. WebChat has UI options while WebChatService has connection options.
Example
window._genesys.widgets.webchat = {

	apikey: 'n3eNkgLLgLKXREBMYjGm6lygOHHOK8VA',
	dataURL: 'https://api.genesyscloud.com/gms-chat/2/chat',
	userData: {},
	emojis: true,
	uploadsEnabled: false,
	confirmFormCloseEnabled: true,
	actionsMenu: true,
	maxMessageLength: 140,

	autoInvite: {

		enabled: false,
		timeToInviteSeconds: 10,
		inviteTimeoutSeconds: 30
	},

	chatButton: {

		enabled: true,
		template: '<div class="cx-widget cx-webchat-chat-button cx-side-button" role="button"
tabindex="0" data-message="ChatButton" data-gcb-service-node="true"><span class="cx-icon" data-icon="chat">
</span><span class="i18n cx-chat-button-label" data-message="ChatButton"></span></div>',
		effect: 'fade',
		openDelay: 1000,
		effectDuration: 300,
		hideDuringInvite: true
	},

	minimizeOnMobileRestore: false,

	ariaIdleAlertIntervals:[50,25,10],

	ariaCharRemainingIntervals:[75, 25, 10]
};
Options
| Name | Type | Description | Default | Required | Introduced/Updated |
|---|---|---|---|---|---|
| emojis | boolean | Enable/disable Emoji menu inside chat message input. Emojis are supported using unicode characters and the list includes ☺ U+263A (smile), 👍 U+1F44D (thumbs up) and ☹ U+2639 (sad). | false | n/a | |
| form | object | A JSON object containing a custom registration form definition. The JSON definition placed here becomes the default registration form layout for WebChat. See Customizable Chat Registration Form. | A basic registration form is defined internally by default | n/a | |
| uploadsEnabled | boolean | Show/Hide the Send File button. The button will be shown if the value is set to true. | false | n/a | |
| confirmFormCloseEnabled | boolean | Enable or disable displaying a confirmation message before closing WebChat if information has been entered into the registration form. | true | n/a | |
| timeFormat | number/string | This sets the time format for the timestamps in this widget. It can be 12 or 24. | 12 | false | |
| actionsMenu | boolean | Enable/disable actions menu next to chat message input. | true | n/a | |
| maxMessageLength | number | Set a character limit that the user can input into the message area during a chat. When max is reached, user cannot type any more. | 500 | n/a | |
| charCountEnabled | boolean | Show/Hide the number of characters remaining in the input message area while the user is typing. | false | n/a | |
| autoInvite.enabled | boolean | Enable/disable auto-invite feature. Automatically invites user to chat after user idles on page for preset time. Important When running Widgets in lazy load mode, this option requires that you pre-load the WebChat plugin. |
false | n/a | |
| autoInvite.timeToInviteSeconds | number | Number of seconds of idle time before inviting customer to chat. | 5 | n/a | |
| autoInvite.inviteTimeoutSeconds | number | Number of seconds to wait, after showing invite, before closing chat invite. | 30 | n/a | |
| chatButton.enabled | boolean | Enable/disable chat button on screen. Important When running Widgets in lazy load mode, this option requires that you pre-load the WebChat plugin. |
false | n/a | |
| chatButton.template | string | Custom HTML string template for chat button. | <div class="cx-widget cx-webchat-chat-button
cx-side-button" role="button" tabindex="0"
data-message="ChatButton"
data-gcb-service-node="true"><span
class="cx-icon" data-icon="chat">
</span><span class="i18n cx-chat-button-label"
data-message="ChatButton"></span></div> |
n/a | |
| chatButton.effect | string | Type of animation effect when revealing chat button. 'slide' or 'fade'. | fade | n/a | |
| chatButton.openDelay | number | Number of milliseconds before displaying chat button on screen. | 1000 | n/a | |
| chatButton.effectDuration | number | Length of animation effect in milliseconds. | 300 | n/a | |
| chatButton.hideDuringInvite | boolean | When the auto-invite feature is activated, hides the chat button. When invite is dismissed, reveals the chat button again. | true | n/a | |
| ariaIdleAlertIntervals | array/boolean | An array containing the intervals as a percentage at which the screen reader will announce the remaining idle time. By default, it is enabled with the following time intervals, and it is customizable according to the user's needs. Configuring a value of 'false' will let the screen reader call out idle time for every change. | [100, 75, 50, 25, 10] | n/a | 9.0.016.11 |
| ariaCharRemainingIntervals | array/boolean | An array containing the intervals as a percentage at which the screen reader will announce the remaining characters when the user inputs text into the message area. By default, it is enabled with the following intervals, and it is customizable according to the user needs. Configuring a value of 'false' will let the screen reader call out remaining characters for every change. | [50, 25, 10] | n/a | 9.0.016.11 |
Localization
You can define string key names and values to match the system messages that are received from the chat server. If a customer system message is received as SYS001 in the message body, Webchat checks to determine if any keys match in the language pack, and then replaces the message body accordingly. SYS001 is an example format. There are no format restrictions on custom message keys. The purpose of this feature is to allow localization for the User Interface and Server to be kept in the same file.
Special values for localization
You can inject the <%Agent%> special value. When used, the agent's name is rendered in its place at runtime.
Error handling
Customers can define their own error messages in the Errors section found in the above Webchat Localization. If no error messages are defined, default error messages are used.
Usage
You must use the webchat namespace for defining localization strings for the WebChat plugin in your i18n JSON file.
The following example shows how to define new strings for the en (English) language. You can use any language codes you wish; there is no standard format. When selecting the active language in your configuration, you must match one of the language codes defined in your i18n JSON file. Please note that you must only define a language code once in your i18n JSON file. Inside each language object you should define new strings for each widget.
Inactivity messages
If Chat Server is configured to end the chat session after a certain idle time, it may send several warning messages to the client to inform them and prompt them to act. Chat Server can be configured to show a first warning, a second warning, and a final notice when it ends the chat session. By default, WebChat will display the warning message text as it is received from the server. If you wish to localize these methods on the client side instead, follow these steps:
The first warning can be localized by setting the string 'IdleMessage1'.
The second warning can be localized by setting the string 'IdleMessage2'.
The final notice can be localized by setting the string 'IdleMessageClose'.
Default i18n JSON
{
	"en": {
		"webchat": {
			"ChatButton": "Chat",
			"ChatStarted": "Chat Started",
			"ChatEnded": "Chat Ended",
			"AgentNameDefault": "Agent",
			"AgentConnected": "<%Agent%> Connected",
			"AgentDisconnected": "<%Agent%> Disconnected",
			"BotNameDefault": "Bot",
			"BotConnected": "<%Bot%> Connected",
			"BotDisconnected": "<%Bot%> Disconnected",
			"SupervisorNameDefault": "Supervisor",
			"SupervisorConnected": "<%Agent%> Connected",
			"SupervisorDisconnected": "<%Agent%> Disconnected",
			"AgentTyping": "...",
			"AriaAgentTyping": "Agent is typing",
			"AgentUnavailable": "Sorry. There are no agents available. Please try later.",
			"ChatTitle": "Live Chat",
			"ChatEnd": "X",
			"ChatClose": "X",
			"ChatMinimize": "Min",
			"ChatFormFirstName": "First Name",
			"ChatFormLastName": "Last Name",
			"ChatFormNickname": "Nickname",
			"ChatFormEmail": "Email",
			"ChatFormSubject": "Subject",
			"ChatFormPlaceholderFirstName": "Required",
			"ChatFormPlaceholderLastName": "Required",
			"ChatFormPlaceholderNickname": "Optional",
			"ChatFormPlaceholderEmail": "Optional",
			"ChatFormPlaceholderSubject": "Optional",
			"ChatFormSubmit": "Start Chat",
			"AriaChatFormSubmit": "Start Chat",
			"ChatFormCancel": "Cancel",
			"AriaChatFormCancel": "Cancel",
			"ChatFormClose": "Close",
			"ChatInputPlaceholder": "Type your message here",
			"ChatInputSend": "Send",
			"AriaChatInputSend": "Send",
			"ChatEndQuestion": "Are you sure you want to end this chat session?",
			"ChatEndCancel": "Cancel",
			"ChatEndConfirm": "End chat",
			"AriaChatEndCancel": "Cancel",
			"AriaChatEndConfirm": "End chat",
			"ConfirmCloseWindow": "Are you sure you want to close chat?",
			"ConfirmCloseCancel": "Cancel",
			"ConfirmCloseConfirm": "Close",
			"AriaConfirmCloseCancel": "Cancel",
			"AriaConfirmCloseConfirm": "Close",
			"ActionsDownload": "Download transcript",
			"ActionsEmail": "Email transcript",
			"ActionsPrint": "Print transcript",
			"ActionsSendFile": "Attach Files",
			"AriaActionsSendFileTitle": "Opens a file upload dialog",
			"ActionsEmoji": "Send Emoji",
			"ActionsVideo": "Invite to Video Chat",
			"ActionsTransfer": "Transfer",
			"ActionsInvite": "Invite",
			"InstructionsTransfer": "Open this link on another device to transfer your chat session</br></br><%link%>",
			"InstructionsInvite": "Share this link with another person to add them to this chat session</br></br><%link%>",
			"InviteTitle": "Need help?",
			"InviteBody": "Let us know if we can help out.",
			"InviteReject": "No thanks",
			"InviteAccept": "Start chat",
			"AriaInviteAccept": "Start chat",
			"AriaInviteReject": "No thanks",
			"ChatError": "There was a problem starting the chat session. Please retry.",
			"ChatErrorButton": "OK",
			"AriaChatErrorButton": "OK",
			"ChatErrorPrimaryButton": "Yes",
			"ChatErrorDefaultButton": "No",
			"AriaChatErrorPrimaryButton": "Yes",
			"AriaChatErrorDefaultButton": "No",
			"DownloadButton": "Download",
			"AriaDownloadButton": "Download",
			"FileSent": "has sent:",
			"FileTransferRetry": "Retry",
			"AriaFileTransferRetry": "Retry",
			"FileTransferError": "OK",
			"AriaFileTransferError": "OK",
			"FileTransferCancel": "Cancel",
			"AriaFileTransferCancel": "Cancel",
			"RestoreTimeoutTitle": "Chat ended",
			"RestoreTimeoutBody": "Your previous chat session has timed out. Would you like to start a new one?",
			"RestoreTimeoutReject": "No thanks",
			"RestoreTimeoutAccept": "Start chat",
			"AriaRestoreTimeoutAccept": "Start chat",
			"AriaRestoreTimeoutReject": "No thanks",
			"EndConfirmBody": "Would you really like to end your chat session?",
			"EndConfirmAccept": "End chat",
			"EndConfirmReject": "Cancel",
			"AriaEndConfirmAccept": "End chat",
			"AriaEndConfirmReject": "Cancel",
			"SurveyOfferQuestion": "Would you like to participate in a survey?",
			"ShowSurveyAccept": "Yes",
			"ShowSurveyReject": "No",
			"AriaShowSurveyAccept": "Yes",
			"AriaShowSurveyReject": "No",
			"UnreadMessagesTitle": "unread",
			"AriaYouSaid": "You said",
			"AriaSaid": "said",
			"AriaSystemSaid": "System said",
			"AriaWindowLabel": "Live Chat Window",
			"AriaMinimize": "Live Chat Minimize",
			"AriaMaximize": "Live Chat Maximize",
			"AriaClose": "Live Chat Close",
			"AriaEmojiStatusOpen": "Emoji picker dialog is opened",
			"AriaEmojiStatusClose": "Emoji picker dialog is closed",
			"AriaEmoji": "emoji",
			"AriaCharRemaining": "Characters remaining",
			"AriaMessageInput": "Message box",
			"AsyncChatEnd": "End Chat",
			"AsyncChatClose": "Close Window",
			"AriaAsyncChatEnd": "End Chat",
			"AriaAsyncChatClose": "Close Window",
			"DayLabels": [
				"Sun",
				"Mon",
				"Tue",
				"Wed",
				"Thur",
				"Fri",
				"Sat"
			],
			"MonthLabels": [
				"Jan",
				"Feb",
				"Mar",
				"Apr",
				"May",
				"Jun",
				"Jul",
				"Aug",
				"Sept",
				"Oct",
				"Nov",
				"Dec"
			],
			"todayLabel": "Today",
			"Errors": {
				"102": "First name is required.",
				"103": "Last name is required.",
				"161": "Please enter your name.",
				"201": "The file could not be sent.<br/><strong><p class='filename' title='<%FilenameFull%>'>'<%FilenameTruncated%>'</p></strong><p class='cx-advice'>The maximum number of attached files would be exceeded (<%MaxFilesAllowed%>).</p>",
				"202": "The file could not be sent.<br/><strong><p class='filename' title='<%FilenameFull%>'>'<%FilenameTruncated%>'</p></strong><p class='cx-advice'>Upload limit and/or maximum number of attachments would be exceeded (<%MaxAttachmentsSize%>).</p>",
				"203": "The file could not be sent.<br/><strong><p class='filename' title='<%FilenameFull%>'>'<%FilenameTruncated%>'</p></strong><p class='cx-advice'>File type is not allowed.</p>",
				"204": "We're sorry but your message is too long. Please write a shorter message.",
				"240": "We're sorry but we cannot start a new chat at this time. Please try again later.",
				"364": "Invalid email address.",
				"401": "We're sorry but we are not able to authorize the chat session. Would you like to start a new chat?",
				"404": "We're sorry but we cannot find your previous chat session. Would you like to start a new chat?",
				"500": "We're sorry, an unexpected error occurred with the service. Would you like to close and start a new Chat?",
				"503": "We're sorry, the service is currently unavailable or busy. Would you like to close and start a new Chat again?",
				"ChatUnavailable": "We're sorry but we cannot start a new chat at this time. Please try again later.",
				"CriticalFault": "Your chat session has ended unexpectedly due to an unknown issue. We apologize for the inconvenience.",
				"StartFailed": "There was an issue starting your chat session. Please verify your connection and that you submitted all required information properly, then try again.",
				"MessageFailed": "Your message was not received successfully. Please try again.",
				"RestoreFailed": "We're sorry but we were unable to restore your chat session due to an unknown error.",
				"TransferFailed": "Unable to transfer chat at this time. Please try again later.",
				"FileTransferSizeError": "The file could not be sent.<br/><strong><p class='filename' title='<%FilenameFull%>'>'<%FilenameTruncated%>'</p></strong><p class='cx-advice'>File size is larger than the allowed size (<%MaxSizePerFile%>).</p>",
				"InviteFailed": "Unable to generate invite at this time. Please try again later.",
				"ChatServerWentOffline": "Messages are currently taking longer than normal to get through. We're sorry for the delay.",
				"RestoredOffline": "Messages are currently taking longer than normal to get through. We're sorry for the delay.",
				"Disconnected": "<div style='text-align:center'>Connection lost</div>",
				"Reconnected": "<div style='text-align:center'>Connection restored</div>",
				"FileSendFailed": "The file could not be sent.<br/><strong><p class='filename' title='<%FilenameFull%>'><%FilenameTruncated%></p></strong><p class='cx-advice'>There was an unexpected disconnection. Try again?</p>",
				"Generic": "<div style='text-align:center'>An unexpected error occurred.</div>",
				"pureengage-v3-rest-INVALID_FILE_TYPE": "Invalid file type. Only Images are allowed.",
				"pureengage-v3-rest-LIMIT_FILE_SIZE": "File size is larger than the allowed size.",
				"pureengage-v3-rest-LIMIT_FILE_COUNT": "The maximum number of attached files exceeded the limit.",
				"pureengage-v3-rest-INVALID_CONTACT_CENTER": "Invalid x-api-key transport configuration.",
				"pureengage-v3-rest-INVALID_ENDPOINT": "Invalid endpoint transport configuration.",
				"pureengage-v3-rest-INVALID_NICKNAME": "First Name is required.",
				"pureengage-v3-rest-AUTHENTICATION_REQUIRED": "We're sorry but we are not able to authorize the chat session.",
				"purecloud-v2-sockets-400": "Sorry, something went wrong. Please verify your connection and that you submitted all required information properly, then try again.",
				"purecloud-v2-sockets-500": "We're are sorry, an unexpected error occurred with the service.",
				"purecloud-v2-sockets-503": "We're sorry, the service is currently unavailable."
			}
		}
	}
}
API commands
Once you've registered your plugin on the bus, you can call commands on other registered plugins. Here's how to use the global bus object to register a new plugin on the bus.
var oMyPlugin = window._genesys.widgets.bus.registerPlugin('MyPlugin');

oMyPlugin.command('WebChat.open');
configure
Internal use only. The main App plugin shares configuration settings to widgets using each widget’s configure command. The configure command can only be called once at startup. Calling configure again after startup may result in unpredictable behavior.
open
Opens the WebChat UI.
Example
oMyPlugin.command('WebChat.open', {

	userData: {},
	form: {

		autoSubmit: false,
		firstname: 'John',
		lastname: 'Smith',
		email: 'John@mail.com',
		subject: 'Customer Satisfaction'
	}
	formJSON: {...}
	markdown: false

}).done(function(e){

	// WebChat opened successfully

}).fail(function(e){

	// WebChat isn't open or no active chat session
});
Options
| Option | Type | Description |
|---|---|---|
| form | object | Object containing form data to prefill in the chat entry form and optionally auto-submit the form. |
| form.autoSubmit | boolean | Automatically submit the form. Useful for bypassing the entry form step. |
| form.firstname | string | Value for the first name entry field. |
| form.lastname | string | Value for the last name entry field. |
| form.email | string | Value for the email entry field. |
| form.subject | string | Value for the subject entry field. |
| formJSON | object | An object containing a custom registration form definition. See Customizable chat registration form. |
| userData | object | Object containing arbitrary data that gets sent to the server. Overrides userData set in the webchat configuration object. |
| async | boolean | Starts a new chat either in asynchronous or normal mode based on the boolean value. Note that unless async static configuration is defined, a chat in normal mode will start automatically. |
| markdown | boolean | The markdown feature for chat messages. |
| id | string | A Unique identifier of a chat session that helps to identify the instance of that session and its associated events. A random value is automatically generated and assigned when no value is passed explicitly. |
Resolutions
| Status | When | Returns |
|---|---|---|
| resolved | WebChat is successfully opened | n/a |
| rejected | WebChat is already open | 'already opened' |
close
Closes the WebChat UI.
Example
oMyPlugin.command('WebChat.close').done(function(e){

	// WebChat closed successfully

}).fail(function(e){

	// WebChat is already closed or no active chat session
});
Resolutions
| Status | When | Returns |
|---|---|---|
| resolved | WebChat is successfully closed | n/a |
| rejected | WebChat is already closed | 'already closed' |
minimize
Minimizes or un-minimizes the WebChat UI.
Example
oMyPlugin.command('WebChat.minimize').done(function(e){

	// WebChat minimized successfully

}).fail(function(e){

	// WebChat ignores command
});
Options
| Option | Type | Description |
|---|---|---|
| minimized | boolean | Rather than toggling the current minimized state you can specify the minified state directly: true = minimized, false = uniminimized. |
Resolutions
| Status | When | Returns |
|---|---|---|
| resolved | Always | n/a |
| rejected | Never | 'Invalid configuration' |
endChat
Starts the end chat procedure. User may be prompted to confirm.
Example
oMyPlugin.command('WebChat.endChat').done(function(e){

	// WebChat ended a chat successfully

}).fail(function(e){

	// WebChat has no active chat session
});
Resolutions
| Status | When | Returns |
|---|---|---|
| resolved | There is an active chat session to end | n/a |
| rejected | There is no active chat session to end | 'there is no active chat session to end' |
invite
Shows an invitation to chat using the Toaster popup element. The text shown in the invitation can be edited in the localization file.
Example
oMyPlugin.command('WebChat.invite').done(function(e){

	// WebChat invited successfully

}).fail(function(e){

	// WebChat is already open and will be ignored
});
Resolutions
| Status | When | Returns |
|---|---|---|
| resolved | WebChat is closed and the toast element is created successfully | n/a |
| rejected | WebChat is already open (prevents inviting a user that is already in a chat) | 'Chat is already open. Ignoring invite command.' |
reInvite
When an active chat session cannot be restored, this invitation offers to start a new chat for the user. The text shown in the invitation can be edited in the localization file.
Example
oMyPlugin.command('WebChat.reInvite').done(function(e){

	// WebChat reinvited successfully

}).fail(function(e){

	// WebChat is already open and will be ignored
});
Resolutions
| Status | When | Returns |
|---|---|---|
| resolved | WebChat is closed, the config item 'webchat.inviteOnRestoreTimeout' is set, and the toast element is created successfully | n/a |
| rejected | WebChat is already open (prevents inviting a user that is already in a chat) | 'Chat is already open. Ignoring invite command.' |
injectMessage
Injects a custom message into the chat transcript. Useful for extending WebChat functionality with other Genesys products.
Example
oMyPlugin.command('WebChat.injectMessage', {

	type: 'text',
	name: 'person',
	text: 'hello',
	custom: false,
	bubble:{

		fill: '#00FF00',
		radius: '4px',
		time: false,
		name: false,
		direction: 'right',
		avatar:{

			custom: '<div>word</div>',
			icon: 'email'
		}
	}

}).done(function(e){

	// WebChat injected a message successfully
	// e.data == The message HTML reference (jQuery wrapped set)

}).fail(function(e){

	// WebChat isn't open or no active chat
});
Options
| Option | Type | Description |
|---|---|---|
| type | string | Switch the rendering type of the injected message between text and html. |
| name | string | Specify a name label for the message to identify what service or widget has injected the message. |
| text | string | The content of the message. Either plain text or HTML. |
| custom | boolean | If set to true, the default message template will not be used, allowing you to inject a highly customized HTML block unconstrained by the normal message template. |
| bubble.fill | string of valid CSS color value | The content of the message. Either plain text or HTML. |
| bubble.radius | string of valid CSS border radius value | The border radius you'd like for the bubble. |
| bubble.time | boolean | If you'd like to show the timestamp for the bubble. |
| bubble.name | boolean | If you'd like to show the name for the bubble. |
| bubble.direction | string | Which direction you want the message bubble to come from. |
| bubble.avatar.custom | string or HTML reference | Change the content of the html that would be the avatar for the chat bubble. |
| bubble.avatar.icon | class name | Generated common library provided for icon name. |
Resolutions
| Status | When | Returns |
|---|---|---|
| resolved | WebChat is open and there is an active chat session | An HTML reference (jQuery wrapped set) to the new injected message. |
| rejected | WebChat is not open and/or there was no active chat session | 'No chat session to inject into' |
showChatButton
Displays the standalone chat button using either the default template and CSS, or customer-defined ones.
Example
oMyPlugin.command('WebChat.showChatButton', {

	openDelay: 1000,
	duration: 1500

}).done(function(e){

	// WebChat shows chat button successfully

}).fail(function(e){

	// WebChat button is already visible, side bar is active and overrides the chat button, or chat button is disabled in configuration
});
Options
| Option | Type | Description |
|---|---|---|
| openDelay | number | Duration in milliseconds to delay showing the chat button on the page. |
| duration | number | Duration in milliseconds for the show and hide animation. |
Resolutions
| Status | When | Returns |
|---|---|---|
| resolved | The chat button is enabled in the configuration, is currently not visible, and the SideBar plugin is not initialized | n/a |
| rejected | The chat button is not enabled in the configuration, or it's already visible, or the SideBar plugin is initialized | 'Chat button is already visible. Ignoring command.' |
| rejected | The SideBar plugin is active the standalone chat button will be disabled automatically | 'SideBar is active and overrides the default chat button' |
hideChatButton
Hides the standalone chat button.
Example
oMyPlugin.command('WebChat.hideChatButton', {duration: 1500}).done(function(e){

	// WebChat hid chat button successfully

}).fail(function(e){

	// WebChat button is already hidden
});
Options
| Option | Type | Description |
|---|---|---|
| duration | number | Duration in milliseconds for the show and hide animation. |
Resolutions
| Status | When | Returns |
|---|---|---|
| resolved | The chat button is currently visible | n/a |
| rejected | The chat button is already hidden | 'Chat button is already hidden. Ignoring command.' |
showOverlay
Opens a slide-down overlay over WebChat's content. You can fill this overlay with content such as disclaimers, articles, and other information.
Example
oMyPlugin.command('WebChat.showOverlay', {

	html: '<div>Example text</div>',
	hideFooter: false

}).done(function(e){

	// WebChat successfully shows overlay

}).fail(function(e){

	// WebChat isn't open
});
Options
| Option | Type | Description |
|---|---|---|
| html | string or HTML reference | The HTML content you want to display in the overlay. |
| hideFooter | boolean | Normally the overlay appears between the titlebar and footer bar. Set this to true to have the overlay overlap the footer to gain a bit more vertical space. This should only be used in special cases. For general use, don't set this value. |
Resolutions
| Status | When | Returns |
|---|---|---|
| resolved | WebChat is open and the overlay opens | |
| rejected | WebChat is not currently open | WebChat is not currently open. Ignoring command. |
hideOverlay
Hides the slide-down overlay.
Example
oMyPlugin.command('WebChat.hideOverlay').done(function(e){

	// WebChat hid overlay successfully

}).fail(function(e){

	// WebChat isn't open
});
Resolutions
| Status | When | Returns |
|---|---|---|
| resolved | WebChat is open and the overlay closes | |
| rejected | WebChat is not currently open | WebChat is not currently open. Ignoring command. |
API events
Once you've registered your plugin on the bus, you can subscribe to and listen for published events. Here's how to use the global bus object to register a new plugin on the bus.
var oMyPlugin = window._genesys.widgets.bus.registerPlugin('MyPlugin');

oMyPlugin.subscribe('WebChat.ready', function(e){});| Name | Description | Data |
|---|---|---|
| ready | WebChat is initialized and ready to accept commands | n/a |
| opened | The WebChat widget has appeared on screen | n/a |
| started | The WebChat has successfully started. | Metadata |
| submitted | The user has submitted the form. | Metadata |
| rejected | When the chat session fails to start. Typically due to form validation or network errors. | Metadata |
| completed | The Chat session ended after agent is successfully connected to WebChat. | Metadata |
| cancelled | The Chat session ended before agent is connected to WebChat. | Metadata |
| closed | The WebChat widget has been removed from the screen | Metadata |
| minimized | The WebChat widget has been changed to a minimized state | n/a |
| unminimized | The WebChat widget has been restored from a minimized state to the standard view | n/a |
| messageAdded | When a message is added to the transcript, this event will fire | Returns an object containing two properties: 'data' and 'html'. 'data' contains the JSON data for the message, while 'html' contains a reference to the visible message inside the chat transcript. |
Metadata
Interaction Lifecycle
Every WebChat interaction has a sequence of events we call the Interaction Lifecycle. This is a sequence of events that tracks progress and choices from the beginning of an interaction (opening WebChat), to the end (closing WebChat), and every step in between.
The following events are part of the Interaction Lifecycle:
ready
opened
started
cancelled
submitted
rejected
completed
closed
Lifecycle scenarios
An Interaction Lifecycle can vary based on each user's intent and experience with WebChat. Here are several sequences of events in the lifecycle that correspond to different scenarios.
The user opened WebChat but changed their mind and closed it without starting a chat session:
ready -> opened -> cancelled -> closed
The user started a chat session but ended it before an agent connected. Perhaps it was taking too long to reach someone:
ready -> opened -> started -> cancelled -> closed
The user started a chat, but the chat fails to start:
ready -> opened -> started -> submitted -> rejected
The user started a chat, met with an agent, and the session ended normally:
ready -> opened -> started -> submitted -> completed -> closed
Metadata
Each event in the Interaction Lifecycle includes the following block of metadata. By default, all values are set to false. As the user progresses through the lifecycle of a WebChat interaction, these values will be updated.
The metadata block contains boolean state flags, counters, timestamps, and elapsed times. These values can be used to track and identify trends or issues with chat interactions. During run-time, the metadata can help you offer a smart and dynamic experience to your users.
Reference
| Name | Type | Description |
|---|---|---|
| proactive | boolean | Indicates this chat session was started proactively. |
| prefilled | boolean | Indicates the registration form was prefilled with info automatically. |
| autoSubmitted | boolean | Indicates the registration form was submitted automatically, usually after being prefilled. |
| filesUploaded | integer | Current number of files uploaded during chat session. |
| numAgents | integer | Current number of agents that have connected to the chat session. |
| userMessages | integer | Current number of messages sent by user. |
| agentMessages | integer | Current number of messages sent by agents. |
| systemMessages | integer | Current number of system messages received. |
| errors | array/boolean | An array of error codes encountered during chat session. If no errors, this value will be false. |
| form | object | An object containing the form parameters when the form is submitted. |
| opened | integer (timestamp) | Timestamp indicating when WebChat was opened. |
| started | integer (timestamp) | Timestamp indicating when chat session started. |
| cancelled | integer (timestamp) | Timestamp indicating when the chat session was cancelled. Cancelled refers to when a user ends a chat session before an agent connects. |
| rejected | integer (timestamp) | Timestamp indicating when the chat session was rejected. Rejected refers to when a chat session fails to start. |
| completed | integer (timestamp) | Timestamp indicating when the chat session ended normally. Completed refers to when a user or agent ends a chat after an agent connected. |
| closed | integer (timestamp) | Timestamp indicating when WebChat was closed. |
| agentReached | integer (timestamp) | Timestamp indicating when the first agent was reached, if any. |
| supervisorReached | integer (timestamp) | Timestamp indicating when the first agent supervisor was reached, if any. |
| elapsed | integer (milliseconds) | Total elapsed time in milliseconds from when the user started the chat session to when the chat session ended. |
| waitingForAgent | integer (milliseconds) | Total time in milleseconds waiting for an agent from when the user started the chat session to when an agent connected to the session. |
| id | string | A Unique identifier of a chat session that helps to identify the instance of that session and its associated events. |
Customizable chat registration form
WebChat allows you to customize the registration form shown to users prior to starting a session. The following form inputs are currently supported:
- Text
- Select
- Hidden
- Checkbox
- Textarea
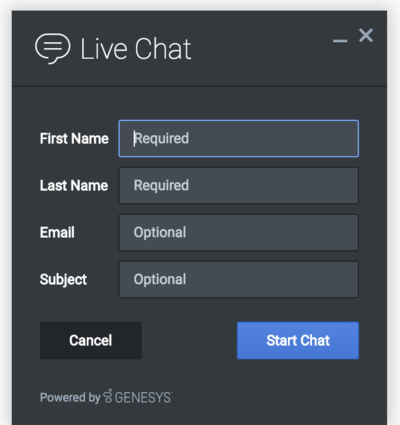
Customization is done through a JSON object structure that defines the layout, input type, label, and attributes for each input. You can set the default registration form definition in the _genesys.widgets.webchat.form configuration option. Alternately, you can pass a new registration form definition through the WebChat.open command:
_genesys.widgets.bus.command("WebChat.open", {formJSON: oRegFormDef});Inputs are rendered as stacked rows with one input and one optional label per row.
Default example
The following example is the default JSON object used to render WebChat’s registration form. This is a very simple definition that does not use many properties.
{
	wrapper: "<table></table>",
	inputs: [

		{
			id: "cx_webchat_form_firstname",
			name: "firstname",
			maxlength: "100",
			placeholder: "@i18n:webchat.ChatFormPlaceholderFirstName",
			label: "@i18n:webchat.ChatFormFirstName"
		},

		{
			id: "cx_webchat_form_lastname",
			name: "lastname",
			maxlength: "100",
			placeholder: "@i18n:webchat.ChatFormPlaceholderLastName",
			label: "@i18n:webchat.ChatFormLastName"
		},

		{
			id: "cx_webchat_form_email",
			name: "email",
			maxlength: "100",
			placeholder: "@i18n:webchat.ChatFormPlaceholderEmail",
			label: "@i18n:webchat.ChatFormEmail"
		},

		{
			id: "cx_webchat_form_subject",
			name: "subject",
			maxlength: "100",
			placeholder: "@i18n:webchat.ChatFormPlaceholderSubject",
			label: "@i18n:webchat.ChatFormSubject"
		}
	]
}
This JSON definition generates the following output:
Properties
Each input definition can contain any number of properties. These are categorized in two groups: "Special properties", which are custom properties used internally to handle rendering logic, and "HTML attributes" which are properties that are applied directly as HTML attributes on the input element.
Special properties
| Property | Type | Default | Description |
|---|---|---|---|
| type | string | "text" | Sets the type of input to render. Possible values are currently "text", "hidden", "select", "checkbox", and "textarea". |
| label | string | Set the text for the label. If no value provided, no label will be shown. You may use localization query strings to enable custom localization (for example, label: "@i18n:namespace.StringName"). Localization query strings allow you to use strings from any widget namespace or to create your own namespace in the localization file (i18n.json) and use strings from there (for example, label: "@i18n:myCustomNamespace.myCustomString001"). For more information, see the Labels section. | |
| wrapper | HTML string | Each input exists in its own row in the form. By default this is a table-row with the label in the left cell and the input in the right cell. You can redefine this wrapper and layout by specifying a new HTML row structure. See the Wrappers section for more info. The default wrapper for an input is " | |
| validate | function | Define a validation function for the input that executes when the input loses focus (blur) or changes value. Your function must return true or false. True to indicate it passed, false to indicate it failed. If your validation fails, the form will not submit and the invalid input will be highlighted in red. See the Validation section for more details and examples. | |
| validateWhileTyping | boolean | false | Execute validation on keypress in addition to blur and change. This ignores non-character keys like shift, ctrl, and alt. |
| options | array | [] | When ‘type’ is set to ‘select’, you can populate the select by adding options to this array. Each option is an object (for example, {text: ‘Option 1’, value: ‘1’} for a selectable option, and {text: "Group 1", group: true} for an option group). |
HTML attributes
With the exception of special properties, all properties will be added as HTML attributes on the input element. You can use standard HTML attributes or make your own.
Example
{
	id: "cx_webchat_form_firstname",
	name: "firstname",
	maxlength: "100",
	placeholder: "@i18n:webchat.ChatFormPlaceholderFirstName",
	label: "@i18n:webchat.ChatFormFirstName"
}
In this example, id, name, maxlength, and placeholder are all standard HTML attributes for the text input element. Whatever values are set here will be applied to the input as HTML attributes.
HTML output
<input type="text" id="cx_webchat_form_firstname
 name="firstname" maxlength="100" placeholder="Required"></input>
Disabling autocomplete
Since the custom form feature supports adding any HTML attributes to your inputs, you can control standard HTML features like disabling autocomplete. To disable autocomplete, add autocomplete: "off" to your input definition.
Example
{
	id: "cx_webchat_form_firstname",
	name: "firstname",
	maxlength: "100",
	placeholder: "@i18n:webchat.ChatFormPlaceholderFirstName",
	label: "@i18n:webchat.ChatFormFirstName",
	autocomplete: "off"
}
Labels
A label tag will be generated for your input if you specify label text and if your custom input wrapper includes a ‘{label}’ designation. If you have added an ID attribute for your input, the label will automatically be linked to your input so that clicking on the label selects the input or, for checkboxes, toggles it.
Labels can be defined as static strings or localization queries.
Wrappers
Wrappers are HTML string templates that define a layout. There are two kinds of wrappers, Form Wrappers and Input Wrappers:
Form wrapper
You can specify the parent wrapper for the overall form in the top-level "wrapper" property. In the example below, we specify this value as “<table></table>".{
wrapper: "<table></table>", /* form wrapper */
inputs: []
}Input wrapper
Each input is rendered as a table row inside the Form Wrapper. You can change this by defining a new wrapper template for your input row. Inside your template you can specify where you want the input and label to be by adding the identifiers "{label}" and "{input}" to your wrapper value. See the example below:
{
	id: "cx_webchat_form_firstname",
	name: "firstname",
	maxlength: "100",
	placeholder: "@i18n:webchat.ChatFormPlaceholderFirstName",
	label: "@i18n:webchat.ChatFormFirstName",
	wrapper: "<tr><th>{label}</th><td>{input}</td></tr>" /* input row wrapper */
}
The {label} identifier is optional. Omitting it will allow the input to fill the row. If you decide to keep the label, you can move it to any location within the wrapper, such as putting the label on the right, or stacking the label on top of the input. You can control the layout of each row independently, depending on your needs.
You are not restricted to using a table for your form. You can change the form wrapper to "<div></div>" and then change the individual input wrappers from a table-row to your own specification. Be aware though that when you move away from the default table wrappers, you are responsible for styling and aligning your layout. Only the default table-row wrapper is supported by default Themes and CSS.Validation
You can apply a validation function to each input that lets you check the value after a change has been made and/or the user has moved to a different input (on change and on blur). You can enable validation on key press by setting validateWhileTyping to true in your input definition.
Here is how to define a validation function:
{
	id: "cx_webchat_form_firstname",
	name: "firstname",
	maxlength: "100",
	placeholder: "@i18n:webchat.ChatFormPlaceholderFirstName",
	label: "@i18n:webchat.ChatFormFirstName",

	validateWhileTyping: true, // default is false

	validate: function(event, form, input, label, $, CXBus, Common){

		return true; // or false
	}
}
You must return true or false to indicate that validation has passed or failed, respectively. If you return false, the WebChat form will not submit, and the input will be highlighted in red. This is achieved by adding the CSS class "cx-error" to the input. The image below displays the the field where a user input validation error has occurred, with the field highlighted in red.
Validation function arguments
| Argument | Type | Description |
|---|---|---|
| event | JavaScript event object | The input event reference object related to the form input field. This event data can be helpful to perform actions like active validation on an input field while the user is typing. |
| form | HTML reference | A jquery reference to the form wrapper element. |
| input | HTML reference | A jquery reference to the input element being validated. |
| label | HTML reference | A jquery reference to the label for the input being validated. |
| $ | jquery instance | Widget’s internal jquery instance. Use this to help you write your validation logic, if needed. |
| CXBus | CXBus instance | Widget’s internal CXBus reference. Use this to call commands on the bus, if needed. |
| Common | Function Library | Widget’s internal Common library of functions and utilities. Use if needed. |
Form submit
Custom input field form values are submitted to the server as key value pairs under the userData section of the form submit request, where input field names will be the property keys. During the submit, this data is merged along with the userData defined in the WebChat.open command.{
firstname: '',
lastname: '',
nickname: '',
email: '',
subject: '',
userData: {}
}Example
The example below shows how the custom form data given in the WebChat form fields have been mapped as a form data object.
The form fields with reserved keywords like firstname, lastname, and email will be sent as top level and the rest of the fields will be sent under userData to the WebChatService plugin.
Once the form data object is sent to the WebChatService plugin, it will parse and send in the payload request.
{
    "wrapper":"<table></table>",
    "inputs":[
        {
            "id":"cx_webchat_form_firstname",
            "name":"firstname",
            "type":"text",
            "maxlength":"100",
            "placeholder":"@i18n:webchat.ChatFormPlaceholderFirstName",
            "label":"@i18n:webchat.ChatFormFirstName",
            "value":"John"
        },
        {
            "id":"cx_webchat_form_lastname",
            "name":"lastname",
            "type":"text",
            "maxlength":"100",
            "placeholder":"@i18n:webchat.ChatFormPlaceholderLastName",
            "label":"@i18n:webchat.ChatFormLastName",
            "value":"Smith"
        },
        {
            "id":"cx_webchat_form_email",
            "name":"email",
            "type":"text",
            "maxlength":"100",
            "placeholder":"@i18n:webchat.ChatFormPlaceholderEmail",
            "label":"Email",
            "value":"john.smith@company.com"
        },
        {
            "id":"cx_webchat_form_phonenumber",
            "name":"phonenumber",
            "type":"text",
            "maxlength":"100",
            "placeholder":"Phone Number",
            "label":"Phone Number",
            "value":"9256328346"
        },
        {
            "id":"cx_webchat_form_enquirytype",
            "name":"enquirytype",
            "type":"select",
            "label":"Enquiry Type",
            "options":[
                {
                    "text":"Account",
                    "group":true
                },
                {
                    "text":"Sales",
                    "value":"Sales",
                    "selected":true
                },
                {
                    "text":"Credit Card",
                    "value":"credit card"
                },
                {
                    "text":"General",
                    "group":true
                },
                {
                    "text":"Warranty",
                    "value":"warranty"
                },
                {
                    "text":"Return policy",
                    "value":"returns"
                }
            ]
        }
    ]
}
{
firstname: 'John',
lastname: 'Smith',
email: 'john.smith@company.com',
userData: {
phonenumber: '9256328346',
enquirytype: 'Sales' //value selected from the dropdown
}
}Customizable emoji menu
Introduction
WebChat offers a v2 emoji menu that lets you choose which emojis to include in the emoji menu.
Differences between v1 and v2
- v1 shows as a tooltip-style overlay; v2 shows as a new block between the transcript and the message input.
- v1 closes when you select an emoji or click outside the menu; v2 lets you choose multiple emojis and only closes if you click the emoji menu button again.
- v1 has three fixed emojis to choose from; v2 can show hundreds of customizable emojis in a grid layout.
- v1 menu appears in mobile mode; v2 menu is not available in mobile mode (when v2 is configured, no emoji menu button is present in mobile mode).
- v1 menu has default emojis; v2 menu does not have default emojis. It must be explicitly configured with a list of emojis.
Configuring the emoji menu
Click the emoji menu icon at the bottom-left corner of the WebChat UI to open the v2 emoji menu. The transcript will be resized to fit the emoji menu, which can vary in height depending on the number of emojis configured.
- When 1-8 emojis are configured, the menu has one row, and no scrollbar appears.
- When 9-16 emojis are configured, the menu has two rows, and no scrollbar appears.
- When 17-24 emojis are configured, the menu has three rows, and no scrollbar appears.
- When 25 or more emojis are configured, the menu has three rows, and a scrollbar appears.
// Configure a flat list of emoji characters
_genesys.widgets.webchat.emojiList = "🤩🤪🤭🤫🤨₿🤮🤯🧐🤬🧡🤟🤲🧠🧒🧑🧔🧓🧕🤱₿🧙🧚🧛🧜🧝🧞🧟🧖🧗🧘🦓🦒🦔🦕🦖🦗🥥🥦🥨🥩
🇦🇺🇫🇷🎂🛍🇨🇦🇧🇷🐉🎅🇲🇽🕯🇨🇳🐰🎥🍂👨💪🎓🔥🎃🕎💕🕉🇺🇸👩🎊🏊🏳️🌈👑☪🌱☘☀🏈🦃💘👰⛄🎿⚽🌎";Add emoji display names
You can also add names to emojis so that their names will appear when you hover over them. To add a name to an emoji, simply add a colon after the question mark symbol, and then type the name. Separate each name with a semicolon.
The format is ;🤩:name;
You can only add one name to an emoji. The following sample shows the format for configuring several emojis.// Configure an emoji list with emoji names
_genesys.widgets.webchat.emojiList = "🤩:Star-Struck;🤪:Zany Face;🤭:Face With Hand Over
Mouth;🤫:Shushing Face;🤨:Face With Raised Eyebrow;₿:Bitcoin;🤮:Face Vomiting;
🤯:Exploding Head;🧐:Face With Monocle;🤬:Face With Symbols on Mouth;🧡:Orange Heart;
🤟:Love-You Gesture;🤲:Palms Up Together;🧠:Brain;🧒:Child;🧑:Person;🧔:Man: Beard;
🧓:Older Person;🧕:Woman With Headscarf;🤱:Breast-Feeding;🧙:Mage;🧚:Fairy;🧛:Vampire;
🧜:Merperson;🧝:Elf;🧞:Genie;🧟:Zombie;🧖:Person in Steamy Room;🧗:Person Climbing;
🧘:Person in Lotus Position;🦓:Zebra;🦒:Giraffe;🦔:Hedgehog;🦕:Sauropod;🦖:T-Rex;🦗:Cricket;
🥥:Coconut;🥦:Broccoli;🥨:Pretzel;🥩:Cut of Meat;🇦🇺:Australia Day;🇫🇷:Bastille
Day;🎂:Birthday;🛍:Black Friday;🇨🇦:Canada Day;🇧🇷:Carnival;🐉:Chinese New Year;🎅:Christmas;
🇲🇽:Cinco de Mayo;🕯:Diwali;🇨🇳:Dragon Boat Festival;🐰:Easter;🎥:Emoji Movie;🍂:Fall/Autumn;
👨:Father’s Day;💪:Festivus;🎓:Graduation;🔥:Guy Fawkes;🎃:Halloween;🕎:Hanukkah;
💕:Hearts;🕉:Holi;🇺🇸:Independence Day;👩:Mother’s Day;🎊:New Year’s Eve;🏊:Olympics;
🏳️🌈:Pride;👑:Queen’s Birthday;☪:Ramadan;🌱:Spring;☘:St Patrick’s Day;☀:Summer;
🏈:SuperBowl;🦃:Thanksgiving;💘:Valentine’s Day;👰:Wedding / Marriage;⛄:Winter;🎿:Winter
Olympics;⚽:World Cup;🌎:World Emoji Day;";Partially named lists
You don't have to add names for every emoji. You can add titles to only a select few.// Configure an emoji list with only a few emoji names
_genesys.widgets.webchat.emojiList = "🤩🤪🤭🤫🤨₿🤮🤯🧐🤬🧡🤟;🤲:Palms Up Together;
🧠🧒🧑🧔🧓🧕🤱₿🧙🧚🧛🧜🧝🧞🧟🧖🧗🧘🦓🦒🦔🦕🦖🦗🥥🥦🥨🥩🇦🇺🇫🇷🎂;🛍:Black Friday;
🇨🇦🇧🇷🐉🎅🇲🇽🕯🇨🇳🐰🎥🍂👨💪🎓🔥🎃🕎💕🕉🇺🇸👩🎊🏊🏳️🌈👑☪🌱☘☀🏈🦃💘👰;⛄:Snowman;🎿⚽🌎";Localization
Emojis can be localized so that each language has a preferred set of emojis and emoji titles.{
"en": {
"webchat": {
"EmojiList": "🤩:Star-Struck;🤪:Zany Face;🤭:Face With Hand Over Mouth;🤫:Shushing Face;"
}
}
}Terminate Chat session on contact side
To prevent a contact from sending another chat message using the Widget after the chat session is terminated in Designer, you must add a customization to the widget to notify it to close.
First, set up a text message informing the contact that the chat is terminated by using a Play Message Block.
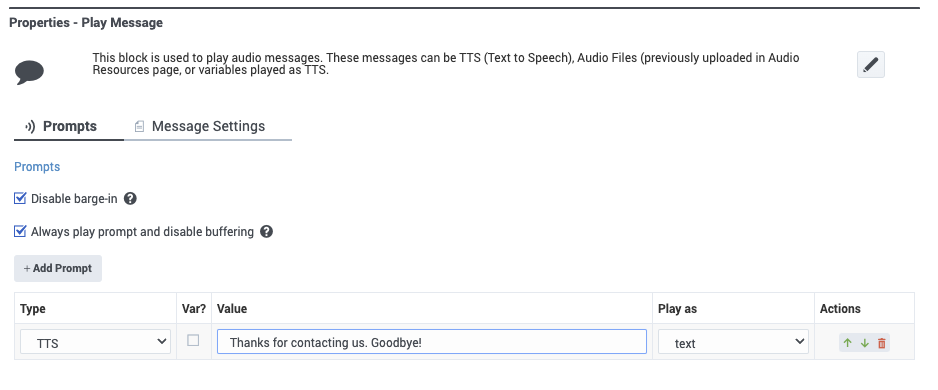
Next, set up the Widget Register Handler for WebChatService.messageReceived (or look for the messageAdded event) to get notifications about messages received, then send the endChat command when the text message is received. For information about Genesys Widgets events and commands, refer to Genesys Widget API Events and Genesys Widget API Commands.
Finally, add the following customized script:
window._genesys.widgets.onReady = function(CXBus){

    var oWH = CXBus.registerPlugin("WebChatHandler");

    oWH.subscribe("WebChatService.messageReceived", function (e) {

        if(e.data) {

            /**
            * Extract the sample data (can be the Playback message configured in Designer)
            * and look for a specific condition to end the chat
            */

            const {messages} = e.data || {};
            let sPlayMessage = (messages) ? messages.find(message => message.type ==    'Message' && message.text == 'play message') : "";

            if(sPlayMessage) {

                oWH.command("WebChatService.endChat");

                /**
                * Check for the chat session data stored in localStorage and clear it
                */

                (window.localStorage.getItem("WebChatSessionData")) ? window.localStorage.removeItem("WebChatSessionData") : "";
            }
        }
    });
  };
