Innovations in customization within Siebel IP 2017 and higher
Contents
Starting with Siebel IP 2017, take into account significant changes to customization techniques.
Overview
If you are using Siebel IP 2017 or higher, pay special attention to the changes that occurred to the Siebel customization approaches introduced by Oracle. The changes directly or indirectly affect almost all procedures in the 8.0 Deployment Guide.
Using Workspaces
Siebel CRM versions IP 2017 and higher use Workspaces to manage application changes instead of the previously used technology of local databases. If you are using these Siebel versions, you must use Workspaces to perform almost all deployment steps (applying .sifs, LOV, and so on).
General practice requires that you make all changes in an open Workspace. After you complete all of the changes, you must deliver the Workspace into the MAIN database. It's your choice whether to perform all of the required Adapter’s deployment steps using the mentioned Siebel tools, in a single Workspace or multiple Workspaces.
For these deployment steps, you can use various tools, for example, Siebel Tools, or Siebel Web Tools/Client.
Setting up a Workspace using Siebel Tools
In Siebel Tools, use the Workspace menu and Workspace Explorer to work with Workspaces.
To make Siebel changes to the configuration, you must first create a Workspace.
- In Siebel Tools, from the Workspace menu, select Create.
- Complete the fields and click OK. Refer to Oracle documentation for detailed information.
- TipAfter you create the Workspace, you can open it from anywhere.
- To make configuration changes, open the Workspace using the right-click menu.
- Make your required changes, for example, import .sif files, edit Siebel objects, import LOV, and so on.
- From the Workspace menu, select Checkpoint to indicate your changes by tagging or adding version information into the field and click OK.
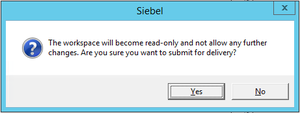
- From the Workspace menu, select Submit for delivery and click Yes in the Siebel dialog box.
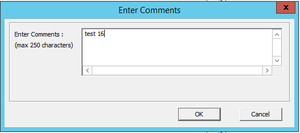
- From the Workspace menu, click Deliver, enter comments in the dialog box, and click OK.
For more information refer to Oracle documentation, see Workspaces Overview, Using Workspaces in Siebel Tools, and others.
Setting up a Workspace using Siebel Web Tools/Client
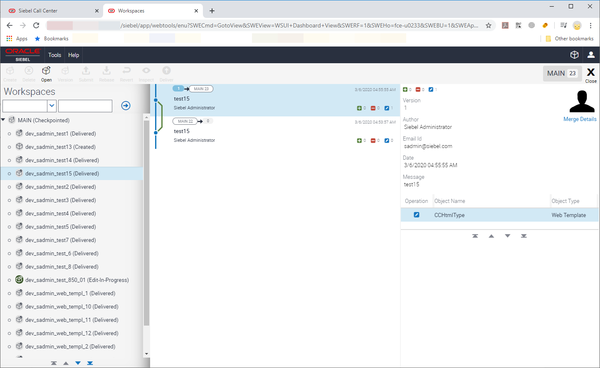
In Siebel Web Tools and Siebel Web Client, use the the Workspace panel to work with Workspaces.
To make Siebel changes to the configuration, you must first create a Workspace.
- In Siebel Web Tools and Siebel Client, from the Workspace menu, select the Create menu option.
- Complete the fields and click Create Workspace. Refer to Oracle documentation for detailed information.
- TipAfter you create the Workspace, you can open it from anywhere.
- To make configuration changes, use the toolbar button to open the Workspace.
- Make your required changes, for example, import .sif files, edit Siebel objects, import LOV, and so on.
- From the toolbar, select Version to indicate your changes by tagging or adding version information into the field and click Version.
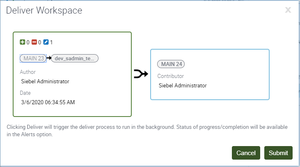
- From the toolbar, click Submit and then click Submit in the Deliver Workspace dialog box.
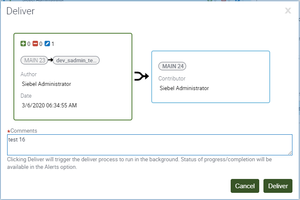
- From the toolbar, click Deliver, enter comments in the dialog box, and click Deliver.
Non-SRF approach
Starting with Siebel IP 2017, Siebel no longer supports the Siebel Repository File (SRF). As such, when working with Siebel Tools, you no longer compile a repository. Also, you do not need to lock projects before changing them, despite it still being possible.
Siebel Tools now connect to a server database only. No local databases are supported. So, when you make changes in Siebel objects, they are applied to the MAIN branch during the Workspace delivery.
As a consequence, note the following changes, distinct from what is documented in the Gplus Adapter for Siebel CRM 8.0 Deployment Guide.
- References to steps that mention the local database or running Siebel Tools against the local database no longer apply. Starting with Siebel IP 2017, you must always connect to the server database.
- Skip any steps that mention locking or unlocking a project.
- Skip all procedures that mention compiling the Siebel Repository file.
- Deliver workspace(s) according to the strategy you chose (whether single or multiple workspaces), as described in this article.
Browser scripts generation
Prior to Siebel IP 2017, browser scripts were generated during project compilation in Siebel Tools. After the compilation, you were required to copy the generated scripts into proper place in Siebel directory tree.
Starting with Siebel IP 2017, since you no longer compile projects in Siebel Tools, you need to generate browser scripts separately using the detailed instructions in the following Oracle article: How To Generate/Deploy To AI ( Web Client ) Browser Scripts / Dedicated Client Browser Scripts (Doc ID 2358341.1). Note that you need an Oracle account to access the article.
You usually generate browser scripts under the MAIN workspace. This means that a working workspace should be delivered to the MAIN workspace prior to scripts generation. If you need to generate browser scripts under another workspace, refer to the article, Generate All Browser Scripts Under A Specific Integration Workspace (Doc ID 2522362.1). Note that you need an Oracle account to access the article.
Here's one scenario that is impacted by this:
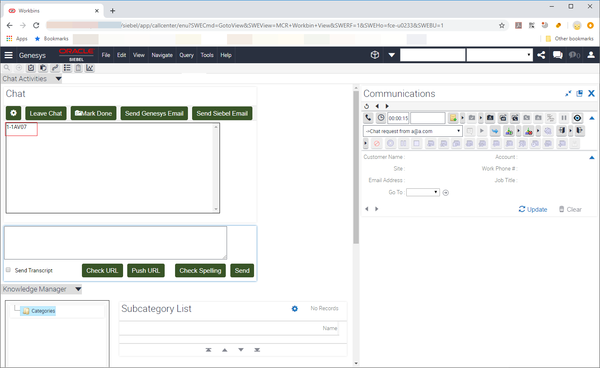
- A person working is in the Genesys Chat user interface and sees the following:
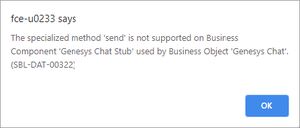
- The person clicks Send and receives the following:
- In the browser window, inspect the source for a 404 error indicating that a URL that can’t be found.
- In the graphic, notice that the srf1583478178_444 directory is expected to host browser scripts.
- To resolve this, you must either (re)generate the scripts or rename the previous srfXXXXXX_XXX directory to srf1583478178_444.
Applying database changes
With Workspaces, the procedure to make Siebel database changes is more brief. Starting with Siebel IP 2017, Siebel Tools always works with a server database. So you don’t need to reconnect to and/or copy any data to the server database.
When performing procedures like “Applying changes to the Siebel database tables,” you only need to do the steps that directly relate to applying tables (that is, pressing the Apply button).
In addition, you can apply changes to the database regardless your workspace status, open or delivered.
Operating with workflows
When deployment procedures ask you to remove certain Siebel Workflow steps, just disconnect the step rather than remove it. Once workspaces were introduced in Siebel, it became impossible to remove workflow elements that do not belong to a current open workspace.
See Siebel Open UI - Delete A Record When Using Workspaces (Doc ID 2189629.1) (https://support.oracle.com/knowledge/Siebel/2189629_1.html) for details. Note that you need an Oracle account to access the article.
Importing LOV
In order to perform the LOV import procedure using Siebel Web Client (or simply modify the LOV), you must have an open workspace. However, changes made to LOV data are not visible in the object list as the workspace’s modified objects.
So, if you created a special separate workspace for importing LOV only with no other changes, when you open that workspace, you will not see any changes in the object list. As such, immediately after you import the LOC, you just need remove that workspace (without delivering it).


