View table: UITab
Table structure:
- uiheading - Text
- uiimage - File
- uigif - String
- uivideo - String
- uitext - Wikitext
- uitextwide - Wikitext
- uialignment - String
- uianchor - String
This table has 50 rows altogether.
| Page | uiheading | uiimage | uigif | uivideo | uitext | uitextwide | uialignment | uianchor |
|---|---|---|---|---|---|---|---|---|
| DES/Current/Designer/GetStarted | Actions toolbar | No | Many of the resource pages in Designer have an Actions toolbar. The action items on the toolbar will vary based on the resource page you are viewing. For more information, see Actions toolbar. | Horizontal | actions | |||
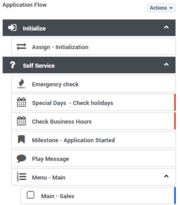
| DES/Current/Designer/GetStarted | Application flow | No | Provides the main area to build your application by adding blocks. For more information, see Using the blocks. | Horizontal | ||||
| DES/Current/Designer/GetStarted | Application toolbar | No | Provides buttons for common actions. Click Settings to set global settings for your application. Click Save Flow to save and validate your application, or click Publish to save and validate your application and prepare it for use by routing engines. Click Build to create and manage the builds associated with the application. | Horizontal | ||||
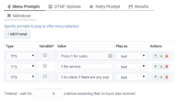
| DES/Current/Designer/GetStarted | Block properties | No | Displays all properties exposed by a block and provides assistance to set them: | Horizontal | ||||
| DES/Current/Designer/GetStarted | Help pane | No | Displays help information for the selected block. | Horizontal | ||||
| DES/Current/Designer/GetStarted | Navigation bar | No | Provides one-click access to Applications, Shared Modules, Media Resources, Digital Resources, Speech Grammars, and Business Controls objects. | Horizontal | Navbar | |||
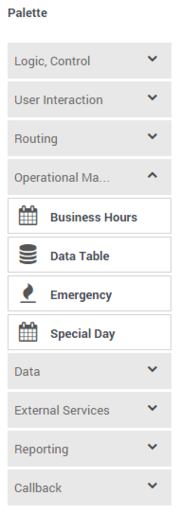
| DES/Current/Designer/GetStarted | Palette | No | Provides all available blocks that you can use in your application, sorted by functional grouping. | Horizontal | ||||
| DES/Current/Designer/GetStarted | Quick filters | No | This toolbar enables you to filter a list of resource items by selecting one or more filters that are associated with tags. The list then refreshes to show only those items that match the selected filters. For more information, see Using the Quick Filters. | Horizontal | ||||
| DES/Current/Designer/GetStarted | Workspace toolbar | No | Provides buttons for common actions. Click your user name to log off. Click the settings icon to view or modify the global Caching settings for certain resources and to toggle certain Features. Click the Help icon to access the Designer Help. | Horizontal | ||||
| Draft:AppStudio/Current/UserGuide/GetStarted | Marketplace | No | Marketplace is the repository where Genesys applications are saved for a quick start with existing modules. You can clone modules from the existing list, but can’t create a new module in the Marketplace.
|
Horizontal | market | |||
| Draft:AppStudio/Current/UserGuide/GetStarted | Modules | No | Modules are discrete units of functionality. Each module is a collection of settings to achieve a specific task or a function.
Refer the Modules section to learn more.
|
Horizontal | mod | |||
| Draft:AppStudio/Current/UserGuide/GetStarted | Navigation tabs | No | App Studio contains two navigation tabs on the Main Toolbar - Modules tab and Marketplace tab. It provides one-click access to the Modules tab and the Marketplace tab. | Horizontal | navbar | |||
| Draft:AppStudio/Current/UserGuide/GetStarted | User Menu | No | Main toolbar provides buttons for common access that includes Notifications, Login, and Help.
|
Horizontal | workbar | |||
| Draft:DES/Current/Designer/GetStarted | Actions toolbar | No | Many of the resource pages in Designer have an Actions toolbar. The action items on the toolbar will vary based on the resource page you are viewing. For more information, see Actions toolbar. | Horizontal | actions | |||
| Draft:DES/Current/Designer/GetStarted | Application flow | No | Provides the main area to build your application by adding blocks. For more information, see Using the blocks. | Horizontal | ||||
| Draft:DES/Current/Designer/GetStarted | Application toolbar | No | Provides buttons for common actions. Click Settings to set global settings for your application. Click Save Flow to save and validate your application, or click Publish to save and validate your application and prepare it for use by routing engines. Click Build to create and manage the builds associated with the application. | Horizontal | ||||
| Draft:DES/Current/Designer/GetStarted | Block properties | No | Displays all properties exposed by a block and provides assistance to set them: | Horizontal | ||||
| Draft:DES/Current/Designer/GetStarted | Help pane | No | Displays help information for the selected block. | Horizontal | ||||
| Draft:DES/Current/Designer/GetStarted | Navigation bar | No | Provides one-click access to Applications, Shared Modules, Media Resources, Digital Resources, Speech Grammars, and Business Controls objects. | Horizontal | Navbar | |||
| Draft:DES/Current/Designer/GetStarted | Palette | No | Provides all available blocks that you can use in your application, sorted by functional grouping. | Horizontal | ||||
| Draft:DES/Current/Designer/GetStarted | Quick filters | No | This toolbar enables you to filter a list of resource items by selecting one or more filters that are associated with tags. The list then refreshes to show only those items that match the selected filters. For more information, see Using the Quick Filters. | Horizontal | ||||
| Draft:DES/Current/Designer/GetStarted | Workspace toolbar | No | Provides buttons for common actions. Click your user name to log off. Click the settings icon to view or modify the global Caching settings for certain resources and to toggle certain Features. Click the Help icon to access the Designer Help. | Horizontal | ||||
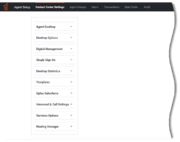
| Draft:PEC-AS/Current/ManageCC/Getting started | Agent Groups | No | (Click image to expand) These are the options and tasks specific to agent groups. These are applied to the agent groups and the agents within those groups. Many of these tasks and options can be changed at the User level, however. |
Horizontal | ||||
| Draft:PEC-AS/Current/ManageCC/Getting started | Audit | No | (Click image to expand) This is where you'll go to view and manage logs. See View audit trail. |
Horizontal | ||||
| Draft:PEC-AS/Current/ManageCC/Getting started | Contact Center Settings | No | (Click image to expand) These are the options and tasks that, once enabled, are applied to the global contact center, meaning all agent groups and users within those groups. Some of these tasks and options, however, can be changed at the agent group or user level, or both. See Agent desktop settings overview. |
Horizontal | ||||
| Draft:PEC-AS/Current/ManageCC/Getting started | Data Tools | No | (Click image to expand) This is where you'll go when you want to use Bulk import to import a file containing a group of agents or contacts. |
Horizontal | ||||
| Draft:PEC-AS/Current/ManageCC/Getting started | Transactions | No | (Click image to expand) Go to this tab to handle business attribute overrides. See Transactions. |
Horizontal | ||||
| Draft:PEC-AS/Current/ManageCC/Getting started | Users | No | (Click image to expand) These are the options and tasks specific to individual users (agents, mainly). Key tasks include: |
Horizontal | ||||
| Draft:PEC-OU/Current/CXContact/GetStarted | Analytics tab | No | Use the Analytics tab to build custom Outbound reports. | Horizontal | ||||
| Draft:PEC-OU/Current/CXContact/GetStarted | Campaigns tab | No | 297982995 | Use the Campaigns tab to handle all tasks related to the configuration and management of campaigns, including:
|
Horizontal | |||
| Draft:PEC-OU/Current/CXContact/GetStarted | Compliance tab | No | 298056646 | Use the Compliance tab to:
|
Horizontal | |||
| Draft:PEC-OU/Current/CXContact/GetStarted | Lists tab | No | 298053202 | Use the Lists tab to create and work with contact lists. Key capabilities include the following:
|
Horizontal | |||
| Draft:PEC-OU/Current/CXContact/GetStarted | Partitions | No | Use the Partitions list, to select a partition to define where new outbound objects (for example, campaigns, lists, and so on) are stored. For more information, see the Partitions section in the Settings page. The Partitions list is located on the right side of the menu. Click to enlarge the image.
|
Horizontal | ||||
| Draft:PEC-OU/Current/CXContact/GetStarted | Settings tab | No | Use the Settings tab to apply or manage the following global application settings:
|
Horizontal | ||||
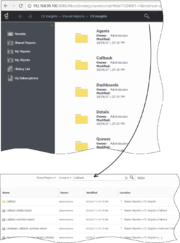
| Draft:PEC-REP/Current/RPRT/GetStarted | Navigating in Genesys CX Insights | No | 439920994 | As you browse in Genesys CX Insights, clickable breadcrumbs appear at the top and bottom of the page:Shared Reports > CX Insights > Business Results Click any word in the breadcrumb to return to that folder. The following folders are the most commonly-used:
If you're not sure what folder or report name to look for, use the search feature to find all relevant reports:
|
Horizontal | |||
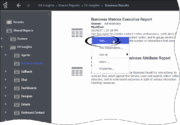
| Draft:PEC-REP/Current/RPRT/GetStarted | Run reports | No | 229633305 | To view a report that is populated with your data, ?'"`UNIQ--nowiki-00000014-QINU`"'?) the report.
|
Horizontal | |||
| PEC-AS/Current/ManageCC/Getting started | Agent Groups | No | (Click image to expand) These are the options and tasks specific to agent groups. These are applied to the agent groups and the agents within those groups. Many of these tasks and options can be changed at the User level, however. |
Horizontal | ||||
| PEC-AS/Current/ManageCC/Getting started | Audit | No | (Click image to expand) This is where you'll go to view and manage logs. See View audit trail. |
Horizontal | ||||
| PEC-AS/Current/ManageCC/Getting started | Contact Center Settings | No | (Click image to expand) These are the options and tasks that, once enabled, are applied to the global contact center, meaning all agent groups and users within those groups. Some of these tasks and options, however, can be changed at the agent group or user level, or both. See Agent desktop settings overview. |
Horizontal | ||||
| PEC-AS/Current/ManageCC/Getting started | Data Tools | No | (Click image to expand) This is where you'll go when you want to use Bulk import to import a file containing a group of agents or contacts. |
Horizontal | ||||
| PEC-AS/Current/ManageCC/Getting started | Transactions | No | (Click image to expand) Go to this tab to handle business attribute overrides. See Transactions. |
Horizontal | ||||
| PEC-AS/Current/ManageCC/Getting started | Users | No | (Click image to expand) These are the options and tasks specific to individual users (agents, mainly). Key tasks include: |
Horizontal | ||||
| PEC-OU/Current/CXContact/GetStarted | Analytics tab | No | Use the Analytics tab to build custom Outbound reports. | Horizontal | ||||
| PEC-OU/Current/CXContact/GetStarted | Campaigns tab | No | 297982995 | Use the Campaigns tab to handle all tasks related to the configuration and management of campaigns, including:
|
Horizontal | |||
| PEC-OU/Current/CXContact/GetStarted | Compliance tab | No | 298056646 | Use the Compliance tab to:
|
Horizontal | |||
| PEC-OU/Current/CXContact/GetStarted | Lists tab | No | 298053202 | Use the Lists tab to create and work with contact lists. Key capabilities include the following:
|
Horizontal | |||
| PEC-OU/Current/CXContact/GetStarted | Partitions | No | Use the Partitions list, to select a partition to define where new outbound objects (for example, campaigns, lists, and so on) are stored. For more information, see the Partitions section in the Settings page. The Partitions list is located on the right side of the menu. Click to enlarge the image.
|
Horizontal | ||||
| PEC-OU/Current/CXContact/GetStarted | Settings tab | No | Use the Settings tab to apply or manage the following global application settings:
|
Horizontal | ||||
| PEC-REP/Current/RPRT/GetStarted | Navigating in Genesys CX Insights | No | 439920994 | As you browse in Genesys CX Insights, clickable breadcrumbs appear at the top and bottom of the page:Shared Reports > CX Insights > Business Results Click any word in the breadcrumb to return to that folder. The following folders are the most commonly-used:
If you're not sure what folder or report name to look for, use the search feature to find all relevant reports:
|
Horizontal | |||
| PEC-REP/Current/RPRT/GetStarted | Run reports | No | 229633305 | To view a report that is populated with your data, ?'"`UNIQ--nowiki-00000014-QINU`"'?) the report.
|
Horizontal |


