Difference between revisions of "ATC/Current/PacingServiceDeployment/ProvisioningArticle"
DannaShirley (talk | contribs) |
m (1 revision imported) |
(No difference)
| |
Revision as of 15:27, November 7, 2018
Contents
Use the provisioning tool or manually provision the Pacing Server.
About Provisioning
You can use Genesys Administrator Extension to manually create all of the Pacing Server–related configuration information in Configuration Server. Or you can do this automatically by running the provisioning tool, located in the Pacing Server installation directory/tools/provisioning folder.
- The provisioning tool is run automatically during the installation process.
- You can run the provisioning tool under Windows or Linux.
Created (or corrected) objects
The provisioning tool connects to Configuration Server and reads the configuration information for the Pacing Server applications. It creates the Genesys objects used by the Pacing Servers and edits the configuration files required to launch the Pacing Servers.
The following objects are created or corrected when you run the provisioning tool.
Alarm conditions
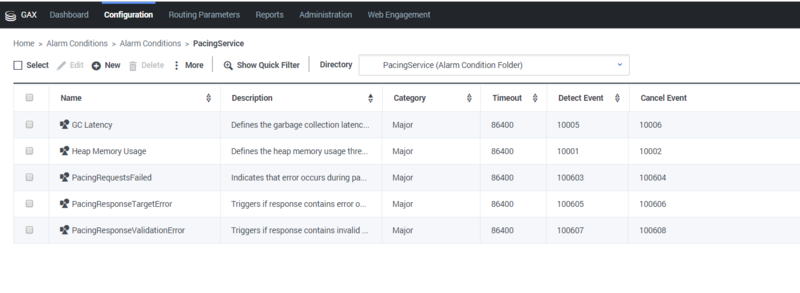
Provisioning creates the following default alarm conditions:
- GC Latency
- Heap Memory Usage
- PacingRequestsFailed
- PacingResponseTargetError
- PacingResponseValidationError
You can access these Alarm Conditions in Genesys Administrator Extension by navigating to the PacingService folder under Environment > Alarm Conditions:
Genesys Stat Server application
Provisioning adds statistics and filters into the options of the Stat Server application connected to the Pacing Service Cluster application. If absent, the following statistics are added:
- PACS_VQ_Abandoned
- PACS_VQ_Accepted
- PACS_VQ_Current
The following filter is also added:
- PACS_Proactive_Interaction
Files specific to Pacing Server
The provisioning tool can fill in pacing-related placeholder values in the following files, which are located in the Pacing Server installation directory/server folder:
- launcher.ini
- setenv.bat
- setenv.sh
Because this replacement is usually carried out successfully by the installation script, this feature of the provisioning tool is rarely used.
Run the provisioning tool
Because the provisioning tool is triggered as part of the installation process, you don't usually need to run it manually. However, there are times when you do need to do that. For example, if pacing-related statistics for Stat Server application or pacing-related Alarm Conditions have been lost, you should run the provisioning tool manually.
Prerequisites
- The configuration applications for the Pacing Servers were created in Configuration Server.
- The connections for the Pacing Service Cluster application include the Stat Server applications.
For more information, see Create and configure a node application in Install the Pacing Service.
- Navigate to the Pacing Server installation directory and open the Pacing Server installation directory/tools/provisioning folder.
- From the command line, run the following command:
provisioning.bat -host Configuration Server host name or IP address -port Configuration Server port -user Configuration Server user ID -password password for the specified user ID -app Pacing Server Application name
For Linux, use the same command, but instead of provisioning.bat, specify provisioning.sh.
- The user and password options may be optional, depending on your Configuration Server settings.
You can also use the overwrite option when you run the provisioning tool. In overwrite mode, the provisioning tool replaces old objects with new objects. Pacing-specific objects that already exist will be removed and new objects will be created instead. You will lose any changes you have made manually on pacing-specific objects. The command looks like this: provisioning.bat -host Configuration Server host name or IP address -port Configuration Server port -user user -password password -app Pacing Server Application name -overwrite
If provisioning is successful, the following message appears: Provisioning script successfully finished his work

