
Install the Pacing Service
Contents
- 1 About the Pacing Service Cluster
- 2 Deploy Pacing Server
- 3 Import the Pacing Service cluster application template
- 4 Create the cluster application
- 5 Configure the cluster application
- 6 Import the Pacing Server application template
- 7 Create and configure a node application
- 8 Add a node application to the cluster
- 9 Install Pacing Server
- 10 Configure alarms
- 11 Configure a forward proxy (optional)
Complete the steps to install the Pacing Server.
The 9.0 release of Pacing Server can be used on premises.
About the Pacing Service Cluster
Agent Pacing Service uses an N+1 architecture. This means that almost all of the configuration is handled at the level of the cluster, rather than at the level of individual nodes. In particular,
- The cluster combines one or more nodes. You must install and configure at least one Pacing Server node in order to use Pacing Service. Every time you add a node to the cluster, you must create and configure it using the same steps you used for the first node.
- All nodes are treated as equivalent to each other. Because of this, the nodes only contain a connection to the cluster application.
- Connections to other Genesys servers—such as Stat Server and Message Server—are defined for the cluster.
Deploy Pacing Server
To deploy Pacing Server, follow these steps:
- Import the Pacing Service Cluster Application template
- Create the cluster application
- Configure the cluster application
- Import the Pacing Server Application template
- Create and configure a node application
- Add the node application to the cluster
- Install Pacing Server
- Configure alarms
- Configure a forward proxy (optional)
Import the Pacing Service cluster application template
Prerequisite: Download the Pacing Server installation on the host where you are going to install it.
- Open Genesys Administrator Extension and navigate to Environment > Application Templates:
- Click New. In the Tasks panel, click Import Application Template:
- Navigate to the Pacing Server installation root/templates folder and select Pacing_Server_Cluster.apd:
- Click Import Metadata.
- Navigate to the Pacing Server installation root/templates folder and select Pacing_Server_Cluster.xml:
- Click Save


Create the cluster application
Prerequisite: Import the Pacing Service cluster application template
- Open Genesys Administrator Extension and navigate to Environment > Applications.
- In the Tasks panel, click New:
- Specify the name of the Pacing Service cluster application (for example, Pacing_Service_Cluster_9.0), then click to select a template:
- Select the application template that you created previously:
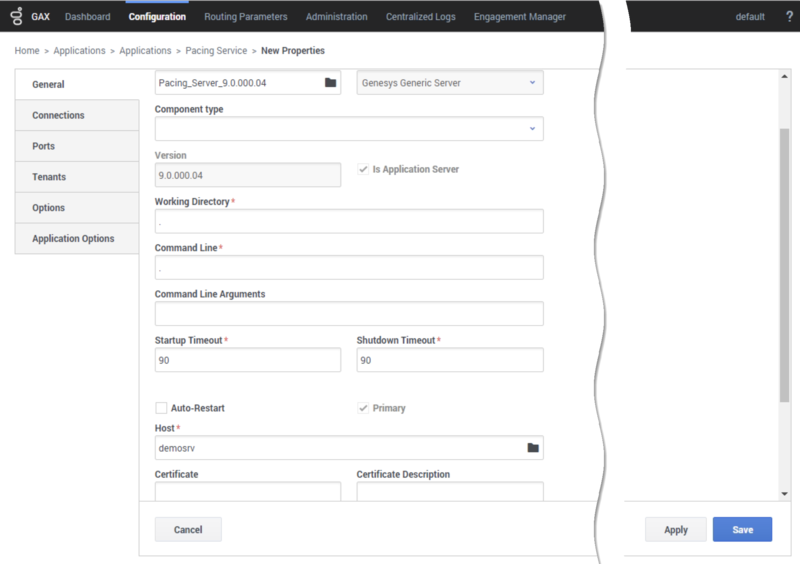
- Select the General tab and:
- Set the value of the Working Directory and Command Line fields to . (a single dot).
- Make sure that State is enabled.
- Select the Host on which the Pacing Service Cluster will reside. This is usually the fully qualified domain name or IP address of the load balancer that provides access to the Pacing Service (that is, the set of Pacing Servers)
- Click Save.
- The new Cluster application is now available:


Configure the cluster application
Prerequisite: Create the cluster application
- Open Genesys Administrator Extension and navigate to Environment > Applications, then open your cluster application:
- In the Connections tab, click Add:
- Select the Stat Server application. Leave the connection port ID set to default. Click OK:
- If appropriate, you can also add a connection to Message Server (to apply the network logging options).
- Navigate to the Ports tab and set the desired value of the default port. Note: The cluster application does not represent a particular server: you must treat as the load balancing entry point. Set the connection type to http. Genesys recommends that you use a secure connection.
- In the Tenant tab, click Add and select your tenant. For instance, Environment.
- Navigate to the Application Options tab. You can keep the default values for all options except the ones in the pacingEndpoint section.
- Click Save.


Import the Pacing Server application template
Prerequisite: Configure the cluster application
- Open Genesys Administrator Extension and navigate to Environment > Application Templates:
- Click New. In the Tasks panel, click Import Application Template:
- Navigate to the Pacing Server installation root /templates folder and select Pacing_Server.apd:
- Navigate to the Pacing Server installation root/templates folder and select Pacing_Server.xml:
- Click Save.


Create and configure a node application
You must create and configure every node that you add to the cluster, using the instructions in this section and the following one.
Prerequisite: Import the Pacing Server application template
- Open Genesys Administrator Extension and navigate to Environment > Applications.
- In the Tasks panel, click New:
- Specify the name of the Pacing Server application, for example, Pacing_Server_Node_01, then click to select a template for creating the application:
- Select the application template you created previously:
- Select the General tab and:
- Set the value of the Working Directory and Command Line fields to . (a single dot).
- Make sure that State is enabled.
- Select the Host on which the Pacing Server node will reside.
- Click Save.
 .
.
- Navigate to the Connections tab and click Add. Select the Pacing Service cluster application you created previously, then click OK:
- Navigate to the Ports tab and make sure that the value of the default port is set to the port that this Pacing Server node should listen on. Also, set the protocol type to http or https.


- Genesys recommends that you always use the HTTPS protocol.
- Genesys recommends that all instances of Pacing Server listen on the same ports.
- Pacing Servers are connected in the cluster through a dedicated port on the host where the Pacing Server instance is installed. By default, this port is 7800. If this port is already in use, go to the Ports tab and add another port with ID clustering and the desired value. You don't have to specify a connection type for this port.

8. Navigate to the Tenants tab and click Add. Select the same tenant that is specified for the Pacing Service Cluster application:

9. Click Save.
Add a node application to the cluster
Prerequisites:
- Create the cluster application
- Configure the cluster application
- Create and Configure a node application
Although a single-node configuration works well in a lab environment, in order to provide high availability in production, you must use multiple nodes.
- Every time you establish a new node, you must complete the steps described in Create and Configure a node application.
- If you use multiple nodes, you must set up load balancing in your environment.
Install Pacing Server
Prerequisite: Create and Configure a node application
Windows[ | edit source]
- In your installation package, locate and double-click setup.exe. InstallShield opens the welcome screen.
- Click Next. The Connection Parameters to the Configuration Server screen appears.
- Under Host, specify the host name and port number where Configuration Server is running. (This is the main listening port entered in the Server Info tab for Configuration Server.)
- Under User, enter the user name and password for logging into Configuration Server.
- Click Next. The Select Application screen appears.
- Select the Genesys Generic Server application—that is, the Node app you created above—that you are installing. The Application Properties area shows the Type, Host, Working Directory, Command Line executable, and Command Line Arguments information previously entered in the Server Info and Start Info tabs of the selected Application object.
- Click Next. The Choose Destination Location screen appears.
- Under Destination Folder, either keep the default value or browse for the desired installation location.
- Click Next. The Backup Configuration Server Parameters screen appears.
- If you have a backup Configuration Server, enter the Host name and Port.
- Click Next. The Ready to Install screen appears.
- Click Install. The Genesys Installation Wizard indicates it is performing the requested operation for Pacing Server. When it is finished, the Installation Complete screen appears.
- Click Finish to complete your installation of the Pacing Server.
Linux[ | edit source]
- Open the Pacing Server IP in a terminal window, and run Install.sh. The Genesys Installation starts.
- Enter the hostname of the host on which you are going to install.
- Enter the connection information to log into Configuration Server:
- The hostname. For instance, demosrv.genesyslab.com.
- The listening port. For instance, 2020.
- The user name. For instance, demo.
- The password.
- If the connection settings are successful, a list of keys and Pacing Server applications is displayed.
- Enter the key for the Pacing Server application—that is, the Node app you created above—that you are installing.
- Enter the location where Pacing Server is to be installed on your host.
Note: This location must match the previous settings that you entered in Configuration Server.
- If you have a backup Configuration Server, enter the Host name and Port.
- If the installation is successful, the console displays the following message:
Installation of Pacing Server, version 9.0.x has completed successfully.
Configure alarms
Genesys recommends that you tune the following Pacing Server–related alarms:
- GC Latency
- Heap Memory Usage
- PacingRequestsFailed
- PacingResponseTargetError
- PacingResponseValidationError
Although these alarms are created automatically during installation, you can remove them if necessary and then re-create them manually.
To access the alarms in Genesys Administrator Extension, open Environment > Alarm Conditions.

The automatic provisioning procedure places the Pacing Server-related alarms in the dedicated PacingService alarm folder.
Configure a forward proxy (optional)
If your environment permits connections to the Internet only through a forward proxy service (such as DMZ or your local intranet), configure the forward-proxy options, so the Pacing Service can connect to Genesys Predictive Engagement.