Get started with eServices Manager
From Genesys Documentation
This topic is part of the manual eServices Manager Administrator's Guide for version Current of eServices Manager.
Learn how to get started with eServices Manager.
Contents
The eServices Manager Plug-in gives you the tools to:
- Respond to incoming interactions using pre-written Standard Responses.
- Customize the Standard Responses using Field Codes to add a personal touch.
- Create Screening Rules in order to screen interactions for specific words or phrases, which you can then use to decide how to handle the interaction.
Access the application[edit source]
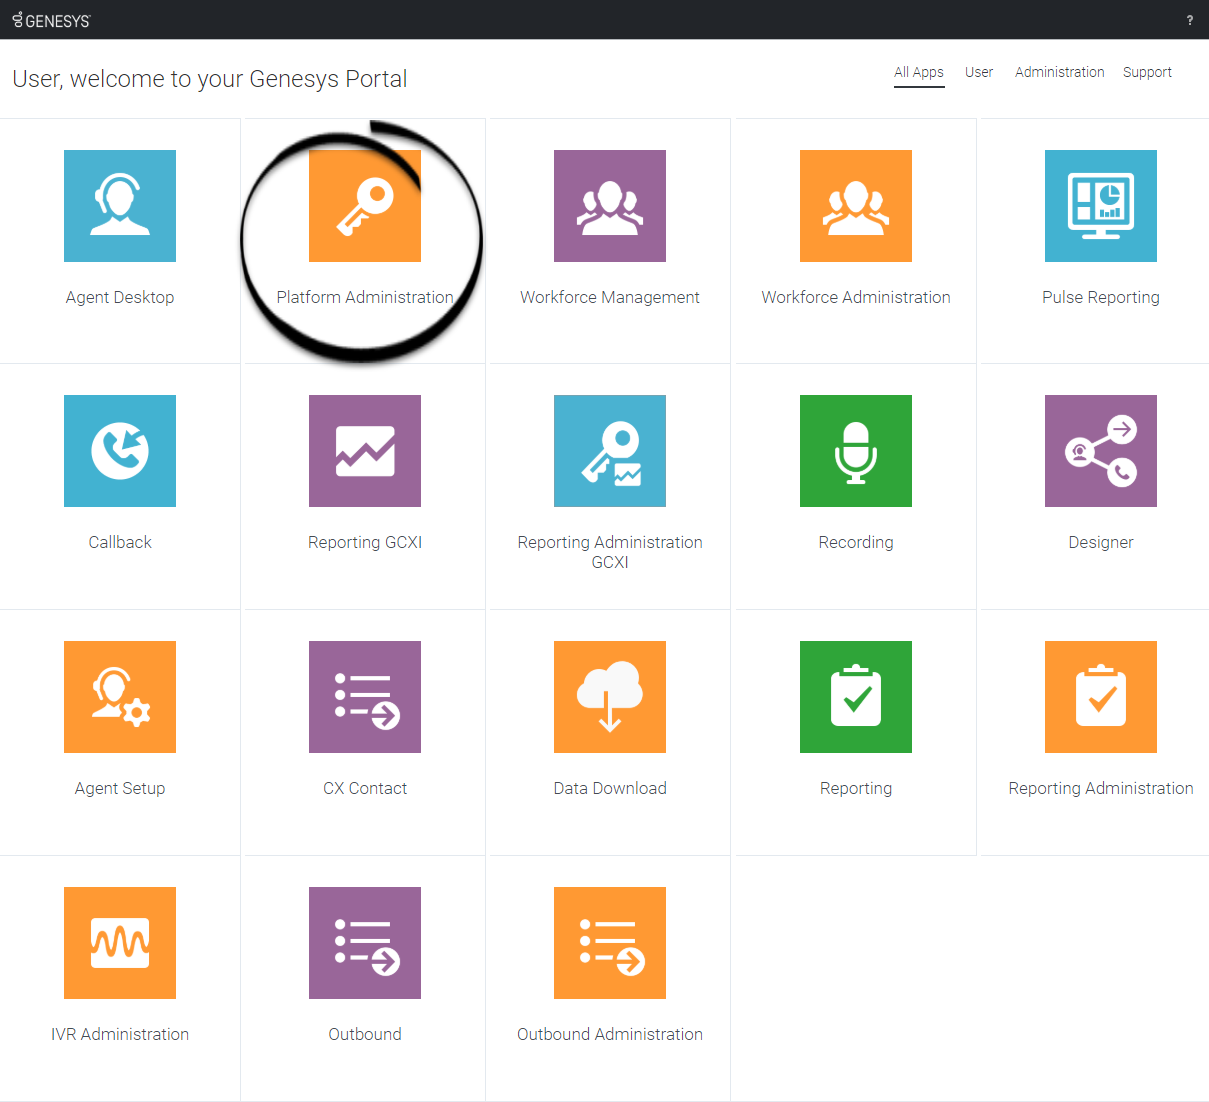
Once your Genesys Multicloud CX environment is up and running and you've checked that you meet the necessary requirements, log in to your Genesys Portal to access Platform Administration. Click the Platform Administration icon and enter your username and password.
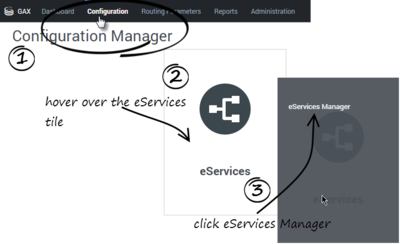
After you start Platform Administration, open the eServices Manager Plug-in:
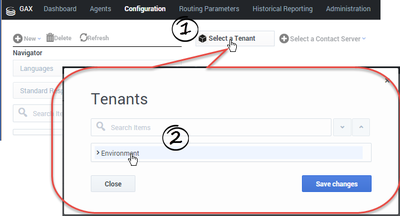
Now, select your Tenant...
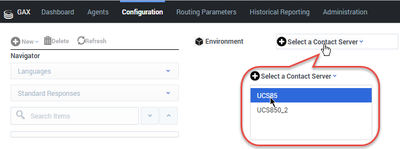
and your Contact Server or Contact Server Proxy:
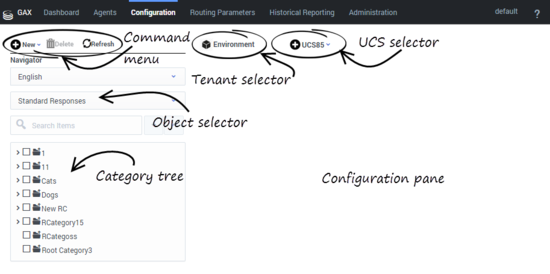
The eServices Manager window includes the following areas:
What next?
- Working with Standard Responses explains how to create and edit Standard Responses and how to create the category tree structure you will use to organize your Standard Responses, Field Codes, and Screening Rules.
- How to create and edit Field Codes, which enable you to insert personal information, such as names, into your Standard Responses.
- Working with Screening Rules explains how to create and edit Screening Rules, which enable you to analyse what incoming messages are about and to handle them accordingly.
Comments or questions about this documentation? Contact us for support!

