Provisioning IVR profiles yourself
You can use Platform Administration to provision IVR profiles and Map Direct Inward Dialing (DID) Groups to IVR profiles. You don't have to ask a manager or a system administrator.
What is an IVR Profile?
Leveraged as part of the DID group, an IVR profile is a pointer to what happens when a call is received. For example, the IVR Profile name may be “XXAirlines-CFD”, and, the URL to that application may be http://... (the initial page URL).
You may ask, why not just set the IVR profile to the initial page URL? The reason is that the IVR profile can house other settings for the customer beyond the base application. For example, you may allow customers to set up a backup application (in case their main one goes down).
How to provision IVR profiles
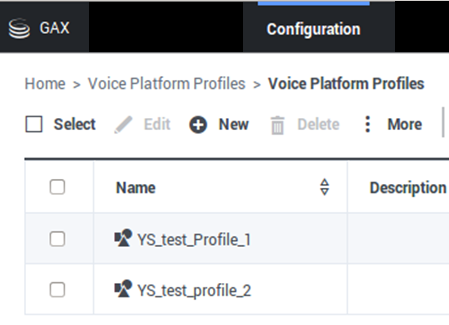
Log in as a tenant and select the Voice Platform Profile icon on the Main Menu page.
- The Voice Platform Profiles Main Page lists all existing IVR profiles that belong to you (the logged-in tenant).
- The Edit, New, Delete, and More commands (above the list) act on the IVR profile(s) that you select.
How to create new IVR profiles
Creating a new IVR profile requires completing two forms.
Click New and be ready to enter information that the forms need:
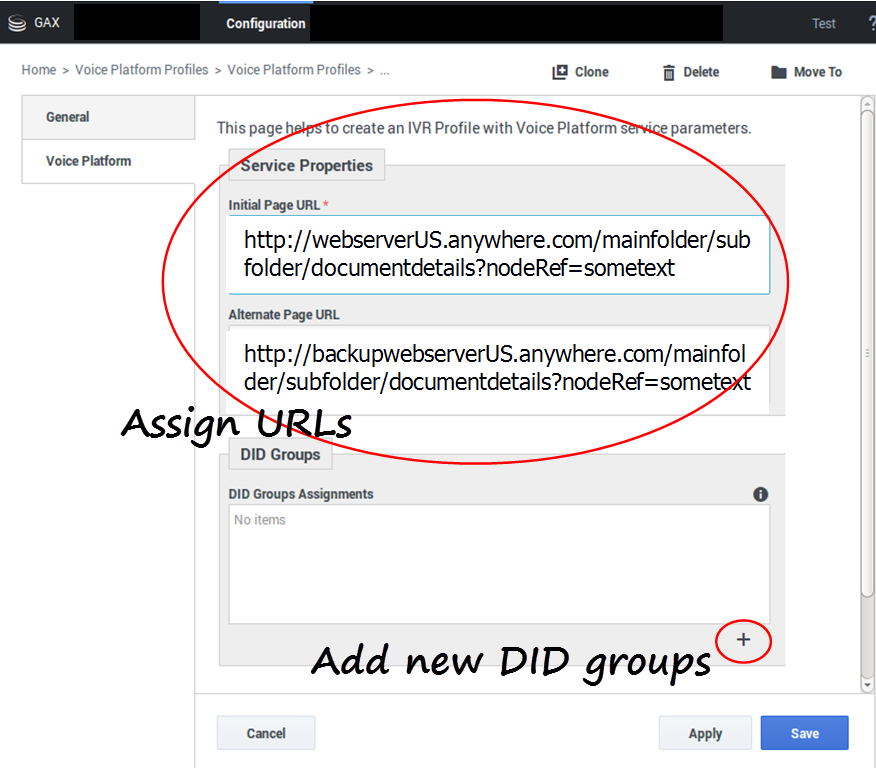
On the Service Properties Page
- Initial page URL (only http, https and file protocols supported)
- Alternate Page URL (only http, https and file protocols supported)
- DID Groups
- Add to the list—click the + button (plus) near the bottom right. An Available DID Groups dialog will pop up.
- Remove from the list—roll over the item with the cursor and click the X.
- Save also moves you to the IVR profile listing page.
On the Available DID Groups Page Popup Dialog
- Select the DID groups to assign and click OK. Your selections appear in the DID Groups Assignments list.
- Save also returns you to the VP Profiles Main Page, which now includes your newly created / newly assigned DID groups in the list.


